Eaton 93PR 500 kW UPS
User's and Installation Guide
40
4.4.1. Installing Customer Input Signals Interface
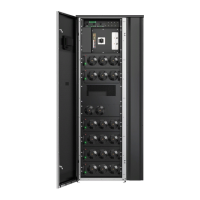
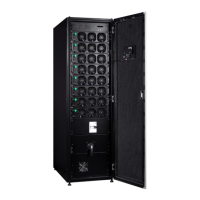
These inputs are located behind the UPS door, on top section of the UPS. See Figure
5-1
: Communication
interfaces for connector locations. Tie points with strain relief for communication cables are located on the
right and left side of the cable conduit.
Signal inputs can be configured to different functions. Normally these functions are either informative
(for example “On Generator”) or functional (for example remote “Go to bypass” command).
4.4.2. External Battery Breaker Wiring Interface
When using the original battery cabinet from the Eaton, the battery breaker interface wiring is provided with
the cabinet. Connecting it requires only routing the wires from the cabinet to the bottom section of the UPS.
When using third party battery system, the breaker must be equipped with auxiliary signal and should have a
48 V Shunt release for remote opening of the breaker, when needed.
Wire entry for battery breaker signal wiring is located on the top of the UPS cabinet. The wire can
pass through the top of UPS cabinet and locked to external battery breaker control terminal at
the front of the module (see Figure 5-1).
Pin 1 and 2 of the terminal are for signal connection of battery
breaker Shunt release control, and Pin 3 and 4 are for Signal connection of battery breaker aux contact detec-
tion.
4.4.3. Relay Output Interface Connections
The general alarm relay is a dry relay signal output. The relay can be used for informing the operators
about UPS alarm conditions, for example through a building management system. By default, the relay is
configured to activate when the UPS general alarm is active, that is, any event having ALARM status is
active. The relay can also be configured to activate by some other event but this needs to be done by
authorized service.
Relay signal wiring can be installed only through the signal cabling canal, from back to front, on the top
section of the UPS.
Table 4-2: Dry Contact Output Terminal
User logical selection
Terminal pins connection
shows on HMI
Note
NO 2-3 Pin1 disconnection
NC 1-3
Pin2 disconnection
4.4.4. Mini-slot Interface Connections
For Mini-slot accessories and communication devices selection see Chapter
5
Communication interfaces. For
installation and setup of a Mini-slot card, please contact your Eaton representative.
To install wiring to connections:
1. If not already installed, install the LAN and telephone drops.
2. Open the front door of the UPS.
3. Remove the particular Mini-slot cover plate by removing the two screws securing the plate and install
 Loading...