8
Installation manual 3A3718 Rev E
Effective February 2019
CCP2-H4X-_ pistol handles for 12 mm shafts
Eaton.com/bussmannseries
36 mm (1.42”)
Shaft
centering
jig
Depth
gauge
Handle
backer
plate
Mark shaft
on front edge
Step 3: With switch shaft extending through the enclosure, place
the handle backer plate onto the shaft as shown and fully seat
backer plate into the hole. Align backer plate horizontally and
vertically with the side and mark the centers for the four mounting
holes as shown.
Step 4: Center punch and drill the four backer plate mounting holes
using a 0.31” (8 mm) bit as shown.
Step 5: Use a utility knife to cut and free the shaft centering jig from
the backer plate and place it on the shaft as shown.
Step 6: Place the handle backer plate against the enclosure’s side
as shown and push the centering jig (now cut free and on the shaft)
back until the edge of the handle backer plate is flush with the side.
Use a pencil or felt tip pen to mark the shaft on the front edge of the
centering jig as shown. This is where the shaft is to be cut.
Loosen shaft setscrew on the switch, remove the shaft and cut to
length were marked. File off any burrs on the cut end as shown.
Note: To ensure proper fit, make a square cut on the shaft.
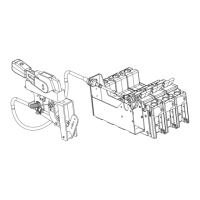
Clockwise handle installation for right side rotary operation
Applies to short and long pistol handles
Note: Before proceeding to Step 1, install the side rotary
mechanism on the switch’s right side following the supplied
instructions. Next, mount the switch in the desired location following
the supplied instructions.
Step 1: With switch mounted and in the OFF position, fully insert
switch shaft and lightly tighten the setscrew using a 2 mm Allen
wrench.
Step 2: Locate shaft’s center on the enclosure’s right side (shaft is
perpendicular to the plane of the side). Then drill/punch a 40 mm
(1.57”) hole as shown and remove any burrs that may result from
the drilling/punching process. Failure to remove burrs may impair the
handle’s lock OFF/lock ON function.
Note: Be careful to not distort the panel’s surface. Doing so may
compromise the handle’s NEMA 4X seal or impair the handle’s lock
OFF/lock ON function.
Ø40 mm
(Ø1.57”)
2-5 mm
(0.08-0.20”)
2
3
1
Ø 8.0 mm
(Ø 0.31”)
Removable shaft
centering jig
Removable
depth gauge
4
5
6
Switch with side rotary mechanism mounted on the right side
 Loading...