EasyManuals Logo

Eaton Current-Limiting - Type NXC Fuse Operation Instructions

Eaton Current-Limiting - Type NXC Fuse
16 pages
To Next Page IconTo Next Page
To Previous Page IconTo Previous Page
Page #8 background imageLoading...
Page #8 background image
Step 4
Provide a visible break
Clean and lubricate PUSH-OP insulated standoff bushing.
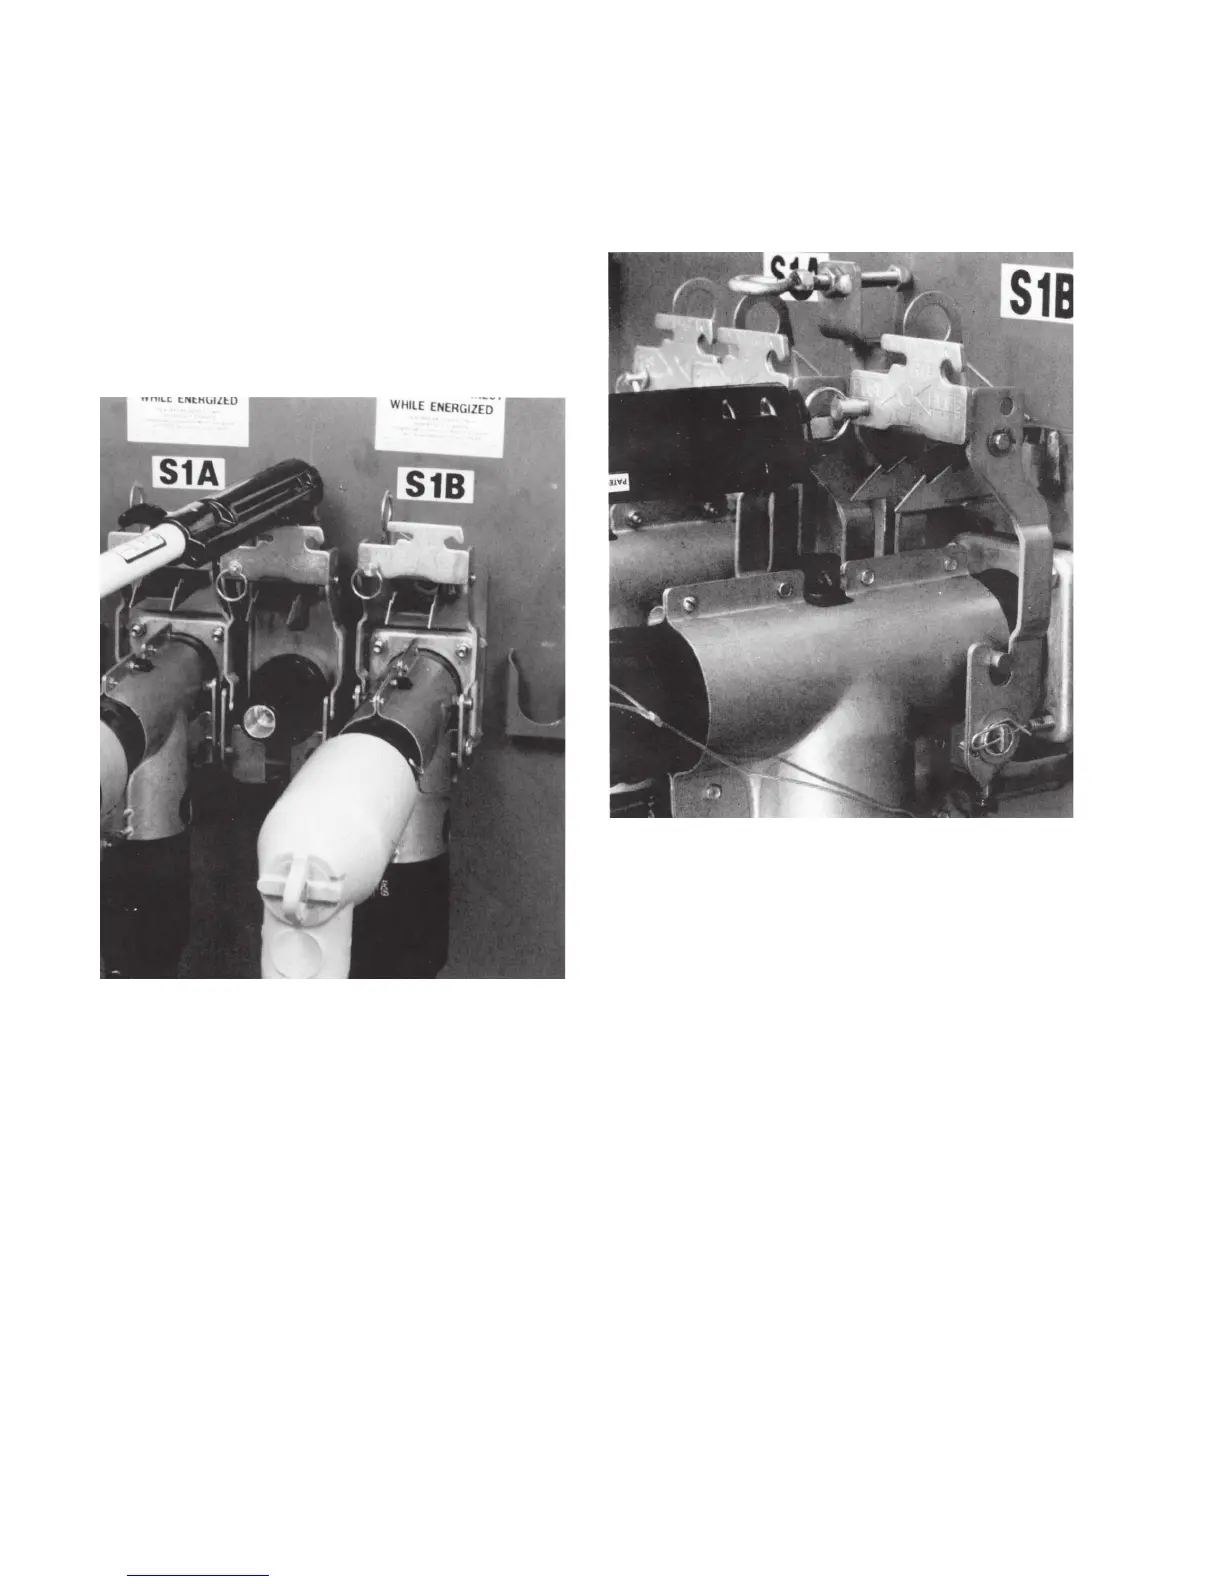
Mount PUSH-OP insulated standoff bushing in the
apparatus parking pocket using a hotstick. Tighten eyebolt
to ensure secure mounting. Ensure that PUSH-OP bail
bracket on the insulated standoff bushing is unlatched.
Refer to Figure 7.
Unthread the hitch pin on the push plate. Refer to Figure
8.
Figure 7. Mount PUSH-OP standoff bushing.
Figure 8. Unthread the hitch pin.
4 600 A PUSH-oP DeADbreAk connector oPerAtion inStrUctionS MN650011EN May 2017

Other manuals for Eaton Current-Limiting - Type NXC Fuse

Questions and Answers:

Question and Answer IconNeed help?

Do you have a question about the Eaton Current-Limiting - Type NXC Fuse and is the answer not in the manual?

Eaton Current-Limiting - Type NXC Fuse Specifications

General IconGeneral
BrandEaton
ModelCurrent-Limiting - Type NXC Fuse
CategoryCables and connectors
LanguageEnglish

Related product manuals