Network Communication Configuration
Eaton ePDU G3 Operation Manual P-164000277—Rev 1 www.eaton.com/ePDU 40
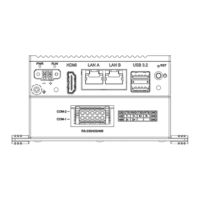
Figure 36. Reset Button
Serial connection — Static IP address
Use the RJ45-to-DB9 serial cable that is provided to connect the computer to the ePDU. If your computer does
not have a DB9 (RS-232) connector, a USB-to-RS-232 adapter can be purchased separately. Access the CLI
using a terminal emulation program such as HyperTerminal, PuTTY, or TeraTerm.
To set up the serial port using your selected terminal emulation program, use the following settings:
l
Bits per second: 9600
l
Data bits: 8
l
Parity: None
l
Stop bits: 1
l
Flow Control: None
After establishing a serial connection, perform the following steps:
1. In the terminal emulator session window, enter the default user name (admin) at the login prompt. For
example:
Enter Login: admin
Enter Password:
2. Type admin (default) at the password prompt. Press Enter
.The CLI uses a “get” command to return the
value of a setting and a “set” command to change the value of a setting. For example:
PDU#0>set System.Network.DHCP 0
PDU#0>get System.Network.DHCP
0
3. Type set System.Network.DHCP 0 and press Enter to modify the value (0 = disabled and 1= enabled). For
e
xample:
PDU#0>set System.Network.DHCP 0
0
4. Set the IP address to a value provided by your system administrator.
PDU#0>set System.Network.IPAddress xxx.xxx.xxx.xxx
xxx.xxx.xxx.xxx
5. If necessary, set the network Subnet Mask to the value required by your system administrator.
PDU#0>set System.Network.IPMask 255.255.yyy.yyy

 Loading...