6
Instruction Leaet IL01301015E
Effective November 2016
Installation instructions for Series NRX
Type NF frame xed breaker rear connect,
front connect, and hybrid congurations
EATON www.eaton.com
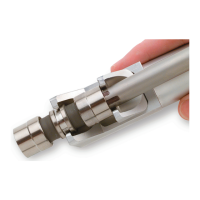
There are several connection configurations that can be used on the
Series NRX front connect. The list of available connections is shown
in Figure 9. These connectors can be used in any combination at
both the line and the load side as needed for the application.
Bus conductor extension
Cable terminal
Bus conductor extension
with cable terminal
Figure 9. Fixed front connect connection options
Front connect kit installation
In order to attach cable terminals or bus conductor extensions to the
line and load bus adapters, proceed with the following steps.
Step 1
Remove the four screws (or five screws for a four-pole breaker)
while holding the front of the arc hood. Also remove the four screws
(or five screws for a four-pole breaker) to remove the front of the
shroud that is mounted on the load side (Figure 10).
Remove screws
Remove screws
Figure 10. Step 1
Step 2
With the screws removed, pull out the front of the arc hood and set
it aside (Figure 11). Follow the same procedure to remove the front
shroud at the load side.
Figure 11. Step 2
Step 3
Slide each of the baffles forward and out to provide proper access to
the bus adapters (Figure 12).
Baffle
notches
Figure 12. Step 3
 Loading...