The EBA 435 E and EBA 435 EP are guillotine paper cutters designed for precision cutting of paper stacks. These machines are manufactured by Krug & Priester GmbH u. Co KG in Balingen, Germany, and comply with EC-regulations 98/37/EG, 2006/95/EG, and 2004/108/EG, as well as ISO 9001:2000 standards. They are also UL listed (I.T.E. Listed 802 D) and bear the CE mark, indicating adherence to European safety, health, and environmental protection requirements.
Function Description:
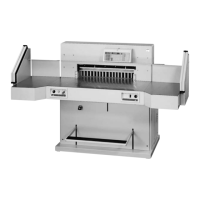
The primary function of the EBA 435 E and EBA 435 EP is to cut stacks of paper to a specified size. They are designed for "one-man operation" only, emphasizing safety and ease of use. The cutting process involves a blade that moves downwards to cut the paper, with a pressing bar to secure the stack during the cut. Both models feature a safety guard system to protect the operator from the blade. The EBA 435 EP model includes electronic programming capabilities for precise cutting dimensions, while the EBA 435 E relies on a manual backgauge crank.
Important Technical Specifications:
- Power Supply: 230V/50Hz/0.45KW or 120V/60Hz/0.45KW.
- Cutting Length: 430 mm.
- Cutting Depth: 430 mm.
- Cutting Height: 40 mm.
- Minimum Space Requirement (W x D):
- EBA 430 E: 640 x 695 x 355 mm (80 kg)
- EBA 430 EP: 655 x 695 x 355 mm (84 kg)
- With stand: 1044mm/E, 1044mm/EP (90 kg/E, 94 kg/EP)
- With cabinet: 1044mm/E, 1080mm/EP (112 kg/E, 116 kg/EP)
- Sound Level: < 70 dB (A) as defined by EN 13023.
- Blade Height: The blade cannot be ground if its height is less than 35 mm/1.38 inches. A new blade must be used in such cases.
- Accessories (Included in delivery for some items):
- Blade Nr. 9000 121
- Cutting stick (6 pieces) Nr. 9000 221
- Paper knock-up block Nr. 9000 520
- Blade changing tool Nr. 9000 517
- Cabinet Nr. 4215 1100 (optional)
- Stand Nr. 4205 1100 (optional)
Usage Features:
- Safety Precautions: The machine is equipped with multiple safety features. All components that could endanger the operator are covered by a guard. Operation is forbidden without the movable front safety guard (A), rear screwed safety guard (B), and cover (C) in place. The dangerous cutting movement is safeguarded by a movable guard (A), a rear screwed safety guard (B), and a two-handed control system (C). The distance between the cover and table must be < 15 mm.
- Power Connection: Connect the power cord to a single-phase socket (230 V / 10A min or 120 V / 15A min). Ensure free access to the mains.
- Main Switch: The main switch should be turned to "0" when not in use for a longer period. It is crucial not to turn the main switch to "0" whilst the blade is moving upwards or downwards to avoid injury. The blade must always be covered by the pressing bar.
- Installation: Unpacking and assembling the cabinet or stand (if applicable) requires two strong people to lift the machine. The machine is secured to the stand using four hexagon nuts.
- Operation (EBA 435 E):
- The measurement is set with the backgauge crank (A). The symbol on the display (B) indicates the rotary direction of the backgauge crank. Turning the crank moves the backgauge until a measurement appears on the display (E). The cutting size is shown on the display (A).
- Optical cutting red line (A) indicates where the blade cuts on the front edge (B) of the light beam. This feature is for approximate cuts only.
- To avoid incorrect measurements, pull out the handle to lock the backgauge.
- Operation (EBA 435 EP):
- The measurement is set either with the hand-wheel (B) or by programming (C) the cutting measurements.
- If the display shows "Cut", the pressure lever (D) to the right until the backgauge (E) is activated.
- Measurement is shown on the display in inches or cm (C).
- Programming allows for storing up to 9 programs with 9 programmable steps each. Dimensions can be entered in cm or inches. The machine automatically converts units.
- The "Eject" function pushes the paper stack forward after a cut.
- Cutting Process:
- Position paper on the backgauge (A) and side lay (B). Use the paper knock-up block (C) to move paper stacks.
- Close the safety guard.
- Move the lever to the left and tighten with light pressure before every cut.
- Activate cutting by pressing both buttons of the two-handed control system (A) simultaneously until the paper is completely cut. Release both buttons to interrupt or stop cutting.
- Error Handling: The manual provides troubleshooting steps for common issues like the machine not functioning (check power, main switch, control system activation), machine turning off (overloaded, blocked, blunt blade), and cut not going through the last sheet (turn or turn around cutting stick, readjust blade).
Maintenance Features:
- Disconnect Mains: Always disconnect the mains before starting any service work or removing the cover. Maintenance work should only be performed by trained staff.
- Blade and Cutting Stick Replacement:
- Replacement of the blade and cutting stick should only be performed when the main switch is switched off.
- Cutting Stick Replacement: Lift the cutting stick by hand and pull it out. The cutting stick can be turned or exchanged (it can be used eight times). After exchanging, close the clamp by moving the clamp lever to the left.
- Blade Replacement:
- Turn the blade depth adjustment screw (A) until it stops.
- Position the main switch to "0". Open the safety guard. Remove the 2 blade screws on the elongated holes. Put the blade changing tool into place and fasten it to the blade.
- Remove the remaining 3 screws. Push the blade and blade changing tool (A) to the right and lower to remove. Place the blade into the blade carrier (B) and screw it into place.
- Take the exchange blade carefully out of the blade box. The blade must be covered.
- Place the blade to be exchanged using the blade changing tool into the blade carrier and push to the top and to the left. Push back both springs.
- Push the blade changing tool to the top with your hand. Lightly tighten the middle blade screw and the other two blade screws. Remove the blade changing tool.
- Lightly tighten the 2 blade screws on the elongated holes.
- Remove all tools and distribute paper along the entire cutting length. Turn the main switch to position "1".
- Close the safety guard. Lower the blade by pressing both cutting buttons. If the last sheet of paper is not completely cut, gradually turn the knob for blade-depth adjustment (A) ¼ turn to the right until the paper is cut along the entire length.
- Tighten all 5 blade screws.
- Perform a paper cutting test. If the last sheet is not completely cut, gradually turn the knob for blade depth adjustment (A) ¼ turn to the right until the paper is cut along the entire length. Do not set too low as the blade will become blunt sooner.
- Greasing: Grease the backgauge (A) weekly (use non-resinous grease). Grease the remaining parts (B) twice a year.
- Safety Test: The manufacturer recommends a safety check every 5 years by an authorized service team.