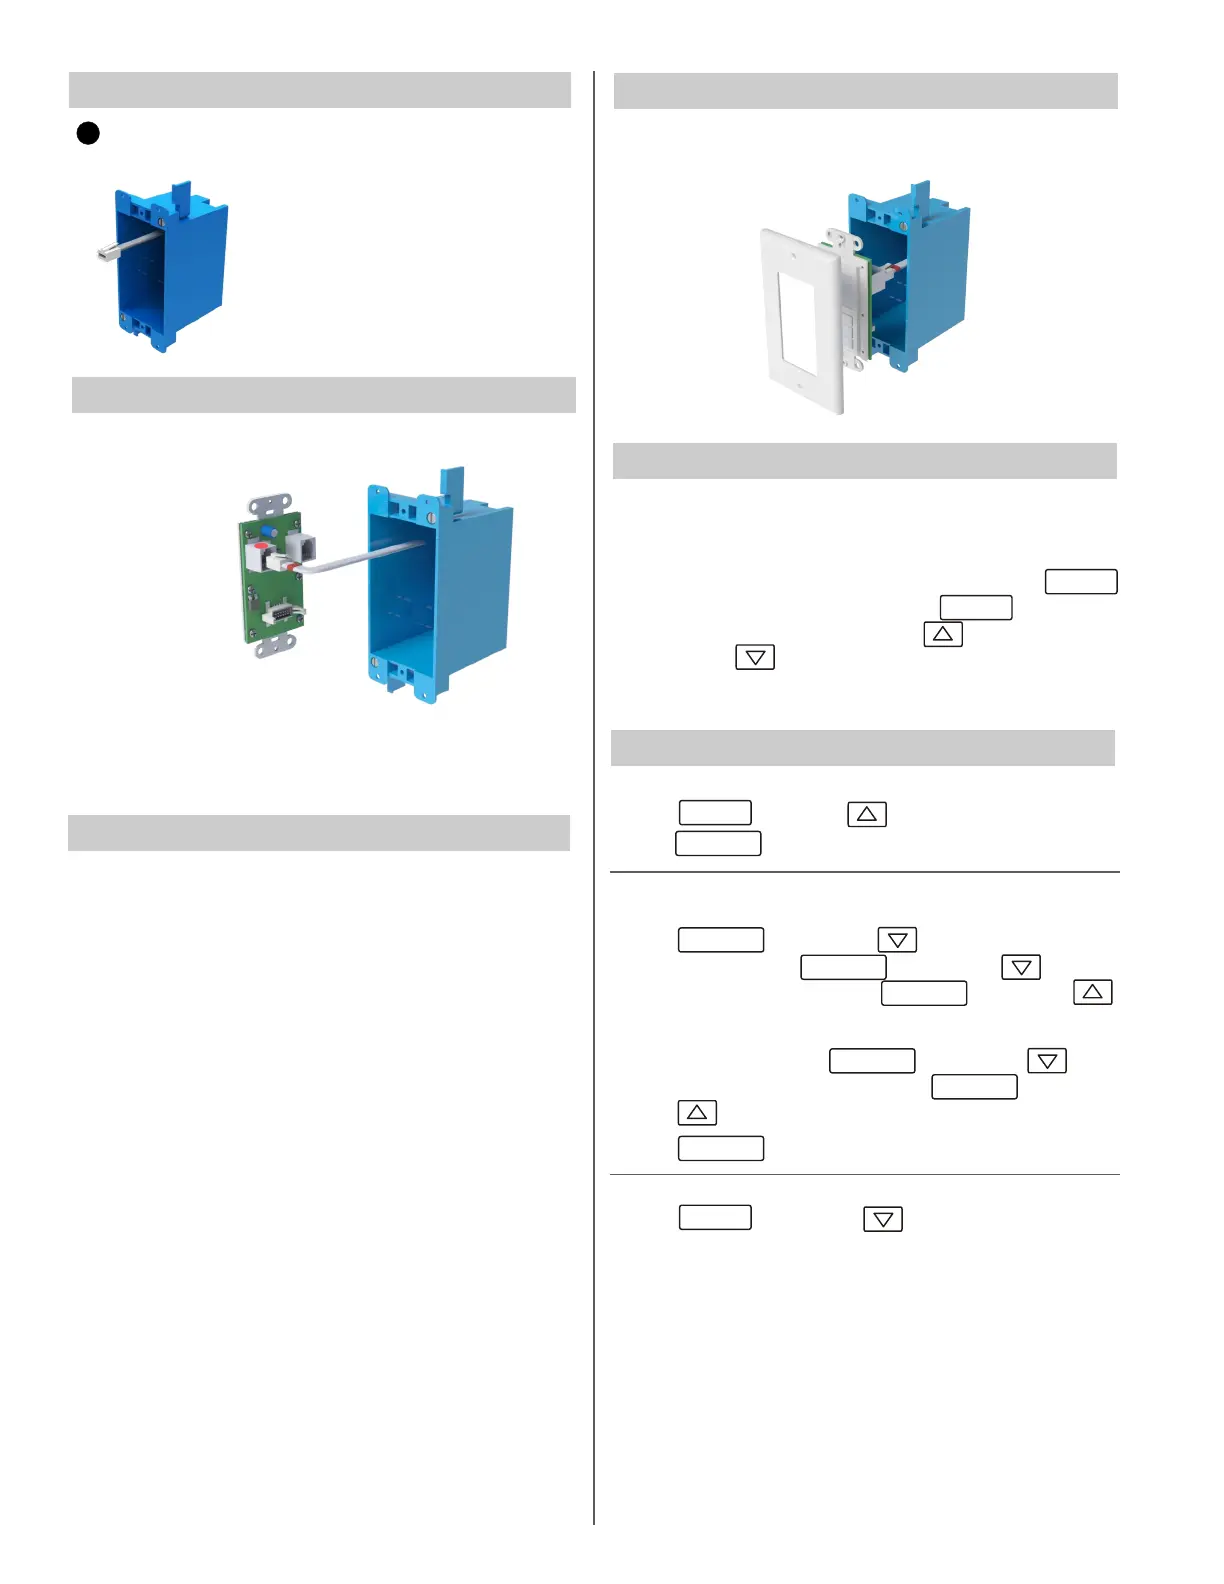
Attach the WTT wall control to the plastic gang box using the
screws provided. Attach the wall plate to the WTT using the
screws provided in the wall plate.
Step 7. Attach the WTT and Wall Plate
Connect the other end of the “RED” Plug&Play cable into
the”RED” connector on the back of the WTT wall control.
Connect to
“RED”
connector on
back of WTT
Step 5. Connect Cable to the WTT
For a 2-Speed fan, PRESS then PRESS to
lower the fan speed to Low (L). PRESS then
PRESS to return to High (H) Speed.
PRESS then PRESS to select
TEMPERATURE CONTROL.
Step 9. Checking the Installation
PRESS to turn the fan ON. Fan should be running.
ON/OFF
PRESS then press to select TIMER CONTROL.
MODE
Verify that the fan is running in High speed. For a 3-Speed fan,
PRESS then PRESS to lower the fan speed
to Medium (M). PRESS then PRESS to lower
the fan speed to Low (L). PRESS then PRESS
to return to High (H) speed.
SPEED
CHECK FAN OPERATION
CHECK FAN SPEEDS
SPEED
SPEED
SPEED
SPEED
RETURN TO TEMPERATURE CONTROL
MODE
ON/OFF
PRESS to turn the fan OFF.
Step 4. Feed Cable to Gang Box
If the optonal TS3J Outdoor Temperature Sensor is
being installed, install it now. (See the TS3J Installer
Guide.)
Feed the other ends of the cable from
the FC3J and the TS3J (if installed)
through the wall and the opening in the
gang box. Insert the gang box into the
wall opening and secure.
i
If a sensor is installed, connect the cable with the “YELLOW”
marker into the “YELLOW” connector.
Step 6. Power the Fan
Apply power to the fan. If the fan automatically starts up,
remove power and check the wiring. If the problem persists,
contact us.
Verify that the WTT Wall Control LCD is displaying, indicating
the the WTT is receiving power.
Step 8. Set the Number of Fan Speeds
The WTT is factory set to a two speed fan. For three-speed or
one-speed fan installations, the number of fan speeds available
needs to be changed to reflect the type of fan installed.
To change the number of speeds, PRESS and HOLD
until the first option is displayed. PRESS again to
display the number of speeds. PRESS to set a 3-speed
fan or PRESS to set a 1-speed fan.
MODE
MODE
 Loading...