3
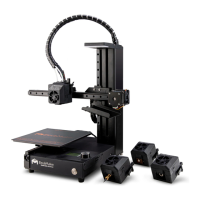
Unscrew the screw on the left side of the platfrom (to limit the bed
movement during shipment) and four screws on the back side of the
fuselage xing the X-axis guide rail and the printing base plate with a
M3.0 screwdriver and remove the two extra angle plate .
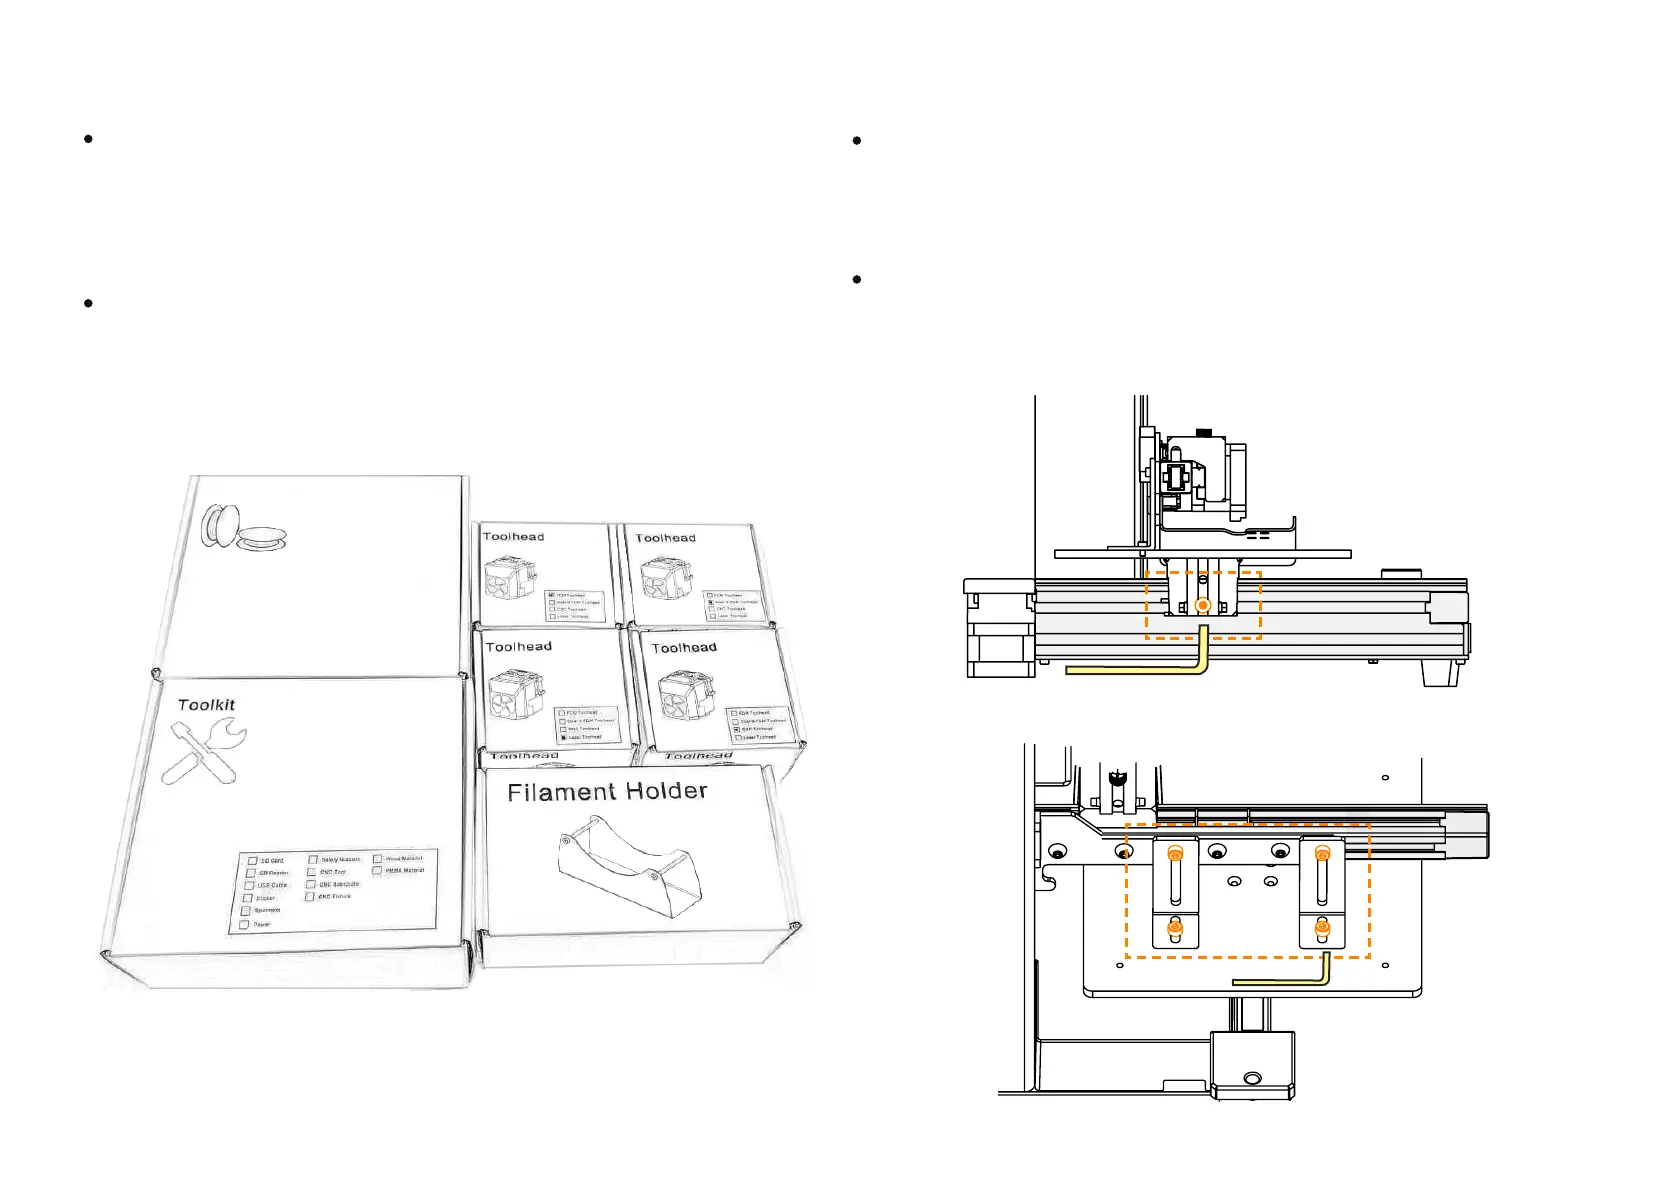
Take out all the packing accessories from the accessory box (the
packing accessories with different congurations are different, which
shall be subject to the physical objects received. Four kinds of tool
heads are used as demonstration. In case of doubt, please consult
your vendor).
用 M3.0 螺丝刀旋下机身左侧(固定打印底板固定座)的一颗螺丝,机
身背面 固定 X 轴导轨与打印底板的四颗螺丝。
从配件箱中取出所有装箱配件(不同配置装箱配件不同,具体以收到实
物为准,此以四种工具头作为演示。如有疑问,可咨询您的销售商)
M3.0 screwdriver


 To Next Page