1. INTRODUCTION
Pressing on the Ei407 Manual Call Point (Manual Call Point) black spot
causes all Alarms on RF Bases and RF Alarms to sound. This informs
the occupants that the building must be evacuated.
The Ei407 Manual Call Point also provides a means to test the
Alarms without having to reach up to the Alarms on the ceilings, as it
can be reset with the plastic key (supplied).
We suggest that the plastic key is mounted on a small nail under or
alongside the Manual Call Point for future use when resetting (as
shown above).
2. INSTALLATION
It is recommended that you install all the other RF Bases / Alarms and
any other RF components before installing this Manual Call Point.
All RF units should be located in their final positions before House
Coding commences.
1. The Manual Call Point should be positioned (approx) 1.2 meters high
on a wall, in a suitable location on an exit route (avoid locating near
metal objects).
2. Securely attach the mounting box to the wall using the fixing
screws supplied.
3. Remove the bottom housing by first pushing in the forked end of
the key (with arrow side out) into the two slots (see Figure 1). The
bottom housing should drop down by about 10mm and expose
the yellow edge on the top of the white element (with the black
spot). Remove the key, pull the bottom housing down and then
lift it up to remove (see Figure 2).
4. Next remove the white element by lifting the lower edge (see
Figure 3).
5. Connect the built-in battery by sliding
the battery switch into the “on” position.
(see Figure 4).
6. Press the House Code switch until the
light on the front turns on red (see Figure
4) (The unit will now send out a coded
alarm signal and the red light will flash).
7. Screw the front plate to the wall box
using the two machine screws provided
(see Figure 5).
8. Now re-install the white element, yellow
edge uppermost (see Figure 6). Replace
the bottom housing by lining up the two
notches and carefully pushing it flat - this
should leave it about 10mm below the
bottom edge.
Now slide the bottom housing upwards
(see Figure 7). This resets the switch.
The yellow edge on the white element
should now be hidden (The unit will now
send out a coded alarm cancel signal).
The red light will then continue to flash
to show it is in House Code mode, for
the next 15 minutes.
9. Immediately put all other RF Smoke
Alarms and other components into
House Code mode within 10 minutes.
10. In House Code mode, the Manual Call
Point will now send a radio message
every 5 seconds. All RF Bases and
Smoke/Heat Alarms within range
that are also in House Code mode
themselves will memorise the House
Code of the Manual Call Point.
11. Check that the number of amber light
flashes (for RF Bases) or blue light flashes
(for RF Smoke Alarms) corresponds
with the number of units in the system
(e.g. Bases / Alarms plus Manual Call
Point). For example, with 3 RF Bases
and 1 Manual Call Point you should see
4 amber light flashes from each Base.
(Note: the Manual Call Point flashing
red light does not indicate the number
of units in the system. It just flashes
rapidly to show it is in House Code
mode. The Manual Call Point is only an
RF transmitter and does not receive any
RF signals).
12. Remove all the RF Bases / Alarms from
House Code mode as described in their
instruction leaflets.
13. The Manual Call Point will exit the
House Code mode by itself after
approx. 15 minutes without further
user intervention.
However, this could result in problems
with nearby systems if their units are
being House Coded at the same time. If
this is the case remove the Manual Call
Point from its mounting box and then
from House Code mode by pressing and
holding the code button until the red light
comes on (i.e. use the same method as
to enter House Code mode). Release
the button and the red light will go out,
indicating that the Manual Call Point has
exited House Code mode. Re-assemble
and attach to box as described previously.
Please note that this will cause the Manual
Call Point to send out a coded alarm
signal which will activate the RF Bases /
Alarms that have previously been House
Coded during the installation procedure.
3. CHECKING & TESTING THE MANUAL CALL POINT
The Manual Call Point is an important alarm device and should
be tested after installation and then monthly (and after prolonged
absence) to ensure correct operation as follows.
a) Check that the light on the front flashes green every 40 seconds.
This indicates it has power.
b) Press the black spot and the white element will drop down
exposing the yellow edge to show it is activated. The light will turn
red and stay on continuously for 3 seconds and then continue to
flash red (every 45 seconds) for 5 minutes indicating transmission
of the alarm signal (Note: after 5 minutes the RF alarm signal
ceases and therefore the smoke alarms will stop alarming. This
prevents the batteries in the Manual Call Point and the alarm from
being depleted).
c) Check the RF units are now in alarm (If some or all of the alarms
have not been activated, then the House Coding procedure
should be repeated. If there are still some problems, see the
“Troubleshooting RF” section on page 4).
d) The Manual Call Point should be reset with the plastic key provided
by pushing the forked end (arrow side up) into the slots (see Figure
1) and pulling the bottom housing down. Remove the plastic key.
Now push the bottom housing firmly against the back and slide
upwards. This resets the switch. The yellow strip on the white
element should now be hidden.
e) If the Manual Call Point is not reset the light will flash red every 40
seconds to remind the user to reset it.
On reset, the alarm cancel signal will be transmitted (indicated by a
single red light flash for 3 seconds).
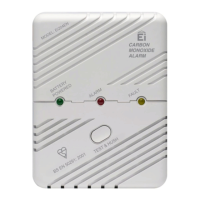
Manual Call Point
Model: Ei407
For use with RF Smoke/Heat Alarms and Bases
House Code Button
BATTERY
ON/OFF SWITCH
Figure 1
Figure 6
Figure 3
Figure 2
Figure 4
1
2 3
Contains vital information on the product’s operation and installation.
Read and retain carefully. If you are just installing this product the
manual MUST be given to the householder.
Figure 5
Figure 7