Do you have a question about the Eiki EX-2000-N Series and is the answer not in the manual?
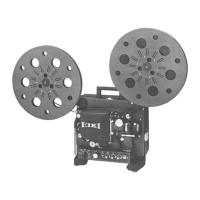
Overview of the EIKI 'N' series projector and its relation to earlier models.
Explanation of the mechanical system controlled by the function switch for forward, reverse, and lamp positions.
Details on projector voltage availability, safety regulations, and power transformer specifications.
Description of sound playback and record capabilities for different EIKI 'N' series models.
Important safety and service precautions for handling EIKI 'N' series projectors.
List of standard and special tools, and essential test equipment for projector maintenance.
Recommended lubricants and lubrication schedule for projector parts, with cautions.
Basic steps and techniques for troubleshooting projector issues using a VOM and other methods.
Procedure for removing and installing the Cam Tank Module, including disassembly and re-installation notes.
Steps for removing and installing the Amplifier Module, with notes on knob removal and connections.
Instructions for removing and installing the Motor Module, noting differences in early production models.
Procedure for removing and installing the Transformer Module, emphasizing wire routing.
Steps to remove the Lens and Gate Module, securing the film gate assembly.
Specifications, disassembly, re-assembly, and adjustments for the Cam Tank Module.
Procedure for adjusting the claw protrusion using a specific tool and screws.
Adjusting claw position for film perforation alignment and framing using projector running tests.
International dimensions of 16mm film and correct claw pitch settings.
Adjusting claw pitch using the fulcrum control assembly and its effect on film jitter.
Procedure for checking and adjusting the claw lever tension force for proper operation.
Instructions on mounting two, three, or five bladed shutters and timing adjustments.
Description of the still picture clutch mechanism and adjustment for still position clearance.
Specifications for the amplifier module, including solid state components, output power, and frequency response.
Explanation of the amplifier power supply circuit and its connections to the transformer secondary.
Description of the audio amplifier circuit, signal path, and tone control functions.
Specifications for the AC induction motor module, including HP, voltage, and torque ratings.
Diagram showing the motor circuit, including capacitor, thermal switch, and connections.
Wiring color code and connections for the 6-pin motor connector (female).
Instructions for silent film operation and conversion between 50Hz and 60Hz speeds.
Circuit diagrams for earlier and later production transformer modules, showing voltage taps.
Wiring codes for 9-pin nylon connectors for different projector models and voltage types.
Description and adjustment of the film gate assembly, including inner and outer guide rails.
Description of the film shoe and lens holder assembly, including adjustments for pressure and focus.
Description and adjustments for the take-up arm assembly, focusing on take-up torque.
Description of the supply arm's function in providing back tension and its adjustment.
Description and adjustments for reverse projection operation, including clutch and roller mechanisms.
Description and adjustments for the lower loop setter system to maintain correct film loops.
Description of the self-threading mechanism's operation and components.
Adjustments for the #1 sprocket shoe assembly, checking clearance with film layers.
Adjustment of the #1 film guide's travel for proper operation in self-thread mode.
Adjusting claw retraction clearance and re-forming the shutter blade if necessary.
Cleaning and adjusting the sound drum rubber pinch roller for proper film advance and flutter.
Adjusting tension guide and roller assembly for minimum wow and flutter.
Adjusting #2 sprocket shoe clearance and checking its protrusion.
Description and adjustments for the rewind mechanism, focusing on gear lash and tension.
Description of the sound drum and flywheel assembly's function in stabilizing film speed.
Adjusting the drive torque to the flywheel using the plate spring tension.
Procedure for aligning the optical sound system, including tools and setup.
Procedure for adjusting the buzz track for correct sound alignment.
Procedure for aligning the magnetic head for optimal playback and record performance.
Description of the projector's lamp circuit, including lamp types and function switch settings.
Procedure for replacing and aligning the projector lamp, including safety precautions.
Description and function of the projector's rotary function switch and its contacts.
| Brand | Eiki |
|---|---|
| Model | EX-2000-N Series |
| Category | Music Equipment |
| Language | English |