Turntable installation
1. Place the turntable ring assembly on the cavity bottom.
2. Place the glass tray on top of the turntable support.
• Do not place the glass tray upside down.
• Both glass tray and turntable ring assembly must always
be used during cooking.
• Always place food and food containers on the glass tray
when cooking.
• If the glass tray or turntable ring assembly cracks or
breaks, contact your nearest authorized service center.
4 using your microwave oven electrolux e:line built-in microwave oven
Control panel
1. cooking function – select microwave power, grill,
convection or combination cooking modes
2. power level – select desired microwave power level
3. auto reheat – select desired reheat mode
4. defrost – select defrost by weight or time
5. display panel – view cooking time, power level, cooking
mode, and time of day
6. clock – set the time of day and delayed start
7. stop/clear – stop or pause your microwave oven
program, or exit the cooking program setting
8. start/go – start your microwave oven
9. control knob – select cooking mode and time
Using your microwave oven
convection+grill
cooking
function
power
level
clock
stop/clear
start/go
auto
reheat
defrost
cooking
function
power
level
clock
convection+grill
stop/clear
start/go
auto
reheat
defrost
1
2
3
4
5
6
7
8
9
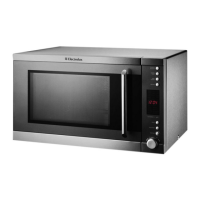
1. Control panel
2. Turntable shaft
3. Turntable ring
4. Glass tray
5. Observation window
6. Door assembly
7. Safety interlock system
8. Mica cover – DO NOT REMOVE
grill rack
glass tray
turntable shaft
turntable ring assembly
1
23 84
5
6
7
 Loading...