3.2 Built-in hobs
Only use the built-in hobs after you assemble
the hob into correct built-in units and work
surfaces that align to the standards.
3.3 Connection cable
• The hob is supplied with the connection
cable.
• Replace the damaged mains cable only
with the spare parts cable. Speak to your
local Authorised Service Centre.
WARNING!
All electrical connections must
be made by a qualified
electrician.
CAUTION!
Do not drill or solder the wire
ends. It is forbidden.
CAUTION!
Do not connect the cable without
cable end sleeve.
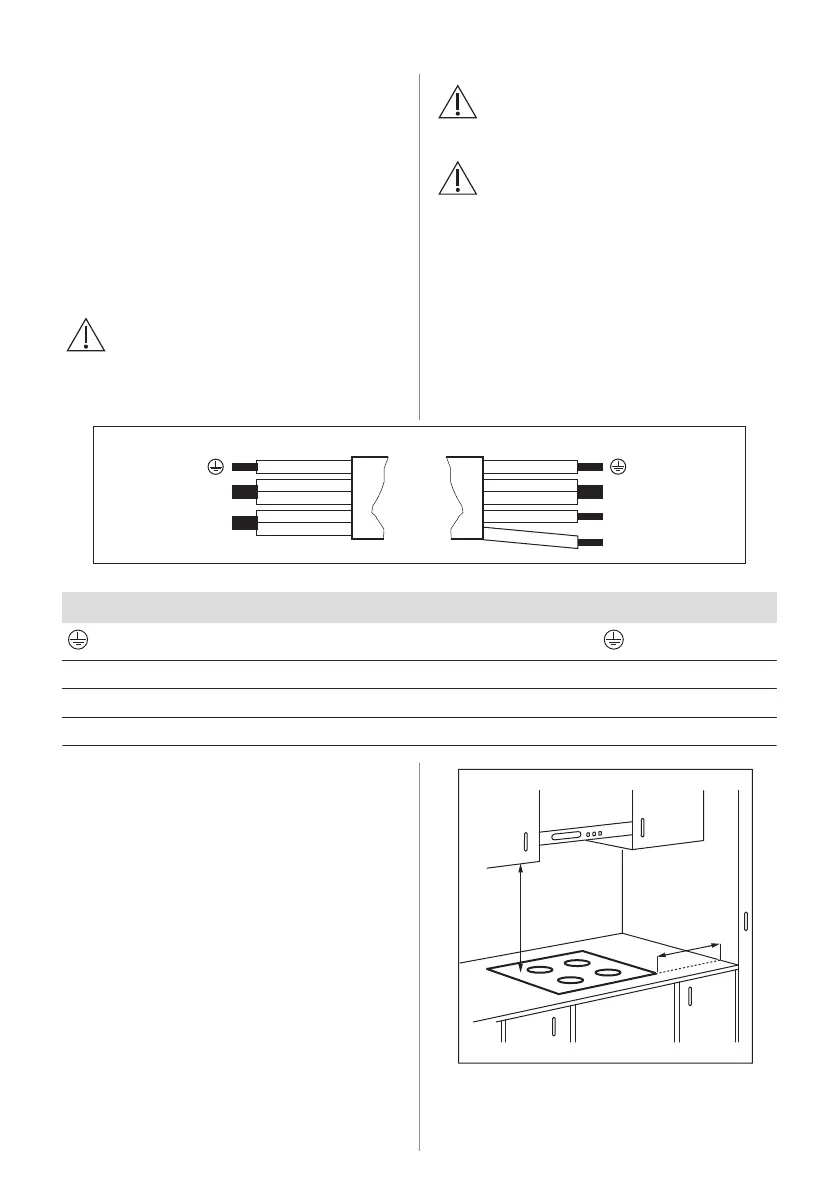
Two-phase connection
1. Remove the cable end sleeve from black
and brown wires.
2. Remove an insulation of the brown and
black cable ends.
3. Apply a new wire end sleeve of 1.5 mm²
on each cable end. (special tool
required).
Cable cross section
One-phase connection - 230 V~ Two-phase connection - 400 V 2 ~ N
Green - yellow Green - yellow
N Blue and blue Blue and blue N
L Black and brown Black L1
Brown L2
3.4 Assembly
If you install the hob under a hood, please
see the installation instructions of the hood
for the minimum distance between the
appliances.
If the appliance is installed above a drawer,
the hob ventilation can warm up the items
ENGLISH 7