11
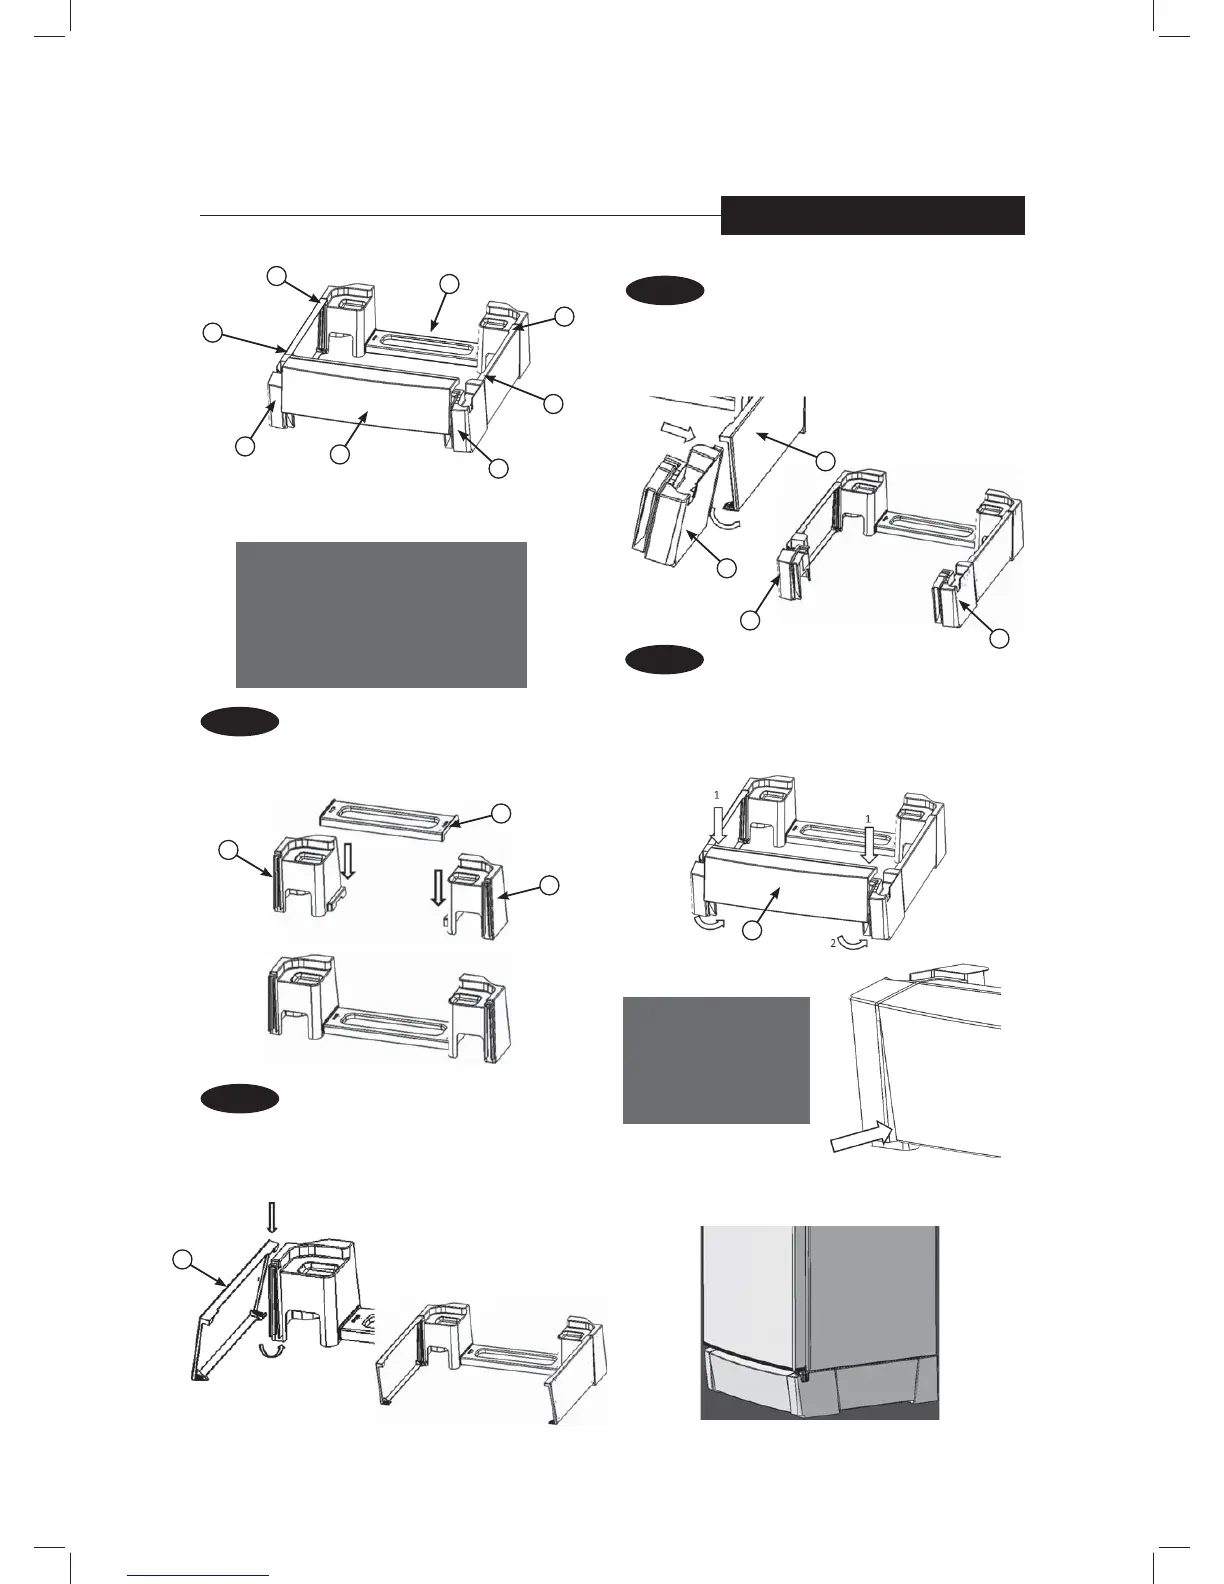
Plinth Mounting Instructions
TO BE ASSEMBLED AS SHOWN BELOW (210 L & 230 L MODEL)
PART LIST
1. FRONT COVER 1
2. FRONT CORNER RH 1
3. FRONT CORNER LF 1
4. REAR CORNER RH 1
5. REAR CORNER LH 1
6. REAR PIECE 1
7. SIDE PIECE 2
NOTE:
Make sure that the
front cover (Part 1)
goes in completely on
both sides as shown.
STEP 1
• Orientate Parts 4, 5 and 6 as shown below.
• Insert Part 6 vertically from the top into Parts 4 and 5
until it clicks as shown in the final position.
STEP 2
• Orientate Part 7 as shown (larger side on top)
• Clip onto the slot on Part 4 (or 5) from the top and
press the bottom to clip on as indicated by the arrow.
• Repeat the process for the other side as shown in the
final position.
STEP 3
• Clip on Part 2 with Part 7 on the right hand side and
then into the slot. Press in from bottom as indicated
by the arrow.
• Repeat the process with Part 3 for the left hand side.
STEP 4
• Orientate part 1 as shown below.
• Insert Part 1 into the slots of Part 2 and 3 from
the top, and then gently press in from the bottom
as indicated by the arrow until it clips firmly.
Place the refrigerator onto the
plinth as shown below.
Remove all Plinth parts from packaging
(see inside the bottom bin for parts)
5
6
4
2
1
3
7
7
7
5
4
6
1
2
2
3
7
INSTALLATION
Initial position
Position after step 1
Position after
step 2
Position after
step 3