9
Consult a professional if you have difficulties or your
installation is unique. Consult template and Figs.above.
c. Install drywall; then refinish ceiling.
Determine the required position for the conduit and cut a
1-1/4" (3.2 cm) hole at this location.
Run wires through hole according the National Electrical
Code or CSA Standards and local codes and
ordinances.
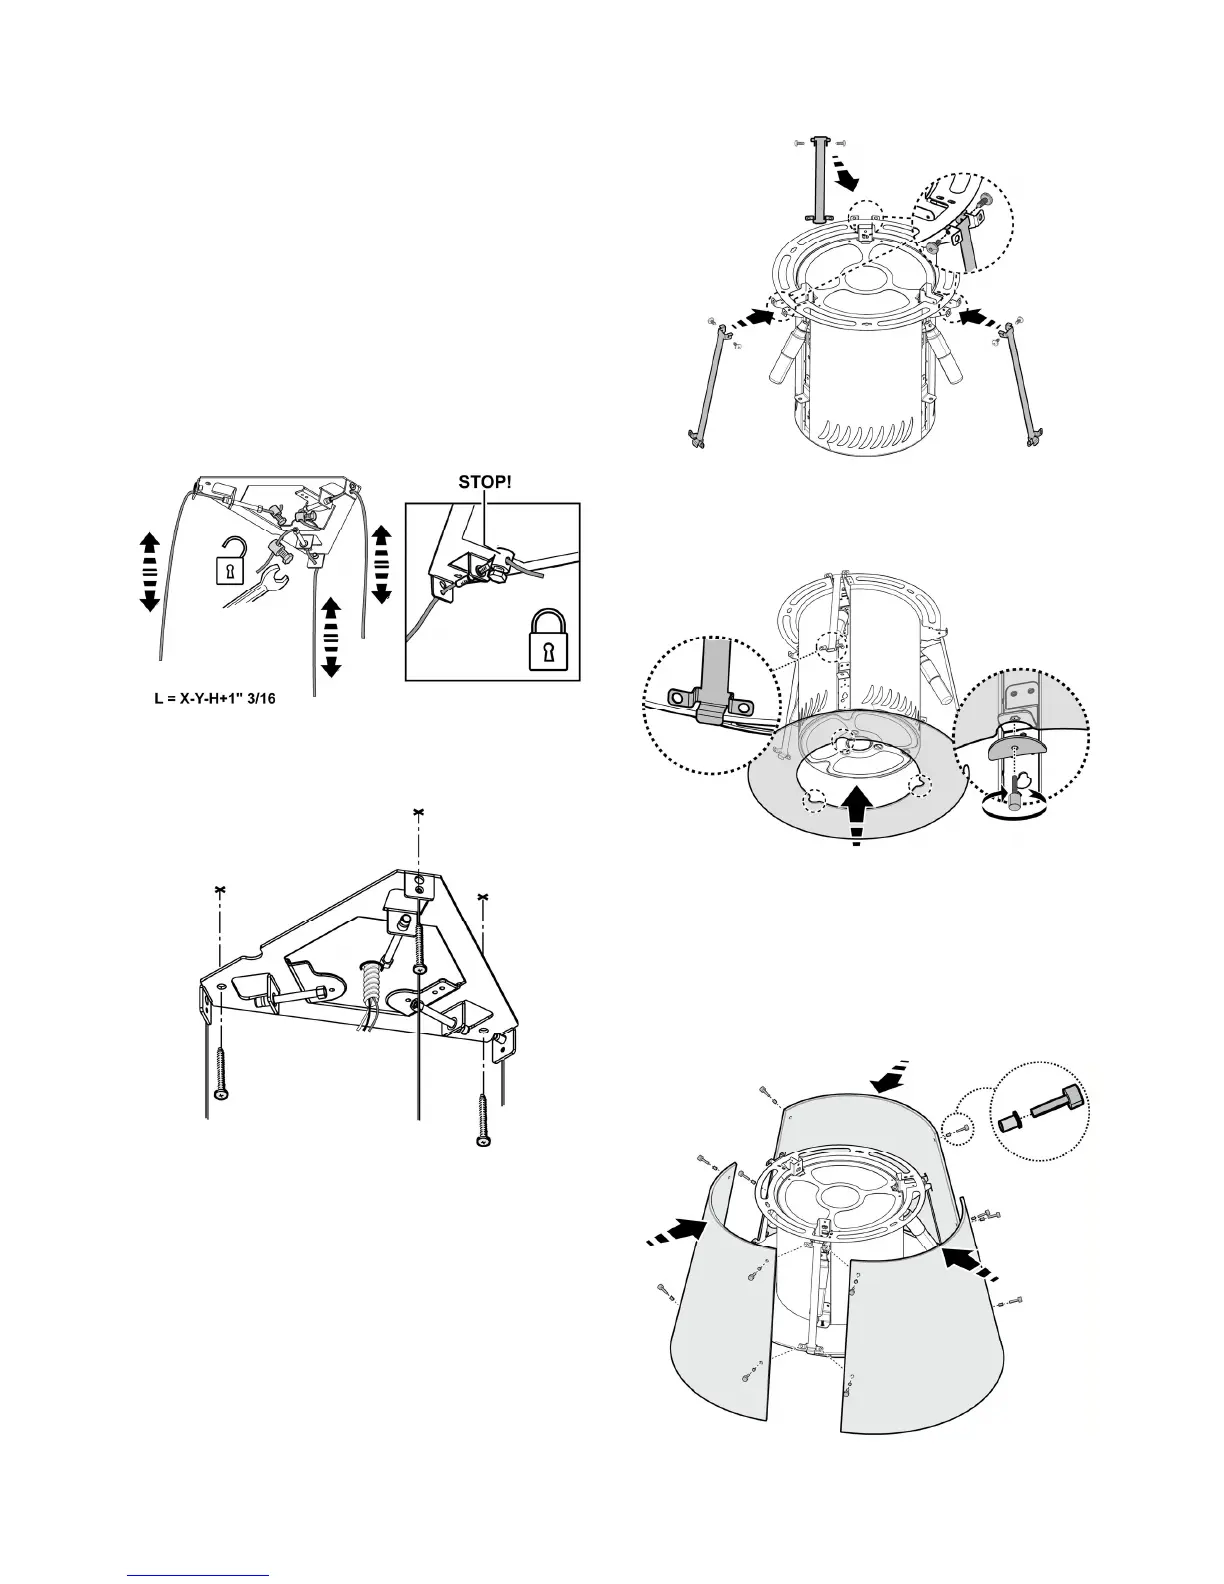
d. Tape Template in place and mount the support bracket
with wood screws (Supplied in mounting hardware kit)
on locations marked on template, then remove template.
3. Prepare the support bracket, suitably adjusting the
length of the cables according to the following formula:
L = X-Y-H+1" 3/16
L = truss extension
X = distance between the ceiling and the bottom edge of
the hood
After finding the right length, secure the cables,
tightening the lock nuts with a spanner.
4. Apply the support bracket on the ceiling, passing the
cables for the electrical connection through the middle
hole.
Fix with 3 wood screws.
5. Install the aesthetic cover brackets and lock with 6
screws.
6. Fix the lighting unit to the hood with 3 screws and
crescent-shaped washers.
Note: The inside rim of the lighting unit has chamfers which
must match the fixing places.
7. Apply the aesthetic covers.
Fix the aesthetic covers with 12 knobs and 12 nylon
bushings (4 per each cover).
Repeat the operation for all the aesthetic covers to be
installed.
ATTENTION! Pay particular attention to the position of the
excess cable; the non-observance of this direction might
cause serious damage to the appliance and/or electrical
shocks to the user or the installer.
 Loading...