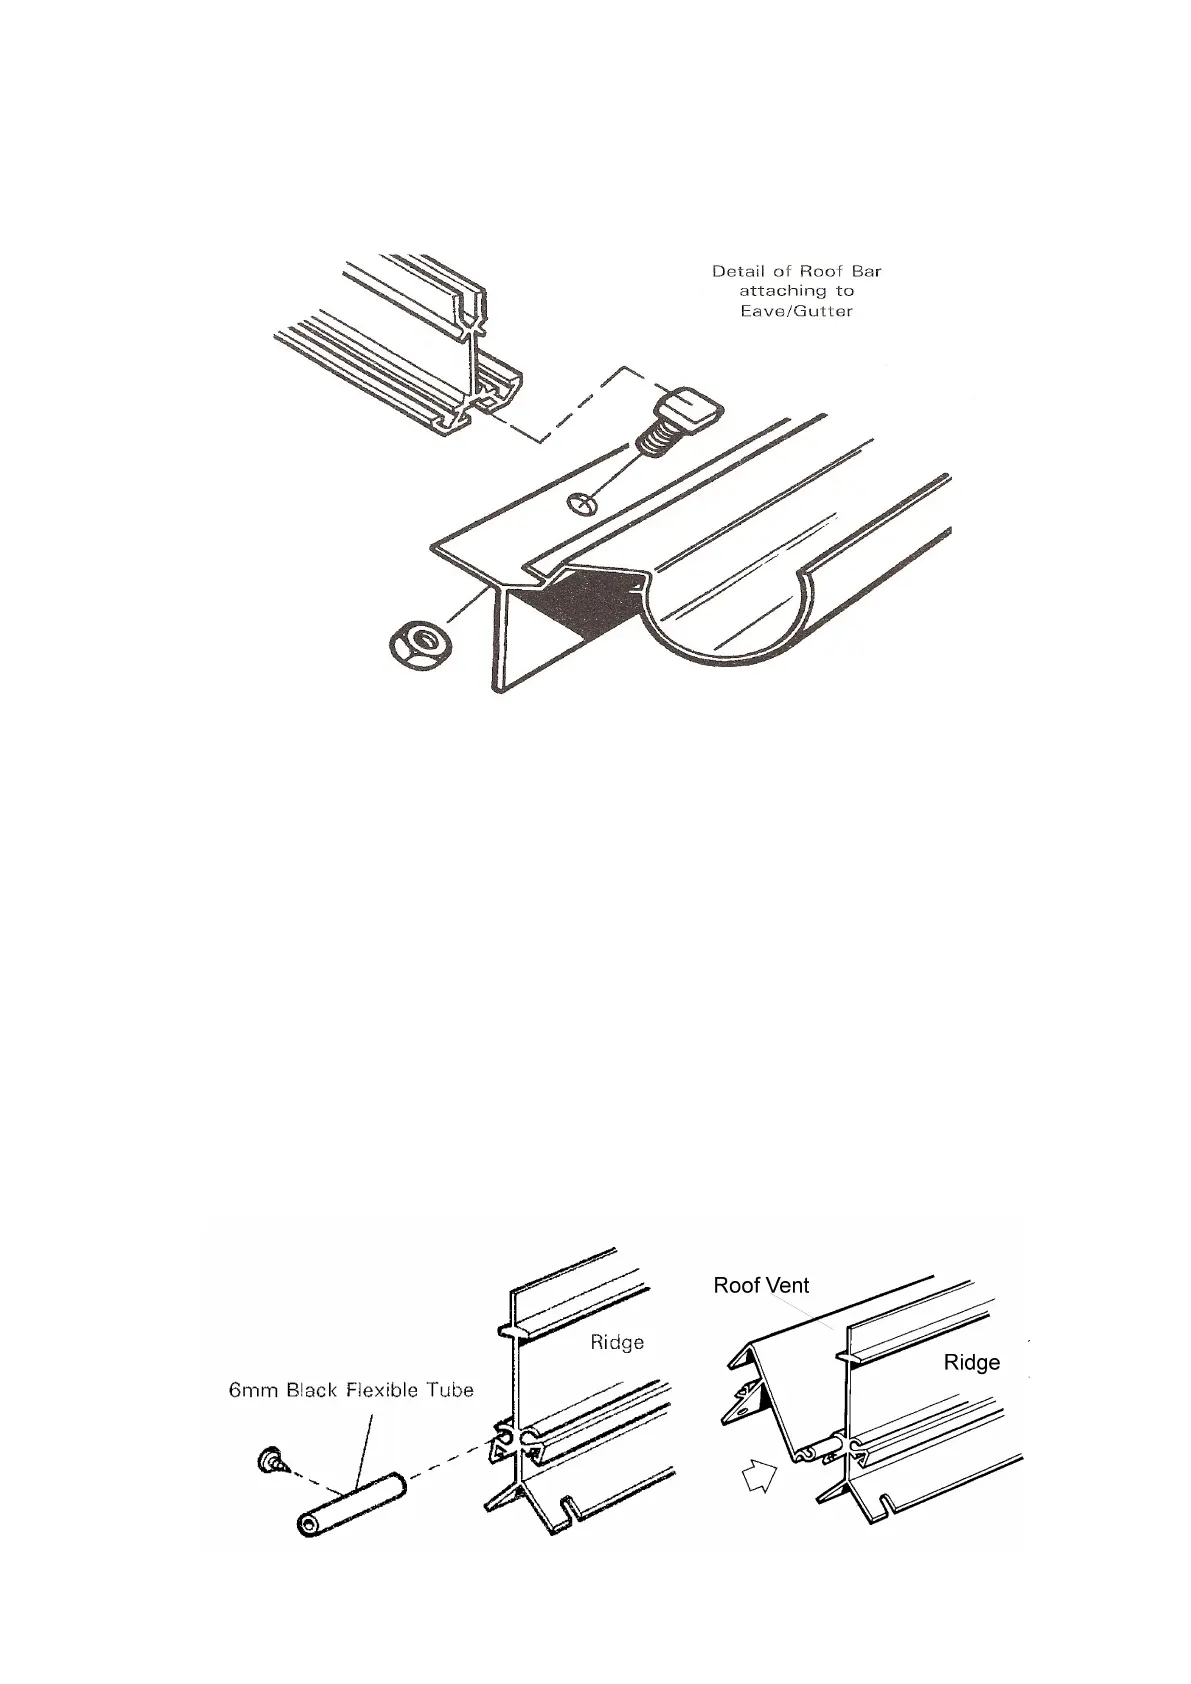
10. Before bolting the bottom of the roof bar to the flange of the eave bar, insert extra bolts.
Where the roof vent is to be positioned put an extra one bolt per bar i.e. the roof vent co-
vers two glazing bars so two extra bolts per vent. (Key Point). Then attach the final nut
and bolt to the eave bar as illustrated.
NOW YOU CAN FIT THE VENT TO THE RIDGE
11. Before sliding the vent into the ridge, slide a piece of black tube into the vent hinge sock-
et. Slide the roof vent onto the ridge as indicated in the diagram below from either end and
into the desired position. When the roof vent is in the correct position push the black tube
up to the roof vent hinge, insert a small self tapping screw into the black tube approxi-
mately ½ way along then tighten the screw. The tube will expand and lock into position
thus preventing sideways movement of the roof vent. These are two tubes, one each side
of the vent.
N.B. There is no hole for the screw but it will easily push into the black tube and screw up.
(Key Point). The roof vent overlaps the two glazing bars that it covers so is therefore wid-
er than the opening. Having slid the roof vents from the end on the ridge to the desired po-
sition, you can now fit the “slam bars” to the 2 glazing bars. Utilise the bolts you inserted
during general assembly and position the “slam bars” just under the roof vent allowing the
casement stay to effectively close. The slam bar can be adjusted later to facilitate good
opening and closing of the roof vent.


 To Next Page
 Loading...