1
3
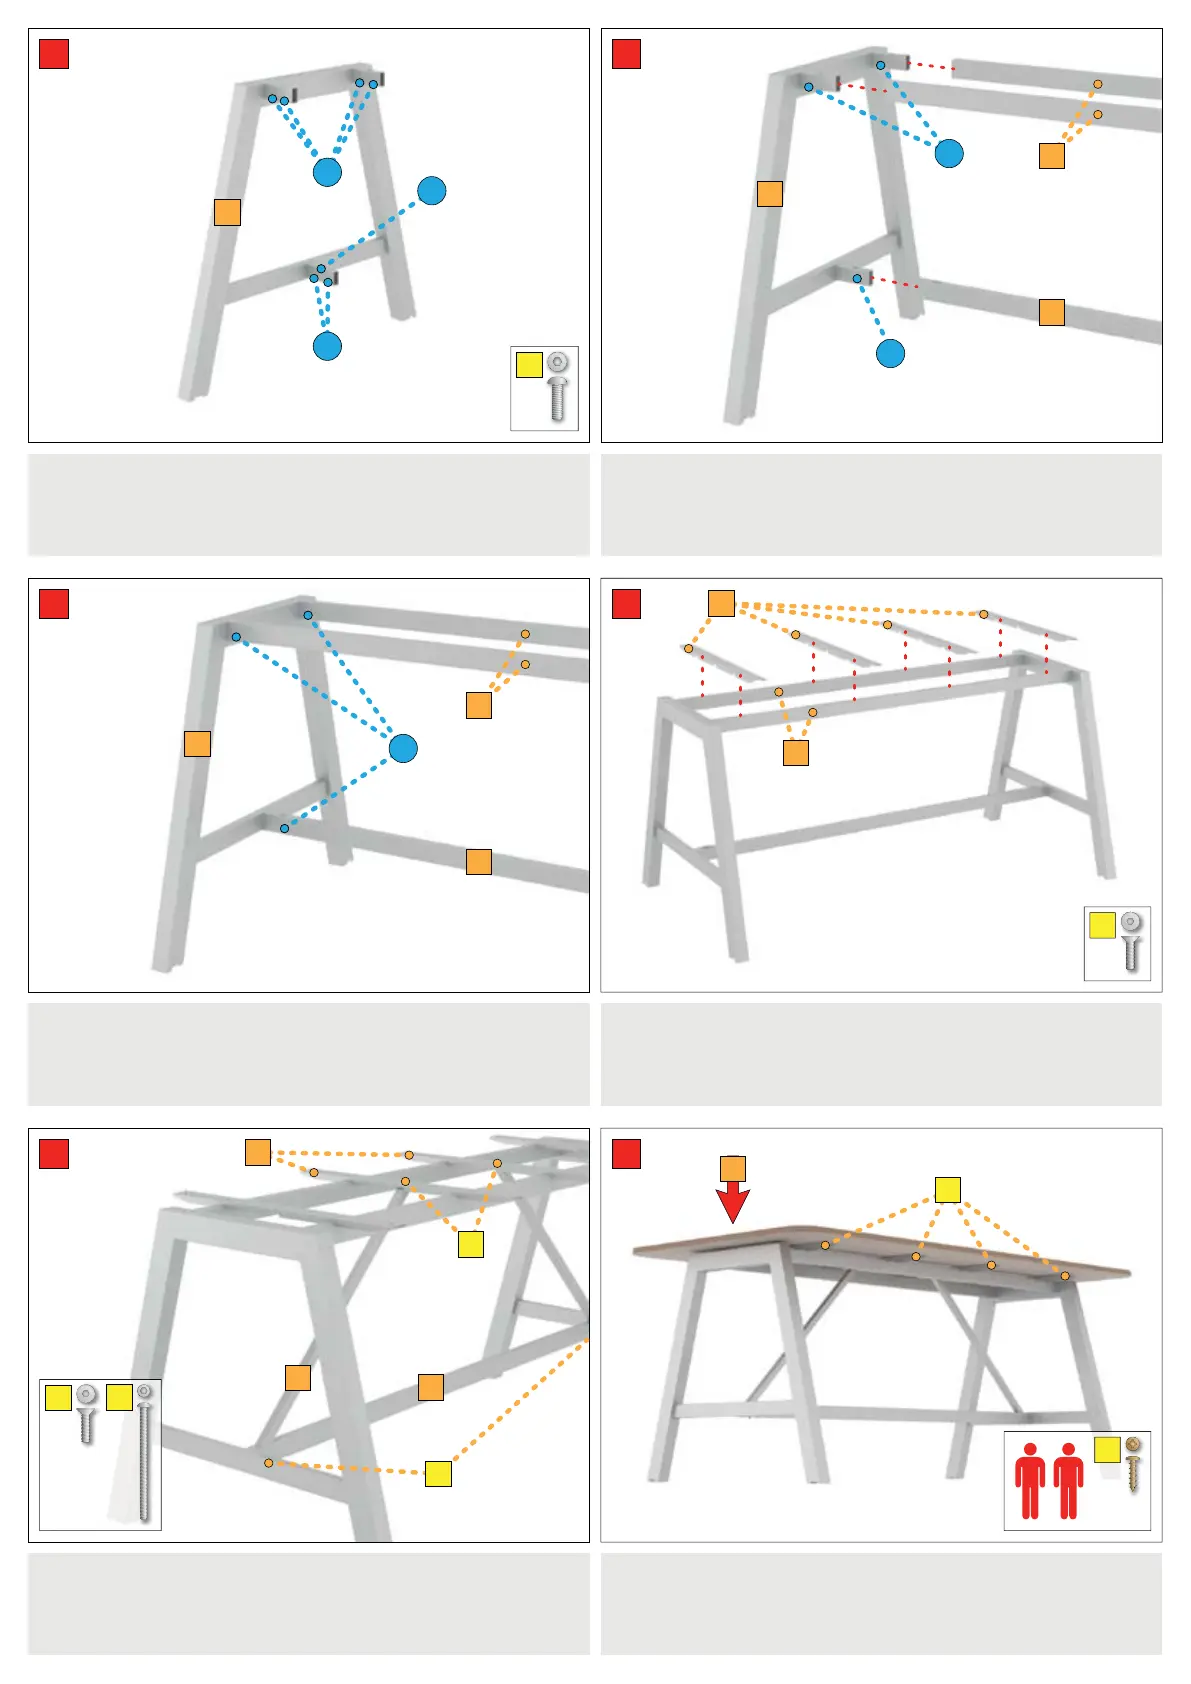
1. On each Leg Frame ‘B’, insert Leg Frame Bolts ‘G’ into the
6x positions per leg ‘Z’ (12x in total) so that they are touch tight
only. Be aware that you want the outer positions on the bottom
extended section ‘Y’.
3. When in place, unscrew the touch tightened bolts ‘G’ on the
Top Rails ‘C’ and Bottom Rail ‘D’ until they are tight and secure.
Repeat with Leg Frame ‘B’ on the opposite side.
4
5
4. Position 4x Support Arms ‘F’ over the screw positions on the
2x Top Rails ‘C’. Using 2x Top Rail Bolts ‘H’ per Arm, x each
Support Arms ‘F’ onto the frame.
5. Screw Support Rail ‘E’ to the centre of Support Arms ‘F’
using 2x Top Rail Screws ‘H’ before screwing the Bottom Rail
‘D’ to the Support Rail ‘E’ using 2x Support Rail Bolts ‘J’.
6
6. With assistance, lay Desktop Panel ‘A’ onto the assembled
frames Support Arms ‘F’ and secure in place using 10x Arm
Screws ‘K’.
The Alto Bench is now fully assembled.
E
D
Z
B
D
Z
Z
Y
A
K
F
C
F
H
B
2
2. With Leg Frame ‘B’ positioned upright, align and join 2x Top
Rails ‘C’ to the top extended sections ‘Z’ and Bottom Rail ‘D’ to
the bottom extended section ‘Y’ covering the inserted Leg
Frame Bolts ‘G’.
Z
Y
B
D
C
C
J
G
H
H
J
K
 Loading...