EasyManua.ls Logo

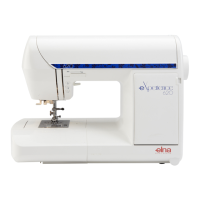
ELNA eXperience 560 User Manual

ELNA eXperience 560
72 pages
To Next Page IconTo Next Page
Page #1 background imageLoading...
Page #1 background image
| Instruction Manual |

Table of Contents

Questions and Answers:

ELNA eXperience 560 Specifications

General IconGeneral
TypeElectronic
Stitch Patterns100
Buttonhole Styles7
Maximum Stitch Width7 mm
Maximum Stitch Length5 mm
Needle Positions15
LCD DisplayYes
Built-in Needle ThreaderYes
Drop FeedYes
Speed ControlYes

Summary

Important Safety Instructions

General Safety Precautions

Essential safety guidelines for operating the sewing machine safely, covering electrical hazards and general warnings.

Usage Restrictions and Supervision

Guidelines on who can use the appliance and the necessity of supervision for children.

Essential Parts Overview

Component Identification

Detailed identification of all machine components and their functions.

Getting Ready to Sew

Connecting the Power Supply

Instructions for safely connecting the sewing machine to the power supply.

Using the Foot Control

How to use the foot control pedal to operate the sewing machine's speed.

Machine Operation Controls

Controlling Sewing Speed

Adjusting the sewing speed using the speed control slider and foot control.

Presser Foot Management

Changing the Presser Foot

Detailed steps for safely removing and attaching different presser feet.

Thread Tension Adjustment

Straight Stitch Balanced Tension

Achieving balanced tension for straight stitches, ensuring thread is locked between fabric layers.

Adjusting Straight Stitch Tension

Troubleshooting and adjusting needle thread tension when it is too tight or too loose.

Thread Tension Adjustment (Continued)

Zigzag Stitch Balanced Tension

Achieving balanced tension for zigzag stitches, ensuring proper stitch appearance.

Adjusting Zigzag Stitch Tension

Correcting tension issues for zigzag stitches that are too tight or too loose.

Needle Management

Changing the Sewing Needle

Step-by-step guide for safely removing and inserting a new sewing machine needle.

Bobbin Winding Preparation

Bobbin Winding Process

Winding the Bobbin

Detailed instructions for winding the bobbin, including starting and stopping the machine.

Bobbin Insertion

Inserting and Threading the Bobbin

Correctly inserting the bobbin and threading the bobbin holder tension system.

Threading the Machine

Top Threading Procedure

Step-by-step guide for threading the needle and the machine's thread path.

Needle Threader Operation

Using the Automatic Needle Threader

Instructions for operating the automatic needle threader for quick and easy threading.

Bobbin Thread Retrieval

Drawing Up the Bobbin Thread

Steps to bring the bobbin thread up through the needle plate to start sewing.

Basic Sewing Operations

Straight Stitch Sewing

Performing basic straight stitch sewing, including starting and securing seams.

Stitch Adjustments

Zigzag Stitch

Zigzag Stitch Overview (Patterns 06/07)

Utilizing the versatile zigzag stitch for overcasting, mending, appliqué, and decoration.

Special Stitches

Buttonholes

Types of Buttonholes Available

An overview of the seven different types of buttonholes the machine can create.

Square Buttonhole

Sewing Square Buttonholes (Pattern 16)

Detailed steps for sewing square buttonholes using the automatic buttonhole foot.

Square Buttonhole (Continued)

Buttonhole Sewing Sequence

The step-by-step sequence of sewing a buttonhole, including stopping and finishing.

Square Buttonhole (Continued)

Specialty Buttonholes

Corded Buttonhole

Sewing a Corded Buttonhole

Instructions for sewing a corded buttonhole, including setting stitch width and using filler cord.

Welted Buttonhole

Creating Welted Buttonholes (Pattern 22)

Making welted buttonholes by stitching a fabric strip, suitable for tailored garments.

Welted Buttonhole (Continued)

Welted Buttonhole Construction Steps

Detailed steps for constructing a welted buttonhole, including folding, pressing, and stitching.

Tacking Stitch

Zipper Sewing

Attaching the Zipper Foot

Fitting the zipper foot to the foot holder, noting left and right side attachments.

Zipper Sewing (Continued)

Starting Zipper Sewing

Initial steps for sewing a zipper, including folding allowances and positioning the needle.

Completing Zipper Installation

Steps to complete zipper installation by sewing the remaining seam and removing basting stitches.

Blind Hemming

Blind Hemming Technique (Pattern 11)

Performing blind hemming using the blind hem foot, adjusting the guide for precise stitching.

Button Sewing

Sewing Buttons with the Machine

Attaching buttons using the machine by adjusting stitch width and lowering the feed dog.

Rolled Hem

Creating a Rolled Hem (Pattern 00)

Making a rolled hem using the rolled hem foot, including fabric folding and feeding techniques.

Gathering Fabric

Gathering Fabric with Stitches

Gathering fabric by sewing multiple rows of stitches and pulling threads to create gathers.

Decorative Stitches (Continued)

Machine Care

Cleaning the Hook Race and Feed Dog

Instructions for cleaning the hook race and feed dog to maintain machine performance.

Stitch Pattern Correction

Correcting Distorted Stretch Stitch Patterns

Correcting distorted stretch stitch patterns by adjusting the feed adjusting screw.

Problem Diagnosis

Troubleshooting Warning Signs

Interpreting warning signs on the LCD display and taking corrective actions.

Comprehensive Troubleshooting

Needle and Thread Breakage Issues

Resolving problems with needle thread breaking, bobbin thread breaking, and needle breakage.

Skipped Stitches and Seam Puckering

Addressing skipped stitches and seam puckering by checking tension, needle, and fabric feed.

Fabric Feeding and Machine Operation Problems

Troubleshooting fabric feeding, machine not working, noise, and auto thread cutting failures.

Buttonhole Sewing Errors

Diagnosing and correcting issues related to buttonhole sewing.

Related product manuals