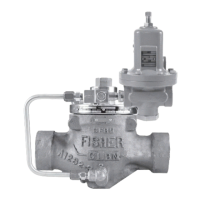
Types 95L, 95H, 95HP, and 95HT
7
Find the pusher post (key 30) and place on a
surface with the larger at surface down and
the thread stem up (metal diaphragm pusher
post has a recessed diameter in the bottom
surface). Then, nd one smaller elastomer
(or graphite) gaskets (key 47) and t it over
the threaded end of the pusher post. Find
and take one of the diaphragm heads and
slip it over the threaded end of the pusher
post with the chamfered side of the
diaphragm head toward the gasket. Take a
second gasket and place it over the threaded
end of the pusher post on top of the
diaphragm head.
b. Replace the large diaphragm gasket (key 19)
on the surface of the body that will support the
diaphragms. There will be two diaphragms
used per regulator, except for 95L, NPS 1/4
with 2 to 6 psi (0,14 to 0,41 bar) outlet setting
which uses only one metal diaphragm. The
raised surfaces of the metal diaphragms
should be placed in the unit so that they are
facing toward the assembler (toward the
spring) except only when one diaphragm is
being used then the raised surface should be
facing down (towards the body). See
Figures 2 and 4 as references.
11. Reassemble in the reverse of the above
procedures. Lubricate the upper spring seat and
the exposed threads of the adjusting screw with
Anti-Seize lubricant.
Before tightening cap screws (key 16) be sure to
install the adjusting screw, if completely removed,
and turn it down so that diaphragm slack is
obtained. This allows proper positioning of the
diaphragm to permit full travel of the valve plug.
Torque diaphragm cap screws per Table 3.
Complete reassembly procedures and turn the
adjusting screw to produce the desired outlet
pressure. Tighten the locknut to maintain the
desired setting.
15
11
16
2
1
3
4
5
10
20
7
12
6
21
9
17
NS
LS
PITOT TUBE USED
IN 3/4-INCH & 1-INCH
SIZES ONLY
PARTS NOT SHOWN 13,14 AND 18
NAME PLATE, PART NO. 13 TO BE ON
RIGHTSIDE LOOKING INTO INLET.
NS - NEVER-SEEZ
LS - LEAD SEAL
30A6997
Figure 3. Type 95L with Elastomer Seat, NPS 1/4 to 1 (DN 25) Sizes Assembly
®
Never-Seez
®
is a trademark of Bostik Corp.

 Loading...