4. From the O2 CAL SETUP/COE CAL SETUP, select Solenoids. Select Present to enable the
solenoids.
3.5.3 Configuring the Calibration Solenoids with the LOI
1. Use the "Z" pattern to enter the LOI menu tree.
2. From the SYSTEM menu, select Calib Setup.
3. From the Calib Setup menu, select Use Solenoids. Select Yes to enable the solenoids.
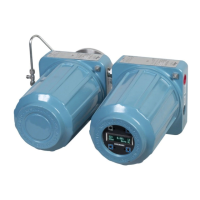
3.6 Blowback Feature
The blowback feature blows instrument air back through the center of the internal filter and out
the sample tube of the probe. This removes built up dirt and particulate from the internal filter,
sample line and any optional in-situ filter on the end of the sample tube. The blowback feature is
normally used in systems that have heavy particulate in the process stream.
The blowback feature requires the optional blowback hardware to be properly installed external
to the Hazardous Area OCX 8800. See Section 2, Pneumatic Installation, for details.
A Hazardous Area OCX 8800 shipped from the factory must be configured before blowback can
be implemented. This same process must be performed any time a replacement card stack is
installed.
3.6.1 Configuring Blowback with the Field Communicator - HART
1. Use the 375 Field Communicator or AMS software to access the HART menu.
2. From the DETAILED SETUP menu, select INPUT/OUTPUT.
3. From the INPUT/OUTPUT menu, select BLOWBACK.
4. From the BLOWBACK, select BlBk Enabled. Select Yes to enable blowback. Also set the
following parameters:
• BlBk Intrvl - Length of time between blowback events (60 minutes
recommended).
• BlBk Period - Length of time blowback is activated (5 seconds recommended).
• BlBk Purge Time - Length of time after blowback is complete before oxygem/
combustibles readings are considered valid (Set as required by the application).
5. Manually initiate blowback from DIAG/SERVICE, then BLOW BACK, When select
BLOWBACK.
6. Configuring Blowback with the Field Communicator - Fieldbus
3.6.2 Use the 375 Field Communicator or AMS software to access
the Fieldbus menu.
1. From the TRANSDUCER block menu, select Alarm Relay/Blowback.
 Loading...