Note: There is one independent over- current limiter that protects L+/L- pins on each pair of ports, for
example: Port 2 and 4.
This allows you to do power budgeting on pair of ports that allows flexibility in the application. The
combined overload cutoff current on a pair of ports is 1.05 A for the L+/ L- pins.
As long as the cutoff current of 1.05 A is not exceeded, the current output could be budgeted
between a pair of ports such as Port 2 and 4 any way you want.
For example, Port 2 output can be at 900 mA and Port 4 output can be at 100 mA. Or, Port 2 could be
left open and Port 4 output can be at 1 A.
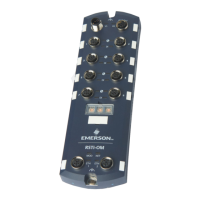
Use the following procedure to attach IO-Link or digital input/output devices to the ports.
1. Securely attach the IO-link cable between the IO-Link or digital input/output device and the IO-
Link port.
Note: Make sure that you tighten the cables properly to maintain IP67 integrity.
2. If necessary, securely attach a connector cap to prevent dust or liquids from getting into any unused
ports. Connector caps were shipped with the IOLM.
Note: IO-Link ports must have an approved cable or protective cover attached to the port to
guarantee IP67 compliance.
3. If necessary, configure IO-Link port parameters using the Configuration | IO-Link Settings page to
configure the port mode.
• If an IO-Link device is attached to the port, the IO-Link LED should now be lit green and the
device is receiving power.
• If a digital input or output device is attached to the IO-Link port after the port is configured for
digital input or output on the IO-Link Settings page, the IO-Link LED does not light but when an
event occurs:
o Digital input causes the DI LED to flash.
o Digital output causes the IO-Link LED to flash.
You can refer to the help system or 3.7.1, IO-Link Port Modules for configuration information.
 Loading...
