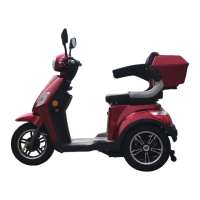
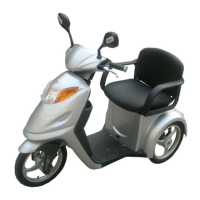
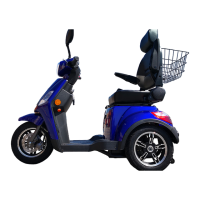
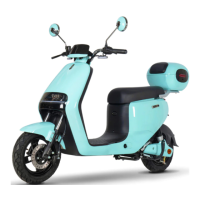
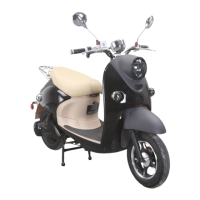
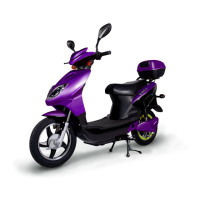
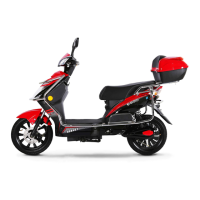
This document describes a recreational electric vehicle, model T409, designed for urban use and suitable for the elderly or individuals with special mobility needs.
Function Description
The T409 is a modern means of transport, manufactured with advanced production technologies and components. It is characterized by high adaptability, ease of operation, durability, novel style, and simple driving. The vehicle is equipped with several human-oriented features for special populations:
- Voice-enabled reversing: Provides audible cues when reversing.
- Buffered soft start: Ensures a smooth acceleration from a standstill.
- Low-speed gear regulation: Allows for adjustment of driving speed, particularly useful for safety.
- Rear brake parking: Facilitates secure parking.
The vehicle's design is inspired by motorcycles, emphasizing stability and appearance harmony for user safety and comfort. It features an automotive differential rear axle, a brushless motor, and front and rear hydraulic shock absorbers, contributing to stable operation. It is promoted as an efficient, environmentally friendly, and energy-saving mode of transport.
Important Technical Specifications
Model: T409
Motor Power: 500W/650W/1000W (variable)
Dimensions: 1950mm x 690mm x 1100mm
Wheel Base: 1475mm
Min Steering Diameter: ≤ 3m
Running Distance: 50-55km
Rated Loading: 150kg
Capacity of Battery: 20A
Rated Voltage: 48V/60V
Motor Type: Brushless
Rated Output Torque: 16N.m
Rated Current: 15A
Rated Climb Capacity: 20 degrees
Rated Input Voltage: 220V
Charging Time: 6-8h
Braking Distance: 3m
Operating Voltage of Lights: 12V
Diameter of Wheel: 300-10
Net Weight: 112/136KG
Packing: Iron cage cargo box
Packing Size: 1820mm x 770mm x 800mm
Container Capacity: 20GP container: 18pcs, 40HQ container: 57pcs
Usage Features
Control Parts Functionality:
- Left Brake Lever: Controls the rear brake and acts as a brake power-off control switch. Gripping it activates the rear brake, stops the rear wheel, illuminates the brake light, and cuts power to the motor for dual safety.
- Light Switch (Headlight and Dimmer): In the evening, the first-gear position turns on instrument and tail lights. The second-gear position activates both high and low beams.
- High- & Low-Beam Light Switch: Toggles between weak (LO) and strong (HI) headlight beams. For safety, the LO position is recommended when facing oncoming vehicles at night.
- Turn Signal Switch: Used for indicating turns or lane changes. Setting to R (right) or L (left) flashes corresponding front and rear turn signals. The middle position is Off, and pressing inward returns it to Off.
- Speedometer: Displays driving speed (km/h) and distance traveled.
- Energy Meter: Shows battery voltage level (H for high, L for low).
- Indicator Lamps: Pointed lamps indicate turn signals; the middle lamp indicates high/low beam.
- Right Brake Lever (Front Brake Lever): Controls the front wheel brake and acts as a brake power-off control switch. It is recommended to use both front and rear brake levers for emergency braking to prevent skidding.
- Rearview Mirror: Essential for checking surroundings to ensure driving safety during turns or overtakes.
- Speed Governor Handle: Controls motor RPM and driving speed. Gentle inward rotation increases speed.
- Master Lock (Electric Lock): Controls the power supply to the vehicle and controller. The vehicle will not operate until the lock is enabled. In case of malfunction or uncontrolled motor speed, setting the switch to OFF prevents further operation and accidents.
- Horn Switch: Activates the horn when pressed.
- Parking Lock: Engages after stopping. Grip the left brake lever, hold the parking lock upwards, then release the brake lever to activate. Adjustment of the rear brake may be needed if the parking lock is ineffective due to worn brake shoes.
- 3-Speed Switch (Speed Regulation Switch): Designed for special populations. Low-speed mode: 9km/h; Medium-speed mode: 15km/h; High-speed mode: 25km/h. Low-speed mode is recommended initially for safety.
- Reversing Switch: Allows reversing by rotating the speed governor handle when set to the O position. Reversing speed is limited to 5km/h.
- Remote Control Switch (Alarm Switch): Optional, for remote power on/off.
- Player's Switch (MP3 Player): Optional, supports USB flash drives, SD cards, and radio.
- Player Speaker: Used for MP3 player amplification.
- Circuit Breaker (in saddle support): Controls the main switch. Must be closed for riding and set to OFF for battery charging to prevent controller damage from high voltage.
- Charging Receptacle (at lower seat end of front cover): Battery charging input socket. Must not be covered to avoid sparking accidents.
Driving Cautions:
- Start by inserting the key and turning it clockwise.
- Accelerate gradually by slowly turning the governor handle inwards. Release the handle to reduce speed or cut power.
- Operate at low speed on non-motorized vehicle lanes.
- Brake power-off protection: Using either brake lever cuts motor power.
- To restart after stopping, reset the governor handle then slowly accelerate.
- Avoid abrupt acceleration when driving uphill or against wind to prevent motor and battery overload.
- Avoid driving through water deeper than the rear wheel centerline to prevent motor and battery damage.
- Do not operate both the governor handle and brake lever simultaneously to prevent motor overload.
- Avoid bumpy or steep roads and heavy vibration to prevent poor electrical contact. Drive at low speed on such roads.
- Reduce braking frequency and avoid frequent starts.
- Reduce speed on bumpy, muddy, or heavy traffic roads.
- Do not turn the governor handle instantly to accelerate.
- The differential motor for the rear axle requires gear oil lubrication, which should be changed every three months.
Battery Cautions:
- Uses sealed serviceable lead-acid batteries with large capacity, long life, and good maintainability.
- Batteries are consumables; proper use and quality batteries can suppress capacity deterioration.
- Keep batteries fully charged. Charge monthly if stored for long periods. Never store in an exhausted condition.
- Monitor battery case temperature during charging; if too high or if the indicator doesn't change color, stop charging and seek inspection.
- Battery capacity reduces by 20-30% below 15°C.
- Never mix batteries of different parameters in a battery pack.
- Keep batteries away from flames, heat, alkaline materials, and direct sunlight.
- Do not charge immediately after use on hot summer days. Charge in a warm indoor environment below 0°C.
- To maximize range: drive at low speed, charge frequently, and use the low-speed range as much as possible.
Adapter and Battery Charging Cautions:
- The charger has a hi-tech CPU IC with optimized programs for electric bicycle/vehicle batteries, using random process control for optimal charging.
- In regions with unstable grid voltage (fluctuation exceeding AC220V±20%), use an AC regulator. The charger does not require earthing.
- Charge the battery while in service if possible. The charger indicator turning green signifies full charge and float-charge condition (no power cut-off needed). Orange indicates partial charge.
- Never turn off the air switch on the vehicle during charging.
- Connect the charger output plug to the vehicle's charging receptacle, then plug the charger into an AV220V power socket.
- Red indicator: constant-current charging. Orange: 90% charged. Flashing green/orange then steady green (after ~1 hour): 100% charged. Further charging enables on-line maintenance.
- Do not place items on the charger or battery case during charging to facilitate ventilation.
- Avoid rough bumps or impacts to the charger.
- Protect the charger from liquid or metal chip ingress.
- The charger generates heat; do not place flammable materials underneath or cover it. Use in a well-ventilated area.
- If an odor or high temperature (>65°C) is detected, stop charging and seek service.
- On-line maintenance requires longer charging time; weekly long-time charging is recommended.
- The charger adapts to different battery manufacturers and temperatures, regulating charging voltage for full charge without damage and extending battery life.
- If the charger indicator doesn't change color for over 12 hours, remains red, and the battery produces excessive heat, stop charging and seek inspection.
Maintenance Features
Daily Inspection and Adjustment:
- Brake System: Check functionality of left and right brake levers, automatic power cut-off upon braking. Ensure safe stopping distance (5 meters from top speed). Adjust brakes or replace pads if needed. Check front and rear wheels for normal rotation without friction when unloaded. Adjust brake drum cover set screws so the brake lever grips at 1/2 travel.
- Other Safety Systems: Check tire pressure (standard: 300kPa/3.0kpa/cm²). Inflate if inadequate. Check left and right turn signals and tail light. Check power-off brake lever.
- Driving Cautions: Check for smooth vehicle start, consistent driving speed, free and easy handle turning, flexible and reliable brakes, absence of abnormal sounds from wheels, proper function of turn signals, horn, headlights, tail lights, and instrument lights. Check for loose fastening screws, bolts, and nuts. Check free travel of brake cables. Replace immediately if any abnormality.
- Simple Adjustment: Brake lever should engage at 1/2 grip. Maintain appropriate tire pressure.
Inspection and Maintenance Schedule:
- Daily: Inspect if rotating and steering parts of the handle are loose or worn.
- Every 60 days: Inspect if tire pressure is appropriate and tire shoe is worn. Inspect if the rim swings or is distorted. Inspect if the gearbox oil has been replaced. Inspect if the brake is good. Inspect if the horn sounds well. Inspect if the charger and cables are worn.
- Every 180 days: Inspect if rotating and steering parts of the handle are loose or worn. Inspect if tire pressure is appropriate and tire shoe is worn. Inspect if the rim swings or is distorted. Inspect if the gearbox oil has been replaced. Inspect if the brake is good. Inspect if the horn sounds well. Inspect if the charger and cables are worn.
Recommended Lubricating Oil:
- Hydraulic oil #HL68
- Calcium base grease #2
- Differential gear oil
Lubrication Schedule:
- Front shaft, rear shaft, shock absorbers, rotating pivots, and other components should be cleaned and lubricated every 6-12 months, depending on usage.
- Drive parts in the motor hub are pre-lubricated and do not require user maintenance.
Service and Warranty:
- Service and maintenance of motor hub, controller, display unit, and other electronic parts must be conducted by a designated service center. Unauthorized disassembly voids the warranty.
- Warranty periods for main repair parts:
- Frame, front fork assembly: 1 year (free repair for broken parts)
- Front fork assembly, fender: 3 months (free repair for large-area paint peeling)
- Front and rear wheels: 3 months (free repair for air leak)
- Front and rear shafts: 3 months (free repair for heat treated parts damaged or broken)
- Controller: 1 year (free repair for malfunction)
- Governor handle, display unit: 3 months (free repair for malfunction)
- Motor, rear axle: 1 year (free repair for shell cracked, welds falling apart)
- Battery, charger: Consult (buyer responsible for shell cracked, fluid leakage)
- Warranty excludes human factors.
- For models with 500W motor, battery warranty is 6 months.
- For models with 48V 20AH motor, battery warranty is 6 months.
Circumstances Uncovered by Warranty:
- User's failure to follow operation, maintenance, or adjustment instructions.
- Damage due to unauthorized alteration, disassembly, or repair.
- Failures from noncompliance with instructions for use.
- Failures due to improper keeping or accidents.
- Absence of warranty card or mismatch of documents/cards with products.
- Wearing parts and consumables (plastic parts, rubber parts, tire shoes, inner tubes, meters, bulbs, brake pads).
- Damage to appearance after use (initial appearance quality should be identified at purchase).
- Parts damaged due to unauthorized disassembly beyond manual scope.
- Damage caused by repairs without consent of authorized repair organization.
Warranty Rules:
- For failures not covered by warranty or parts beyond warranty period, repairs will be offered with charges at discretion.
- Tongli reserves the sole right to interpret the service card.
Special Notice:
- Illustrations are for explanatory purposes and not a basis for product inspection.
- Graphics may differ from actual products.
- The manufacturer reserves the right to make changes for product performance improvement without further notice.