6
GB | IP Camera
Package contents:
Camera / Monitor / 2× power adapter / 2× USB cable / Mount / Screws / RESET pin / Manual
Technical specications:
Power supply: DC 5 V/1 A
Camera dimensions: 150 × 80 × 80 mm
Monitor dimensions: 157 × 81 × 15 mm
Net weight: 462 g
Resolution: 2 304 × 1 296
Monitor battery capacity: 3 000 mAh
Sensor: 1/2.8‘‘ 3 Megapixel CMOS
IR range: Night vision up to 10 m
Lens: 3.6 mm, F2.0
Storage: SD card (Max. 128 GB)
APP: EMOS GoSmart for Android and iOS
Connection: 2.4 GHz WIFI (IEEE802.11b/g/n)
Maximum number of users: 6
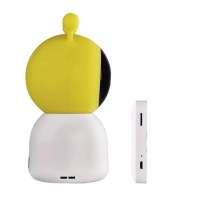
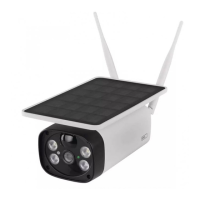
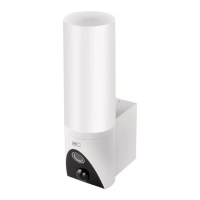
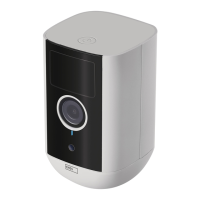
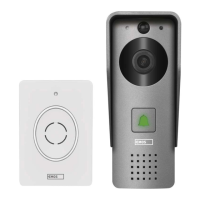
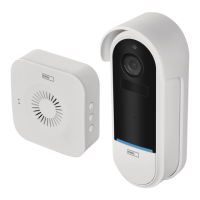
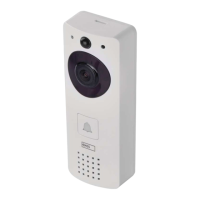
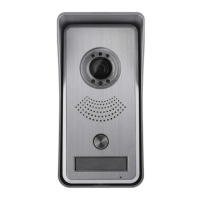
Description of the device: g. 1
A – Status LED
LED ashing red: device waiting for connection to Wi.
LED glowing blue: camera working correctly.
LED glowing red: device not working.
B – Microphone
C – Doorbell button/pairing button
Short press starts a call.
Long press activates pairing mode.
D – Night light
E – SD card slot
F – Speaker
G – Micro USB port
H – RESET button
Desription of the device: g. 2a
A – Microphone
B – Power supply status LED
LED glowing orange: Receiving power.
LED glowing green: Fully charged.
C – Status LED
LED glowing yellow: Monitor on.
LED o: Monitor o.
D – Zoom controls
Capable of 1×/2×/4× zoom.
E – Enter menu
F – Controls – navigation in the menu
G – Conrmation button
H – Open call
I – Back button
Description of the device: g. 2b
A – Antenna
Changing the angle aects signal strength.
B – On/o button
Pressing and holding the button for 5 s turns the
monitor on/o.
C – Speaker
D – Mount
E – SD card slot
F – RESET button
Pressing and holding RESET for 5 s resets the device to
factory settings.
G – Micro USB port
Installing the camera onto an even surface: g. 3
Place the camera onto a clean, even surface.
Installing the camera on a wall: g. 4
1. Place the enclosed mount onto the chosen spot.
2. Install it using the enclosed screws.
3. Install the camera onto the mount.
Installing the EMOS GoSmart app: g. 5
The app is available for Android and iOS on Google play and App Store.
Download the application by scanning the corresponding QR code.
Router setting: g. 6
The camera only supports 2.4 GHz Wi (not 5 GHz).
EMOS GoSmart mobile app:
Fig. 5a
Open EMOS GoSmart and conrm the privacy policy by
tapping agree.
Fig. 5b
Choose sign up.
Fig. 5c
Enter a valid e-mail address and choose a password.
Conrm the privacy policy by tapping agree.
Choose log in.
Fig. 6a
Choose add device.
Fig. 6b
Choose the corresponding product category.
Fig. 6c
Choose the correct type of product.
Fig. 6d
Connect the device to power.
Fig. 6e
Make sure the LED on the device is ashing.
Conrm by tapping next.
Fig. 6f
Enter the name of the Wi network and password.
Conrm by tapping next.