EasyManua.ls Logo

Emos P5613 - User Manual

Emos P5613
132 pages
Print Icon
To Next Page IconTo Next Page
Loading...
1
www.emos.cz
P5613
GB
WIRELESS THERMOSTAT  T13RF
CZ
BEZDRÁTOVÝ TERMOSTAT  T13RF
SK
BEZDRÔTOVÝ TERMOSTAT  T13RF
PL
TERMOSTAT BEZPRZEWODOWY  T13RF
HU
T13RF VEZETÉK NÉLKÜLI TERMOSZTÁT T13RF
SI
BREZŽIČNI TERMOSTAT  T13RF
RS|HR|BA
BEŽIČNI TERMOSTAT  T13RF
DE
DRAHTLOSER THERMOSTAT T13RF
UA
   T13RF
RO
TERMOSTAT FĂRĂ FIR  T13RF
LT
BELAIDIS TERMOSTATAS  T13RF
LV
BEZVADU TERMOSTATS  T13RF
P5613 105 × 148 mm
Question and Answer IconNeed help?

Do you have a question about the Emos P5613 and is the answer not in the manual?

Overview

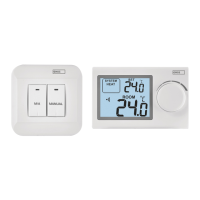
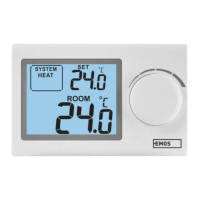
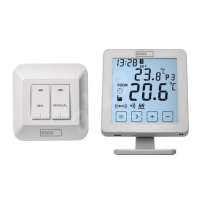
The P5613 is a wireless thermostat (T13RF) designed to control heating or air conditioning systems. Unlike conventional home thermostats, the P5613 system features a separate, wirelessly connected control unit (transmitter) and a switching unit (receiver). The switching unit is responsible for connecting and switching heating/air conditioning systems, while the portable control unit is used for manual temperature adjustment. Both units communicate via a 433.92 MHz radio signal, offering flexibility and easier access to temperature regulation.

Important Notice:

Before first use, carefully read the instruction manual for the thermostat, as well as the boiler and air conditioning systems. Disconnect the power supply before installation. Installation should only be performed by qualified personnel, adhering to all relevant standards.

Technical Specifications:

  • Load Switching: Max. 230 V AC; 16 A for resistive load; 4 A for inductive load.
  • Clock Tolerance: ±60 seconds/month.
  • Temperature Measuring: 0 °C to 35 °C, with a tolerance of 0.5 °C and an accuracy of ±1 °C at 20 °C.
  • Temperature Setting: 5 °C to 30 °C, adjustable in 0.5 °C increments.
  • Set Temperature Variance: 0.5 to 2 °C, adjustable in 0.5 °C increments.
  • Units Connection: Via 433.92 MHz radio signal.
  • Temperature Unit Range: Up to 25 m in an open area.
  • Power:
    • Control Unit (transmitter): 2× 1.5 V AA type (LR6) batteries.
    • Switching Unit (receiver): 230 V AC/50 Hz.
  • Size and Weight:
    • Control Unit: 90 × 113 × 33 mm.
    • Switching Unit: 77 × 110 × 30 mm.

Installation:

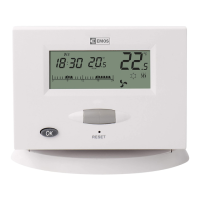
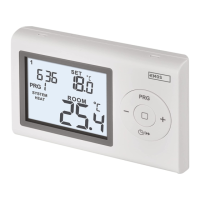
The control unit can be mounted directly on the wall using the two enclosed screws or placed in the provided stand. Before installation, insert 2× 1.5 V AA alkaline batteries (do not use rechargeable batteries). Upon first startup, the display should show the time and room temperature (e.g., 28.5 °C). If incorrect data appears, gently press the RESET button using a thin, straight object like a straightened paperclip.

For wall mounting, attach the backplate to the wall with screws, then slide the control unit onto it. For stand installation, slide the control unit into the stand and place it in the room.

Thermostat Location:

The location of the control unit significantly impacts its functionality. Choose a place frequently occupied by family members, ideally on an inner wall where air circulates freely and direct sunlight does not reach it. Avoid placing the thermostat near heat sources (TVs, radiators, refrigerators) or near doors, as this can lead to inaccurate temperature regulation.

Switching Unit Installation:

Carefully press the lock on the upper part of the front cover and remove it. To connect the wires, loosen 2 cover screws and slide the cover upwards.

Wiring Diagram:

  • If the thermostat and connected device share the same power source (Diagram a): Connect according to Diagram a. Do not remove the pre-installed wire bridge between the COM and L contacts. Connect the phase conductor to the COM terminal.
  • If the thermostat and connected device do NOT share the same power source (Diagram b): Connect according to Diagram b. Remove the pre-installed wire bridge between the COM and L contacts first.

Complete the switching unit installation by securing it with 2 enclosed screws. Before screwing on the contacts' cover, remember to synchronize the control and switching units. Replace the front cover.

Radio Signal Address Setting:

The radio signal address enables information transfer between the control and switching units. To prevent interference from other devices operating on similar frequencies, an appropriate radio code must be set. This is done using 4 DIP switches located inside both units.

  1. Before modifying the address code, remove batteries and unplug the main power cable.
  2. Remove the back cover from the control unit to access the 4 DIP switches on the printed circuit board.
  3. Set the address code by moving some switches to the ON position and record their status.
  4. Set the same code on the DIP switches in the switching unit. The transmitter's address code must match the receiver's address code.

Replacing the Original Thermostat:

ATTENTION: Before replacing the thermostat, disconnect the heating/air conditioning system from the main power source to prevent electric shock.

  1. Switch off the original thermostat and remove its cover.
  2. Unscrew the thermostat from the wall plate.
  3. Unscrew the connecting backplate from the wall. Pull the backplate slightly away, but do not disconnect any wires yet.
  4. Carefully press the lock on the front cover and remove it.

Marking Wires:

  1. Identify and disconnect each wire.
  2. Secure the wires to prevent accidental pulling.
  3. Prevent air penetration by using polyurethane foam if the space behind the thermostat is too large, to avoid incorrect temperature measurement.

Testing Wireless Communication:

  1. Use the thumb-wheel to set the room temperature a few degrees higher than the current room temperature, then press OK. Set the switching unit to AUTO mode.
  2. Wait a few seconds.
  3. The upper LED on the switching unit should light up.
  4. If the LED does not light up, move the control unit closer to the switching unit. Set the room temperature lower than the current room temperature using the thumb-wheel – the receiver must shut down, and the LED should turn off.
  5. Repeat steps 1 to 4. The transmission range between the control unit and switching unit is up to 25 m in an open area. The range may be shorter indoors due to signal interference from walls and other obstacles.
  6. After testing, press the RESET button on the switching unit.

Control Unit (Transmitter) Display:

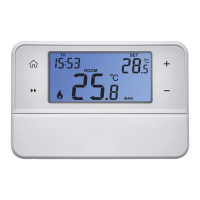
The display shows various icons and values:

  1. Set Temperature
  2. Room Temperature
  3. Temperature Unit Icon
  4. Week Days
  5. Hours
  6. Minutes
  7. Heating Icon
  8. Cooling Icon
  9. Low Batteries Icon
  10. Day Icon (comfort)
  11. Night Icon (cost-saving)
  12. 24-Hour Day Program
  13. Program MORN (morning) period
  14. Program DAY (day) period
  15. Program EVEN (evening) period
  16. Program NIGHT (night) period
  17. Time Setting Icon (TIME)
  18. Program Setting Icon (PROG)
  19. Setting Icon (SET)
  20. Vacations Icon (VACA)
  21. Temporary Mode Icon (HOLD)
  22. Manual Mode Icon
  23. Earlier Start Icon (EARLY)
  24. Anti-Freeze Function
  25. Confirmation Icon (OK)
  26. Spinning Fan Icon – Output Relay Switch

LED Indicators:

  • Automatic Mode: The red OUTPUT LED lights up when the output relay is switched on by the thermostat.
  • Manual Mode: Press the MANU button to light up the red LED. To switch the output relay on, press the OUTPUT button; the red diode will light up. Pressing OUTPUT toggles the device ON/OFF. Pressing MANU deactivates manual mode, and the LED turns off.
    • Note: If the receiver loses power, its previous status will not be restored. It will remain off and await a new status change from the transmitter.

Thermostat Setting:

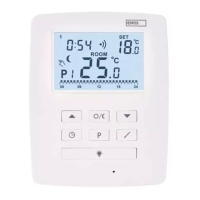
Press and hold the OK button for 2 seconds to access the thermostat menu. Navigate the menu by turning the thumb-wheel. To exit, press and hold OK for 2 seconds, or select the OK option with the thumb-wheel and press OK. Alternatively, wait 15 seconds without pressing any button.

Selecting Heating/Air Conditioning System/Switching off Thermostat:

Select the heating/cooling icon with the thumb-wheel and press OK. Choose HT for heating, CL for cooling, or OF to switch off the thermostat. Press OK to confirm and return to the main menu.

Hour and Week Day Setting:

Select the TIME icon with the thumb-wheel and press OK.

  1. Select the current weekday (Mo-Su) with the thumb-wheel and confirm by pressing it.
  2. Select the hour with the thumb-wheel and confirm by pressing it.
  3. Select the minute with the thumb-wheel and confirm by pressing it. Press OK to confirm.

Program Selection:

The thermostat offers two basic operating modes:

  1. 24-hour day program (set in hourly steps).
  2. Day program with 4 periods (morning, day, evening, night).

Select the PROG icon (showing the 0–24 hrs/4 periods timeline: MORN – DAY – EVEN NIGHT) with the thumb-wheel and press OK. Select one program with the thumb-wheel and confirm by pressing OK.

Temperature Setting for Day (Comfort) / Night (Cost-Saving) Mode (24-hour day program only):

Select the day/night icon with the thumb-wheel and press OK. Toggle between the sun icon (comfort temperature) and moon icon (cost-saving temperature) by pressing the thumb-wheel. Set the temperature by turning the thumb-wheel. Confirm by pressing OK or the thumb-wheel.

Manual Temperature Change:

To change the temperature within the 24-hour program, either press the thumb-wheel to select the preset Day (comfort) / Night (cost-saving) temperature, or simply turn the thumb-wheel to adjust the temperature to the desired level without switching icons. A hand icon will appear on the display.

Program Setting (24 hrs. / 4-day periods):

  • 24-Hour Day Program: Select the PROG icon with the thumb-wheel and press OK. Set a day or time interval with the thumb-wheel and confirm. Options include Monday-Sunday, Monday-Friday, Saturday-Sunday, or individual days.

    • On the timeline, set when the thermostat should switch to the desired temperature (day/night). Press the thumb-wheel to toggle between day (comfort) and night (cost-saving) temperatures. The flashing cursor starts at hour zero. Select a temperature (day/night) from hour zero by pressing the thumb-wheel. Set the switching time hour by hour for the selected temperature. Hours are read, and the cursor moves along the timeline.
    • To process the next temperature change (day/night), press the thumb-wheel again. Set desired temperatures for all 24 hours. Day temperatures appear as black segments on the timeline; night temperatures have no segments. Confirm by pressing OK to exit setup and store changes.
    • To check settings, select PROG, press OK, then press and hold the thumb-wheel for 2 seconds (rE will be shown). Change days with the thumb-wheel to check settings for each day. Press OK to return to the main menu.
  • Day Program – 4 Periods: Select the PROG icon with the thumb-wheel and press OK. Set a day or time interval and confirm. Options include Monday-Sunday, Monday-Friday, Saturday-Sunday, or individual days.

    • The MORN (morning) icon will flash, indicating it can be set. Turn the thumb-wheel to select a different period (MORN, DAY, EVEN, NIGHT).
    • Press the thumb-wheel to set the start time for the selected period. After setting the hour, press the thumb-wheel and set the minutes, then confirm. The temperature setting will then flash.
    • First, set the cooling temperature (snowflake icon) and confirm. Then, set the heating temperature (three flames icon) for that period. Turn the thumb-wheel to access the next period's setting (it will flash). Repeat for the remaining three periods. Confirm by OK.
    • To check settings, select PROG, press OK, then press and hold the thumb-wheel for 2 seconds (rE will be shown). Change days with the thumb-wheel to check settings for each day. Press OK to return to the main menu.

Temporary Interruption of the Preset Program:

  • Day program – 4 periods setting: Select the HOLD icon, press OK. Set the time (0–24 hours, in hourly steps) with the thumb-wheel. Press OK to return to the main menu. Manually set your preferred temperature.
  • 24-hour day program: Manually select the desired temperature before entering the menu. Select the HOLD icon, press OK. Set the time (up to 24 hours, in hourly steps) with the thumb-wheel. The time counts from the current real time. The setting is shown on the timeline. Press OK to return to the main menu. Manually set your preferred temperature.

Holiday Mode:

To set a constant temperature for a longer period: Select the VACA icon (setting a break), press OK. Choose the break's duration (0–99 days, one-day tolerance) with the thumb-wheel. Press OK to return to the main menu. Then, set the temperature that will be active for the entire holiday period.

Earlier Start:

This function allows the system to reach the desired temperature just before the temperature period begins. This setting is only available in the Day Program – 4 Periods. Select the ERLY (Earlier Start) symbol, press OK. Set earlier start ON or OFF with the thumb-wheel. Press OK to return to the main menu.

Anti-Freeze Function:

This function sets a constant temperature of 5 °C. Select the snowflake icon, press OK. Set ON or OFF with the thumb-wheel. Press OK to return to the main menu. This function can be combined with Holiday mode, but in this case, only 5 °C can be set.

Thermostat Setting Tolerance:

  1. Thermostat hysteresis setting (dF)
  2. Thermostat delay setting (dL)
  3. Thermostat's surrounding temperature calibration (TP)

Select the SET icon (setting) with the thumb-wheel and press OK.

Thermostat Hysteresis Setting (dF):

Hysteresis is the temperature difference between heating ON and OFF intervals. For example, if the temperature is set to 20 °C with a variance of 0.5 °C, the heater starts when the room temperature drops to 19.5 °C and switches off when it reaches 20.5 °C. Select the (dF) icon, press the thumb-wheel. Set hysteresis (0.5–2 °C, in 0.5 °C steps) with the thumb-wheel. Confirm by pressing OK to return to the preset mode. Press OK again to return to the menu.

Thermostat Delay Setting (dL):

This function delays the start by about 5 minutes. Select the (dL) icon, press the thumb-wheel. Set ON/OFF with the thumb-wheel. Toggle between heating/cooling modes or both (recommended to set the same for both) by pressing the thumb-wheel. Confirm by pressing OK to return to the preset mode. Press OK again to return to the menu.

Thermostat's Surrounding Temperature Calibration (TP):

The thermometer is factory-calibrated, but for optimization, it can be re-calibrated using a reference thermometer. Calibration can be done in the range of -2.5 °C (L) to +2.5 °C (H). Select the (TP) symbol, press the thumb-wheel. Set the desired current surrounding temperature, which will be shown on the right side of the display.

Low Batteries:

When the thermostat batteries are low, a flashing symbol appears on the display. Replace the batteries.

ATTENTION: The content of this instruction manual may be changed without prior notice. Due to limited printing options, displayed symbols may differ slightly from illustrations. The content of this manual cannot be reproduced without the producer's consent.

Emos spol. s r.o. declares that the T13RF + receiver complies with the essential requirements and other relevant provisions of Directive 1999/5/ES. This device can be freely used within EU countries. The declaration of conformity is part of the instruction manual or can be found at http://shop.emos.cz/download-centrum.

Emos P5613 Specifications

General IconGeneral
BrandEmos
ModelP5613
CategoryThermostat
LanguageEnglish

Related product manuals