EasyManuals Logo

EMPORIA VUE 3 User Manual

EMPORIA VUE 3
42 pages
To Next Page IconTo Next Page
To Previous Page IconTo Previous Page
Page #17 background imageLoading...
Page #17 background image
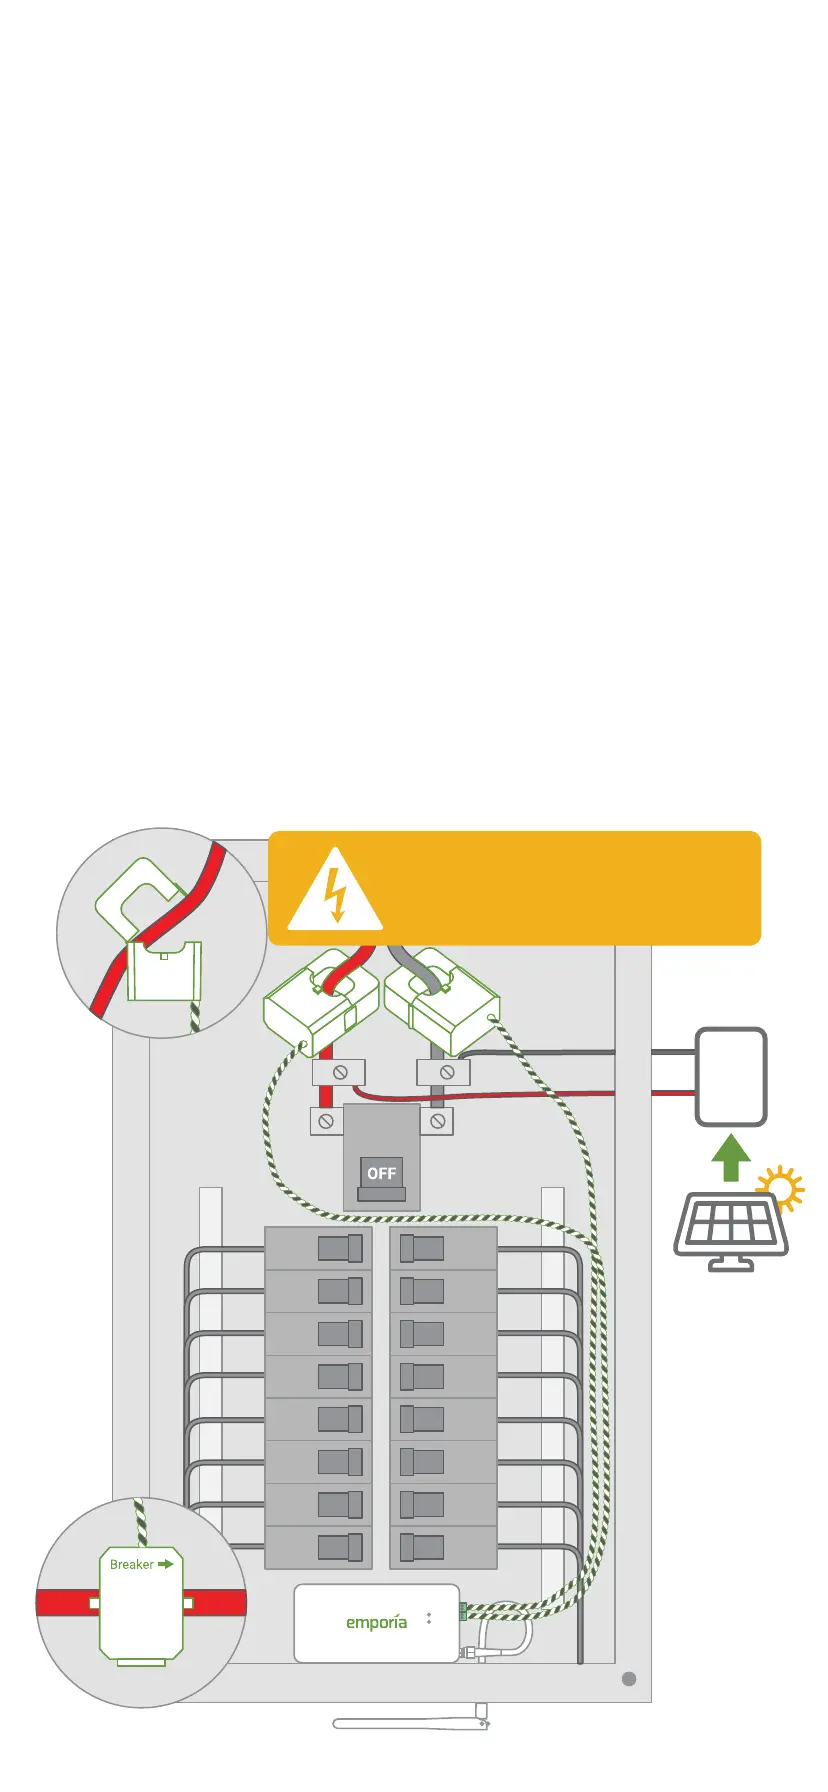
Step 5(c): Line-side tap solar
Main CT installation
Open the clasps on the CTs and place each
clamp around one of the main service cables
between the utility meter and incoming
line-side inverter taps. Then, shut the clasps
to secure the CTs. IMPORTANT! The Breaker
imprint on the bottom of the CTs should
point toward the breakers. Finally, insert the
screw terminal plugs into the ports on the
right side of the monitor. To avoid clutter,
unscrew the 22 AWG wires from the screw
terminals, cut them to size, and reattach
them ensuring the black and white wires
match the icons on the front of the Vue.
DANGER: The service
mains are energized!
Inverter
Solar Panels
Breakers
Meter

Questions and Answers:

Question and Answer IconNeed help?

Do you have a question about the EMPORIA VUE 3 and is the answer not in the manual?

EMPORIA VUE 3 Specifications

General IconGeneral
Voltage120V/240V
ConnectivityWi-Fi
CompatibilityWorks with smart home platforms
InstallationProfessional installation recommended
Maximum Amperage200A
Operating Temperature-4°F to 122°F (-20°C to 50°C)
Wireless Communication2.4GHz Wi-Fi
Current Range0-200A
Frequency50/60 Hz
CommunicationWi-Fi
Power Consumption MonitoringYes
AlertsCustomizable alerts
Warranty1-year limited warranty
TypeEnergy Monitor
Data MonitoringReal-time and historical data
Accuracy±2%
App SupportEmporia App
Energy Usage HistoryYes

Related product manuals