Fastlane
®
Swim Unit Installation Fastlane
®
Swim Unit Installation
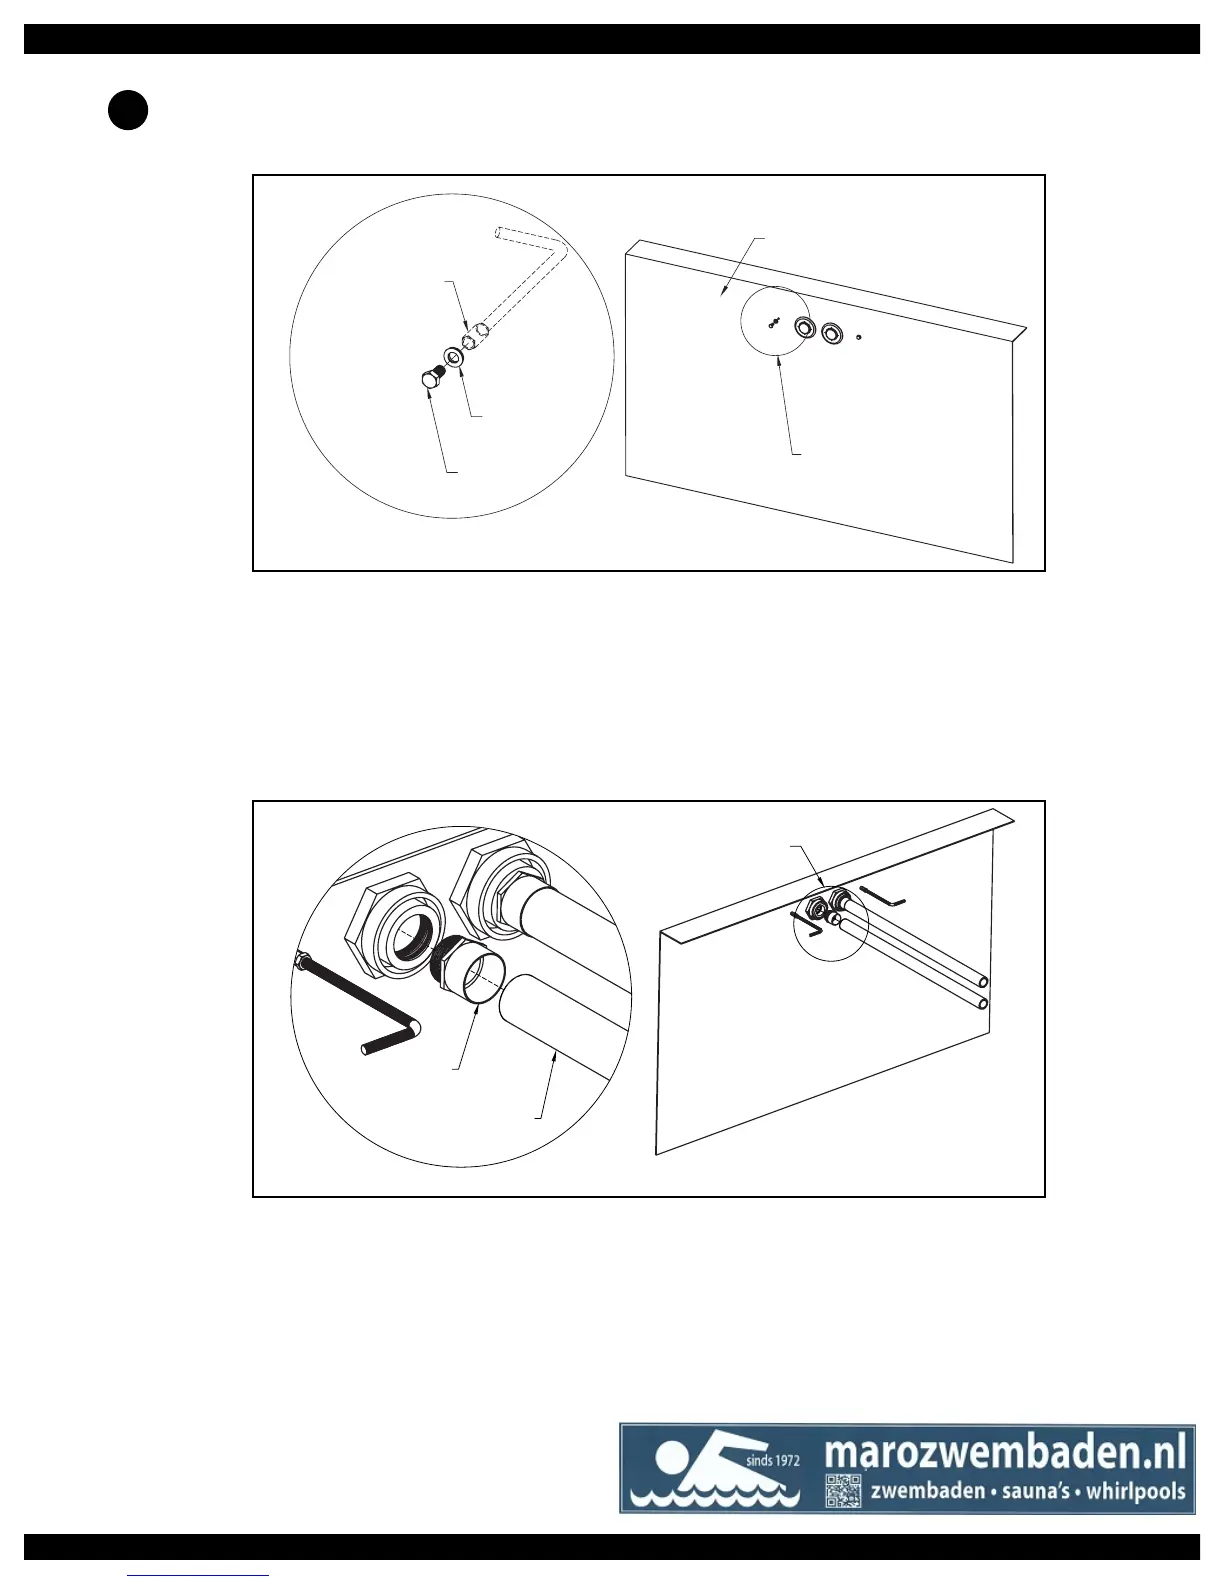
On the inside of the pool, thread the sacricial 3/8" (9,5mm) steel (with rubber washer) and bolt into the
hex coupling through the hole that was previously drilled in the steel wall. Tighten the bolt to secure the
assembly (Fig 4.9).
Inside Pool Wall
Sacrificial Hardware
(See Detail A)
Sacrificial
Bolt
Sacrificial
Washer
Hex Coupling
DETAIL A
Fig. 4.9
Apply Teon thread sealant to the threads of the 1/1/2" (38mm) MPT x FSlip adapters and thread them
into the backside of the star thru-wall ttings. Unroll the exible PVC from the wall mount bracket back to
the hydraulic power unit. Any bends in the exible PVC should be gradual sweeps and not sharp to allow
the hydraulic hoses to be easily fed through the conduit. Each length of PVC must be no longer than 21ft
(6,4m) and should exit the ground near the hydraulic power unit. Glue the PVC ex pipe into the adapter
and run the pipe back to the power unit (Fig 4.10)
Adapter and Flex Pipe
(See Detail A)
1-1/2" (38mm)
PVC Flex Pipe
1-1/2" (38mm)
MPT x FSlip
Adapter
DETAIL A
Fig. 4.10
If the distance between the wall mount bracket and the hydraulic power unit is greater than 25ft (7,6m)
then a junction box and additional ex pipe must be employed. In this case, the ex pipe between the wall
mount bracket and the junction box must be 24ft 6in (7,5m). This will allow the hydraulic hose attached to
the Fastlane to terminate just inside the junction box. Refer to section 5 for additional information.
12
W