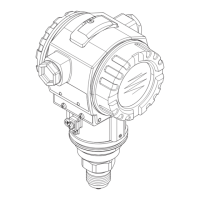
Cerabar S PMP71 with 4 to 20 mA HART Wiring
Endress+Hauser 15
4 Wiring
4.1 Connecting the device
"
Caution!
If the operating voltage is > 35 VDC, do not open the cover when energized in wet locations.
Hazardous live voltage at the terminals.
!
Note!
• When using the measuring device in hazardous areas, installation must comply with the
corresponding national standards and regulations and the Safety Instructions or Installation or
Control Drawings.
• Devices with integrated overvoltage protection must be grounded.
• Protective circuits against reverse polarity, HF influences and overvoltage peaks are integrated.
• The supply voltage must match the supply voltage on the nameplate (→ ä 6, "Nameplates").
• Switch off the supply voltage before connecting the device.
• Remove the housing cover of the terminal compartment.
• Guide the cable through the gland. Preferably use twisted, shielded two-wire cables.
• Connect the device in accordance with the following diagram.
• Screw down the housing cover.
• Switch on the supply voltage.
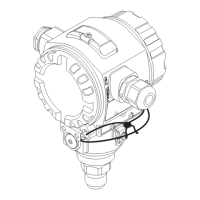
P01-xMx7xxxx-04-xx-xx-xx-001
Fig. 12: Electrical connection 4 to 20 mA HART. Please also note → ä 17, "Supply voltage".
1 Housing
2 Jumper for 4 to 20 mA test signal.
→ ä 17, Section "Taking 4 to 20 mA test signal".
3 Internal earth terminal
4 External earth terminal
5 4 to 20 mA test signal between plus and test terminal
6 Minimum supply voltage = 10.5 V DC, jumper is inserted in accordance with the illustration.
7 Minimum supply voltage = 11.5 V DC, jumper is inserted in "Test" position.
8 Devices with integrated overvoltage protection are labeled OVP (overvoltage protection) here.
4…20 mA
➅
10.5 V DC
➆
11.5 V DC
4... 20mA
Test
Test
➀
➁
➂
➃
➄
Test
➇
4... 20mA Test
 Loading...