Proline Promag 53 NEPSI Zone 1, Zone 21 0
Endress+Hauser 3
Installation instructions
(continued)
• Turning the local display:
the screw cap has to be removed before the local display can be turned, and this must be done with the
device de-energized (and after a delay of at least 10 minutes following shutdown of the power supply) or
when the area is known to be non-hazardous.
"
Caution!
The explosion group for the measuring device can be IIC. However, it is reduced to IIB if the permitted,
external capacitance/inductance for the intrinsically safe communication circuits is increased (see Page 13).
#
Warning!
For entity concept, the criteria for interconnection between the I/O circuits and the associated circuits is as
follow:
•U
o
U
i
•I
o
I
i
•P
o
P
i
•C
o
C
i
+ C
c
•L
o
L
i
+ L
c
C
c
and L
c
stand for the distributed capacitance and distributed inductance of the cable.
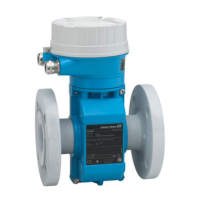
Turning the transmitter housing
1. Unscrew the grub screw.
2. Rotate the transmitter housing cautiously clockwise until the end stop (end of the thread).
3. Rotate the transmitter housing counter-clockwise (max. 360°) in the wanted position.
4. Tighten the grub screw properly after each manipulation
#
Warning!
Ensure that the grub screw is tightened properly.
A0006944
Fig. 1: Turning the transmitter housing
COC certificates of
conformity
COC certificates of conformity
By affixing the certification number the product conforms with the following standards:
Certification numbers:
Inspection body
NEPSI, National Supervision and Inspection Centre for Explosion Protection and Safety of Instrumentation
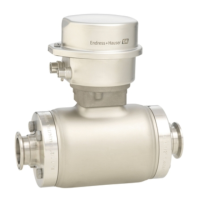
Description of measuring
system
The measuring system consists of transmitters and sensors.
Two versions are available:
• Compact version: transmitters and sensors form a mechanical unit.
• Remote version: transmitters and sensors are installed separately and connected to each other via
connecting cables.

 Loading...