Proline Promag L 400 PROFIBUS DP Table of contents
Endress+Hauser 3
Table of contents
1 Document information .............. 6
1.1 Document function ..................... 6
1.2 Symbols used .......................... 6
1.2.1 Safety symbols .................. 6
1.2.2 Electrical symbols ................ 6
1.2.3 Tool symbols .................... 6
1.2.4 Symbols for certain types of
information .................... 7
1.2.5 Symbols in graphics ............... 7
1.3 Documentation ........................ 7
1.3.1 Standard documentation ........... 8
1.3.2 Supplementary device-dependent
documentation .................. 8
1.4 Registered trademarks ................... 8
2 Basic safety instructions ............ 9
2.1 Requirements for the personnel ............ 9
2.2 Designated use ........................ 9
2.3 Workplace safety ...................... 10
2.4 Operational safety ..................... 10
2.5 Product safety ........................ 10
2.6 IT security ........................... 11
3 Product description ................ 12
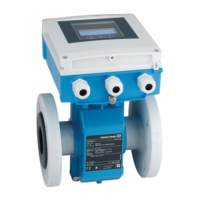
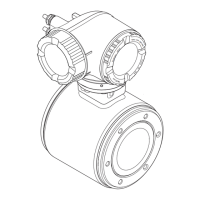
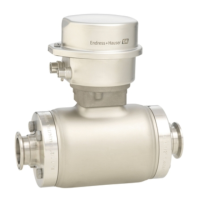
3.1 Product design ........................ 12
4 Incoming acceptance and product
identification ..................... 13
4.1 Incoming acceptance ................... 13
4.2 Product identification ................... 13
4.2.1 Transmitter nameplate ........... 14
4.2.2 Sensor nameplate ............... 15
4.2.3 Symbols on measuring device ...... 16
5 Storage and transport ............. 17
5.1 Storage conditions ..................... 17
5.2 Transporting the product ................ 17
5.2.1 Measuring devices without lifting
lugs ......................... 17
5.2.2 Measuring devices with lifting lugs .. 18
5.2.3 Transporting with a fork lift ........ 18
5.3 Packaging disposal ..................... 18
6 Installation ....................... 19
6.1 Installation conditions .................. 19
6.1.1 Mounting position ............... 19
6.1.2 Requirements from environment and
process ....................... 21
6.1.3 Special mounting instructions ...... 23
6.2 Mounting the measuring device ........... 23
6.2.1 Required tools .................. 23
6.2.2 Preparing the measuring device ..... 23
6.2.3 Mounting the sensor ............. 23
6.2.4 Mounting the transmitter of the
remote version ................. 27
6.2.5 Turning the transmitter housing .... 29
6.2.6 Turning the display module ........ 31
6.3 Post-installation check .................. 32
7 Electrical connection .............. 33
7.1 Connection conditions .................. 33
7.1.1 Required tools .................. 33
7.1.2 Requirements for connecting cable ... 33
7.1.3 Terminal assignment ............. 35
7.1.4 Preparing the measuring device ..... 36
7.1.5 Preparing the connecting cable for
the remote version .............. 36
7.2 Connecting the measuring device .......... 38
7.2.1 Connecting the remote version ..... 38
7.2.2 Connecting the transmitter ........ 40
7.2.3 Ensuring potential equalization ..... 41
7.3 Special connection instructions ............ 43
7.3.1 Connection examples ............. 43
7.4 Hardware settings ..................... 43
7.4.1 Setting the device address ......... 43
7.4.2 Enabling the terminating resistor .... 44
7.5 Ensuring the degree of protection .......... 44
7.5.1 Degree of protection IP66/67, Type
4X enclosure ................... 44
7.6 Post-connection check .................. 45
8 Operation options ................. 46
8.1 Overview of operation options ............ 46
8.2 Structure and function of the operating
menu .............................. 47
8.2.1 Structure of the operating menu .... 47
8.2.2 Operating philosophy ............ 48
8.3 Access to the operating menu via the local
display ............................. 49
8.3.1 Operational display .............. 49
8.3.2 Navigation view ................ 50
8.3.3 Editing view ................... 52
8.3.4 Operating elements .............. 53
8.3.5 Opening the context menu ......... 54
8.3.6 Navigating and selecting from list ... 56
8.3.7 Calling the parameter directly ...... 56
8.3.8 Calling up help text .............. 57
8.3.9 Changing the parameters ......... 58
8.3.10 User roles and related access
authorization .................. 59
8.3.11 Disabling write protection via access
code ......................... 59
8.3.12 Enabling and disabling the keypad
lock ......................... 59

 Loading...