4. How To Use:
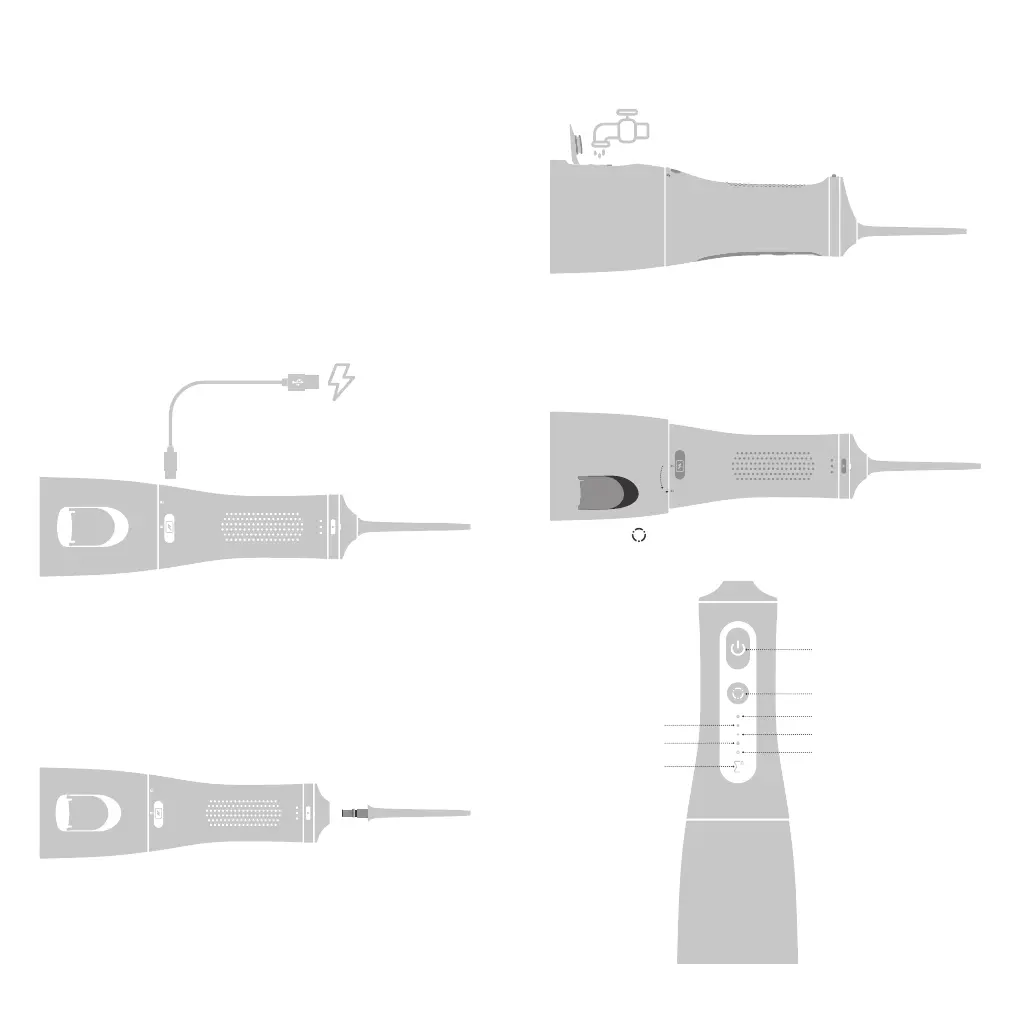
4.1 Charging the device ( As Fig. 1)
Note:
When the power indicator (The Σ logo ) begin to blink, it means the
device need to be charged. It usually takes about 4 hours to get
fully recharged.
Warning:
It's prohibited to press the nozzle unlock button while the product
is running.
• Please cover the lid of the tank tightly before using the water
osser to avoid water leakage.
• Open the cover of the charging port and conrm that there is
no residual liquid in the type c port.
• Connect the USB C charging port with your USB A power
adapter(not included) with the INCLUDED USB A to USB C
charging cable. Then plug the charger adapter into the power
outlet.
• The blue led indicator will start to blink slowly during charging.
Once the device is fully recharged, the logo indicator will stay blue.
• Put the cover on the charger base again after charging is nished.
4.2 Use the Water Flosser
• Attach the nozzle onto the unit. (Fig. 2)
• Open the cap of the water tank to ll it with water which should
not exceed 40℃ , then close the cap.(Fig.3)
• Lay the product horizontally with the water tank on the
right. Hold the water tank with your right hand and turn it
counterclockwise to separate it from the main unit.
Then ll the tank with water that not exceed 40℃ (104 ℉ ), then
close the cap(Fig. 4)
• Press the " " button to change the working mode after turning
on the water flosser. The default will stay on the former mode
before last shutdown. (Fig. 5)
Start button
Mode changing button
Strengthen mode
Soft mode
Manual control mode
Standard mode
Pulse mode
LED indicator
3 4
Fig. 1
Fig. 3
Fig. 4
Fig. 5
Fig. 2
Water injection method 2 :
Water injection method 1 :