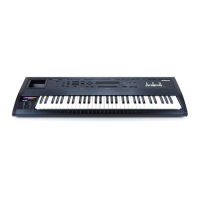
Chapter 2ÑThe ZR-76 Studio
ENSONIQ ZR-76 Musician's Manual22
UU
UU
ss
ss
ii
ii
nn
nn
gg
gg
tt
tt
hh
hh
ee
ee
ZZ
ZZ
RR
RR
--
--
77
77
66
66
aa
aa
ss
ss
aa
aa
SS
SS
tt
tt
aa
aa
nn
nn
dd
dd
--
--
AA
AA
ll
ll
oo
oo
nn
nn
ee
ee
SS
SS
tt
tt
uu
uu
dd
dd
ii
ii
oo
oo
The ZR-76 is a complete songwriting studio straight out of the box. See ÒMaking Audio ConnectionsÓ and
the ÒMaking the Power ConnectionÓ later in this chapter for important information on using the ZR-76 in a
variety of listening situations, and for tips on powering up.
TT
TT
oo
oo
LL
LL
ee
ee
aa
aa
rr
rr
nn
nn
MM
MM
oo
oo
rr
rr
ee
ee
Chapter 1 provides a good starting point for learning about the ZR-76.
UU
UU
ss
ss
ii
ii
nn
nn
gg
gg
tt
tt
hh
hh
ee
ee
ZZ
ZZ
RR
RR
--
--
77
77
66
66
aa
aa
ss
ss
tt
tt
hh
hh
ee
ee
CC
CC
ee
ee
nn
nn
tt
tt
ee
ee
rr
rr
oo
oo
ff
ff
aa
aa
MM
MM
II
II
DD
DD
II
II
SS
SS
tt
tt
uu
uu
dd
dd
ii
ii
oo
oo
The ZR-76 makes an excellent command center for a MIDI studio containing other MIDI instruments,
including sound modules such as ENSONIQÕs ZR-Rack.
WW
WW
hh
hh
aa
aa
tt
tt
YY
YY
oo
oo
uu
uu
ÕÕ
ÕÕ
ll
ll
ll
ll
NN
NN
ee
ee
ee
ee
dd
dd
¥ One less MIDI cable than the number of MIDI devices
NN
NN
oo
oo
tt
tt
ee
ee
::
::
If youÕre going to connect more than one MIDI instrument to the ZR-76, and youÕre
not using a MIDI patchbayÑsee ÒUsing the ZR-76 with a MIDI PatchbayÓ later in this
chapterÑeach of the MIDI instruments must have a MIDI Thru capability (consult each
instrumentÕs manual for further info). This will allow you to Òdaisy-chainÓ the devices.
TT
TT
oo
oo
CC
CC
oo
oo
nn
nn
nn
nn
ee
ee
cc
cc
tt
tt
tt
tt
hh
hh
ee
ee
ZZ
ZZ
RR
RR
--
--
77
77
66
66
tt
tt
oo
oo
OO
OO
tt
tt
hh
hh
ee
ee
rr
rr
MM
MM
II
II
DD
DD
II
II
DD
DD
ee
ee
vv
vv
ii
ii
cc
cc
ee
ee
ss
ss
1. Connect one end of a MIDI cable to the ZRÕs MIDI Out.
2. Connect its other end to the MIDI In of the first MIDI device you want to use.
3. If you want to add other MIDI instruments, connect another MIDI cable to the first deviceÕs MIDI Thru
jack (some MIDI instruments use the MIDI Out jack for MIDI Thru; see your deviceÕs manual if it has
no MIDI Thru jack).
4. Connect the cableÕs other end to the next deviceÕs MIDI In.
5. Repeat steps three and four for each MIDI device you want to add.
NN
NN
oo
oo
tt
tt
ee
ee
::
::
If your set-up utilizes a MIDI patcher, consult your patcherÕs documentation to learn
how to set up the equivalent of this MIDI connection, and see ÒUsing the ZR-76 with a MIDI
PatchbayÓ later in this chapter.
TT
TT
oo
oo
FF
FF
ii
ii
nn
nn
ii
ii
ss
ss
hh
hh
YY
YY
oo
oo
uu
uu
rr
rr
CC
CC
oo
oo
nn
nn
nn
nn
ee
ee
cc
cc
tt
tt
ii
ii
oo
oo
nn
nn
ss
ss
Now that youÕve made your MIDI connections between your computer and the ZR-76, skip ahead to
ÒMaking Audio Connections,Ó and then ÒMaking the Power ConnectionÓ later in this chapter.
For more information on using your ZR-76 as a MIDI master controller, see Chapter 4.
 Loading...