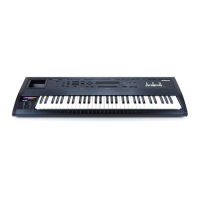
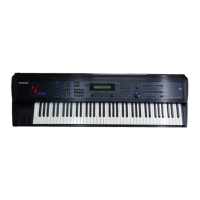
Chapter 2ÑThe ZR-76 Studio
ENSONIQ ZR-76 Musician's Manual 25
NN
NN
oo
oo
tt
tt
ee
ee
::
::
If your set-up utilizes a MIDI patcher, consult your patcherÕs documentation to learn
how to set up the equivalent of this MIDI connection, or see ÒUsing the ZR-76 with a MIDI
PatchbayÓ below.
TT
TT
oo
oo
FF
FF
ii
ii
nn
nn
ii
ii
ss
ss
hh
hh
YY
YY
oo
oo
uu
uu
rr
rr
CC
CC
oo
oo
nn
nn
nn
nn
ee
ee
cc
cc
tt
tt
ii
ii
oo
oo
nn
nn
ss
ss
Now that youÕve made the MIDI connections between your controller and the ZR-76, skip ahead to ÒMaking
Audio Connections,Ó and then ÒMaking the Power ConnectionÓ later in this chapter.
TT
TT
oo
oo
LL
LL
ee
ee
aa
aa
rr
rr
nn
nn
MM
MM
oo
oo
rr
rr
ee
ee
For further information:
¥ on playing the ZRÕs sounds via MIDI, see ÒSoundFinder MIDIÓ in Chapter 4.
¥ on recording onto an ZR-76 16 Track Recorder track via MIDI, see Chapter 7.
UU
UU
ss
ss
ii
ii
nn
nn
gg
gg
tt
tt
hh
hh
ee
ee
ZZ
ZZ
RR
RR
--
--
77
77
66
66
ww
ww
ii
ii
tt
tt
hh
hh
aa
aa
MM
MM
II
II
DD
DD
II
II
PP
PP
aa
aa
tt
tt
cc
cc
hh
hh
bb
bb
aa
aa
yy
yy
A MIDI patchbayÑespecially one with merging capabilitiesÑis the ideal way to connect your ZR-76 to other
MIDI devices. Once everything is wired up to the patchbay, all inter-device connections are just a few
mouse clicks, button presses or knob twists away.
MIDI patchbays typically provide numbered pairs of MIDI In and Out jacksÑeach of these pairs is used by
a single MIDI device. Consult your patchbayÕs documentation to see if the manufacturer has
recommendations as to which locationÑthat is, pairÑshould be used by your computer or your master
controller (your ZR-76 can be used for this purpose). If your patchbayÕs documentation mentions no
specific rules in this regard, you can connect any device to any location.
WW
WW
hh
hh
aa
aa
tt
tt
YY
YY
oo
oo
uu
uu
ÕÕ
ÕÕ
ll
ll
ll
ll
NN
NN
ee
ee
ee
ee
dd
dd
¥ A pair of MIDI cables for each MIDI device youÕll be connecting to the patchbay
TT
TT
oo
oo
MM
MM
aa
aa
kk
kk
ee
ee
YY
YY
oo
oo
uu
uu
rr
rr
ZZ
ZZ
RR
RR
--
--
77
77
66
66
aa
aa
nn
nn
dd
dd
PP
PP
aa
aa
tt
tt
cc
cc
hh
hh
bb
bb
aa
aa
yy
yy
CC
CC
oo
oo
nn
nn
nn
nn
ee
ee
cc
cc
tt
tt
ii
ii
oo
oo
nn
nn
ss
ss
1. Select a patchbay location for the ZR-76.
2. Connect the ZRÕs MIDI Out to the MIDI In of the patchbay location youÕve chosen for the ZR-76.
3. Connect the same locationÕs MIDI Out to the ZRÕs MIDI In.
4. Repeat these steps for each MIDI device youÕd like to connect to your MIDI patchbay.
Consult your patchbayÕs documentation to learn how to route MIDI signals from one MIDI device to
another (or others). The optimal routings will depend on how youÕll be using your MIDI equipment. The
great thing about a patchbay is that, as new MIDI needs arise, it only takes a few moments to meet them.
TT
TT
oo
oo
FF
FF
ii
ii
nn
nn
ii
ii
ss
ss
hh
hh
YY
YY
oo
oo
uu
uu
rr
rr
CC
CC
oo
oo
nn
nn
nn
nn
ee
ee
cc
cc
tt
tt
ii
ii
oo
oo
nn
nn
ss
ss
Once youÕve programmed your patchbay, you can move on to Making Audio Connections below.
MM
MM
aa
aa
kk
kk
ii
ii
nn
nn
gg
gg
AA
AA
uu
uu
dd
dd
ii
ii
oo
oo
CC
CC
oo
oo
nn
nn
nn
nn
ee
ee
cc
cc
tt
tt
ii
ii
oo
oo
nn
nn
ss
ss
In any set-up, youÕll need to determine what type of audio connection youÕd prefer to establish between the
ZR-76 and the rest of your system. There are a number of options.
¥ You can listen to the ZR-76 with headphones plugged into the rear-panel Phones jack. This is great for
 Loading...