4133969 Rev.0 4133969 Rev.0
1-F PMS376U 1-F K
1
Unpack and assemble • Déballez et assemblez le scanner
Start Here • Point de départ
Read these instructions before using your product. • Lisez ces instructions avant d’utiliser votre produit.
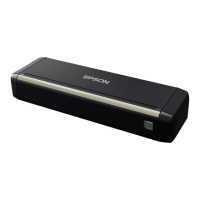
DS-410
2
Install software • Installez les logiciels
Note: An internet connection is required to obtain product software.
Remarque : Une connexion Internet est requise pour obtenir les logiciels du produit.
1 Make sure the scanner is NOT CONNECTED to your computer.
Windows
®
: If you see a Found New Hardware screen,
click Cancel and disconnect the USB cable.
Assurez-vous que le scanner N’EST PAS BRANCHÉ à votre
ordinateur.
Windows
®
: Si une fenêtre Nouveau matériel détecté s’affiche,
cliquez sur Annuler et débranchez le câble USB.
2 Download the DS-410 software package from:
www.epson.com/support/ds410 (U.S.)
www.epson.ca/support/ds410 (Canada)
Téléchargez le progiciel DS-410 à l’adresse :
www.epson.ca/soutien/ds410
3 Double-click the software package you downloaded in the previous step.
Double-cliquez sur le progiciel que vous avez téléchargé à l’étape précédente.
4 Select English, and follow the on-screen instructions. Then connect the USB cable and
turn on your scanner when prompted.
Sélectionnez Français et suivez les instructions qui s’affichent à l’écran. Puis, branchez le
câble USB et mettez le scanner sous tension, à l’invite.
1
Remove all packing materials.
Retirez tout le matériel d’emballage.
2
Open the unit and remove all packing
materials.
Ouvrez l’unité et retirez tout le matériel
d’emballage.
3
Extend the paper guide and the output
tray.
Allongez le guide-papier et le plateau
de sortie.
R
3
Scan a document • Numérisez un document
Note: If you are scanning a business or plastic card,
load it facedown and top edge first. See your online
User’s Guide for instructions.
Remarque : Si vous numérisez une carte professionnelle
ou une carte de plastique, chargez-la face vers le bas
et le bord supérieur en premier. Consultez le Guide de
l’utilisateur en ligne pour obtenir les instructions.
1 2
To prevent paper jams, keep the
lever in this position for most types
of documents. See your online User’s
Guide for more information.
Pour éviter les bourrages papier,
gardez le levier dans cette position
pour la plupart des types de
documents. Consultez le Guide de
l’utilisateur en ligne pour obtenir
plus d’informations.
3
Load your document facedown and
top edge first. Then, slide in the
edge guides.
Chargez votre document face vers
le bas et bord supérieur en premier.
Puis, faites glisser les guide-papier
vers l’intérieur.
4 Open Document Capture Pro (Windows) or Document Capture (Mac).
• Windows 10: Click > All apps > Epson Software > Document Capture Pro.
• Windows 8.x: Navigate to the Apps screen and select Document Capture Pro.
• Windows (other versions): Click or Start > All Programs or Programs > Epson
Software > Document Capture Pro.
• Mac: Select Applications > Epson Software > Document Capture.
Ouvrez Document Capture Pro (Windows) ou Document Capture (Mac).
• Windows 10 : Cliquez sur > Toutes les applications > Epson Software >
Document Capture Pro.
• Windows 8.x : Naviguez vers l’écran Applications et sélectionnez Document
Capture Pro.
• Windows (autres versions) : Cliquez sur ou Démarrer > Tous les programmes
ou Programmes > Epson Software > Document Capture Pro.
• Mac : Sélectionnez Applications > Epson Software > Document Capture.
5 Click Scan to PDF or click the arrow to select a different format.
Cliquez sur Numériser vers PDF ou cliquez sur la flèche pour sélectionner un autre
format.