j
Press the [Esc] button to display the screen from step 5. Select
Horizontal Linearity or Vertical Linearity, and then press the [
]
button.
Select Horizontal Linearity to adjust the horizontal expansion or
contraction, and select Vertical Linearity to adjust the vertical
expansion or contraction.
k
Select the standard line for the adjustments, and then press the
[
] button.
Press the [
][ ] buttons when selecting Horizontal Linearity, and
the [
][ ] buttons when selecting Vertical Linearity, and then
press [
].
The selected standard line is displayed in flashing orange and white.
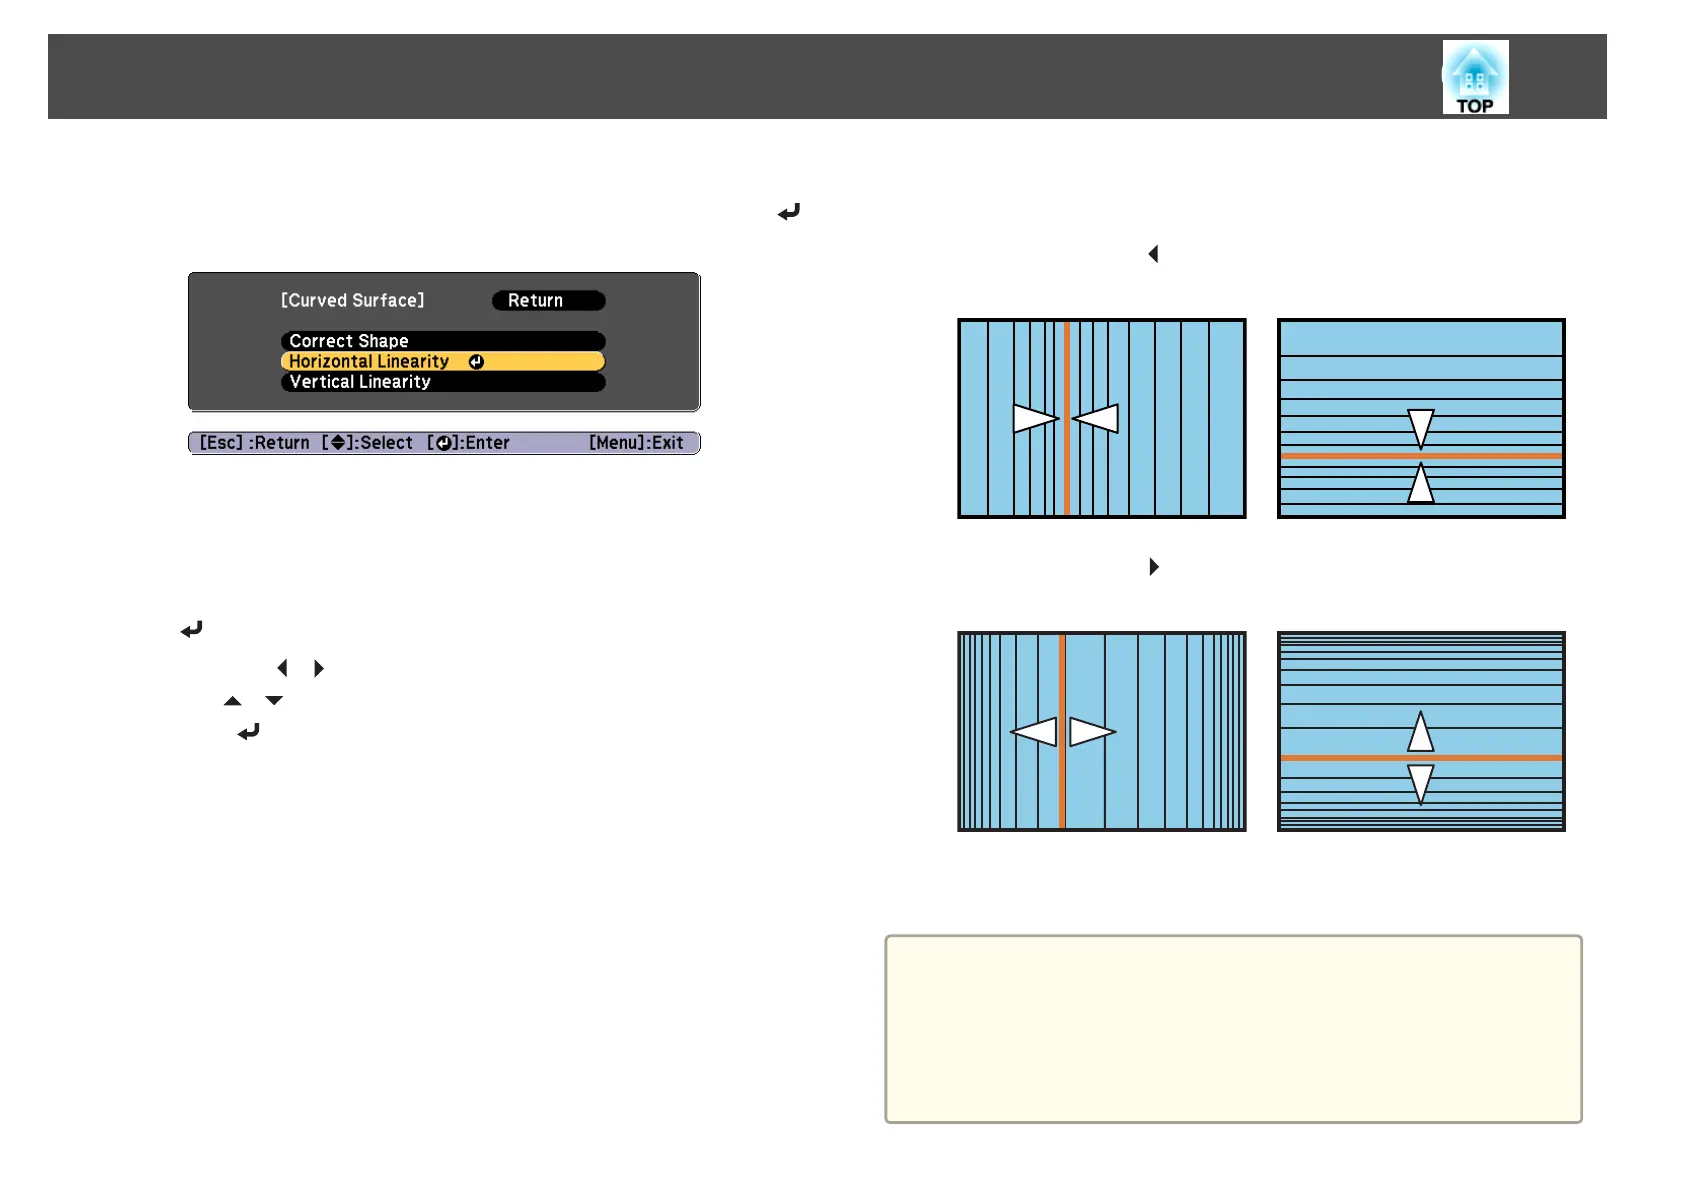
l
Adjust the linearity.
Correct it so that the distance between lines is equal.
When pressing the [
] button
When Horizontal Linearity is selected When Vertical Linearity is selected
When pressing the [ ] button
When Horizontal Linearity is selected When Vertical Linearity is selected
m
To complete the corrections, press the [Menu] button.
a
You can fine tune the corrected results. Use Quick Corner to adjust
the tilt of the image, and then use Point Correction for fine tuning.
Select Quick Corner or Point Correction on the screen from step
4.
s "Quick Corner" p.57
s "Point Correction" p.65
Adjusting Projected Images
61
 Loading...