i
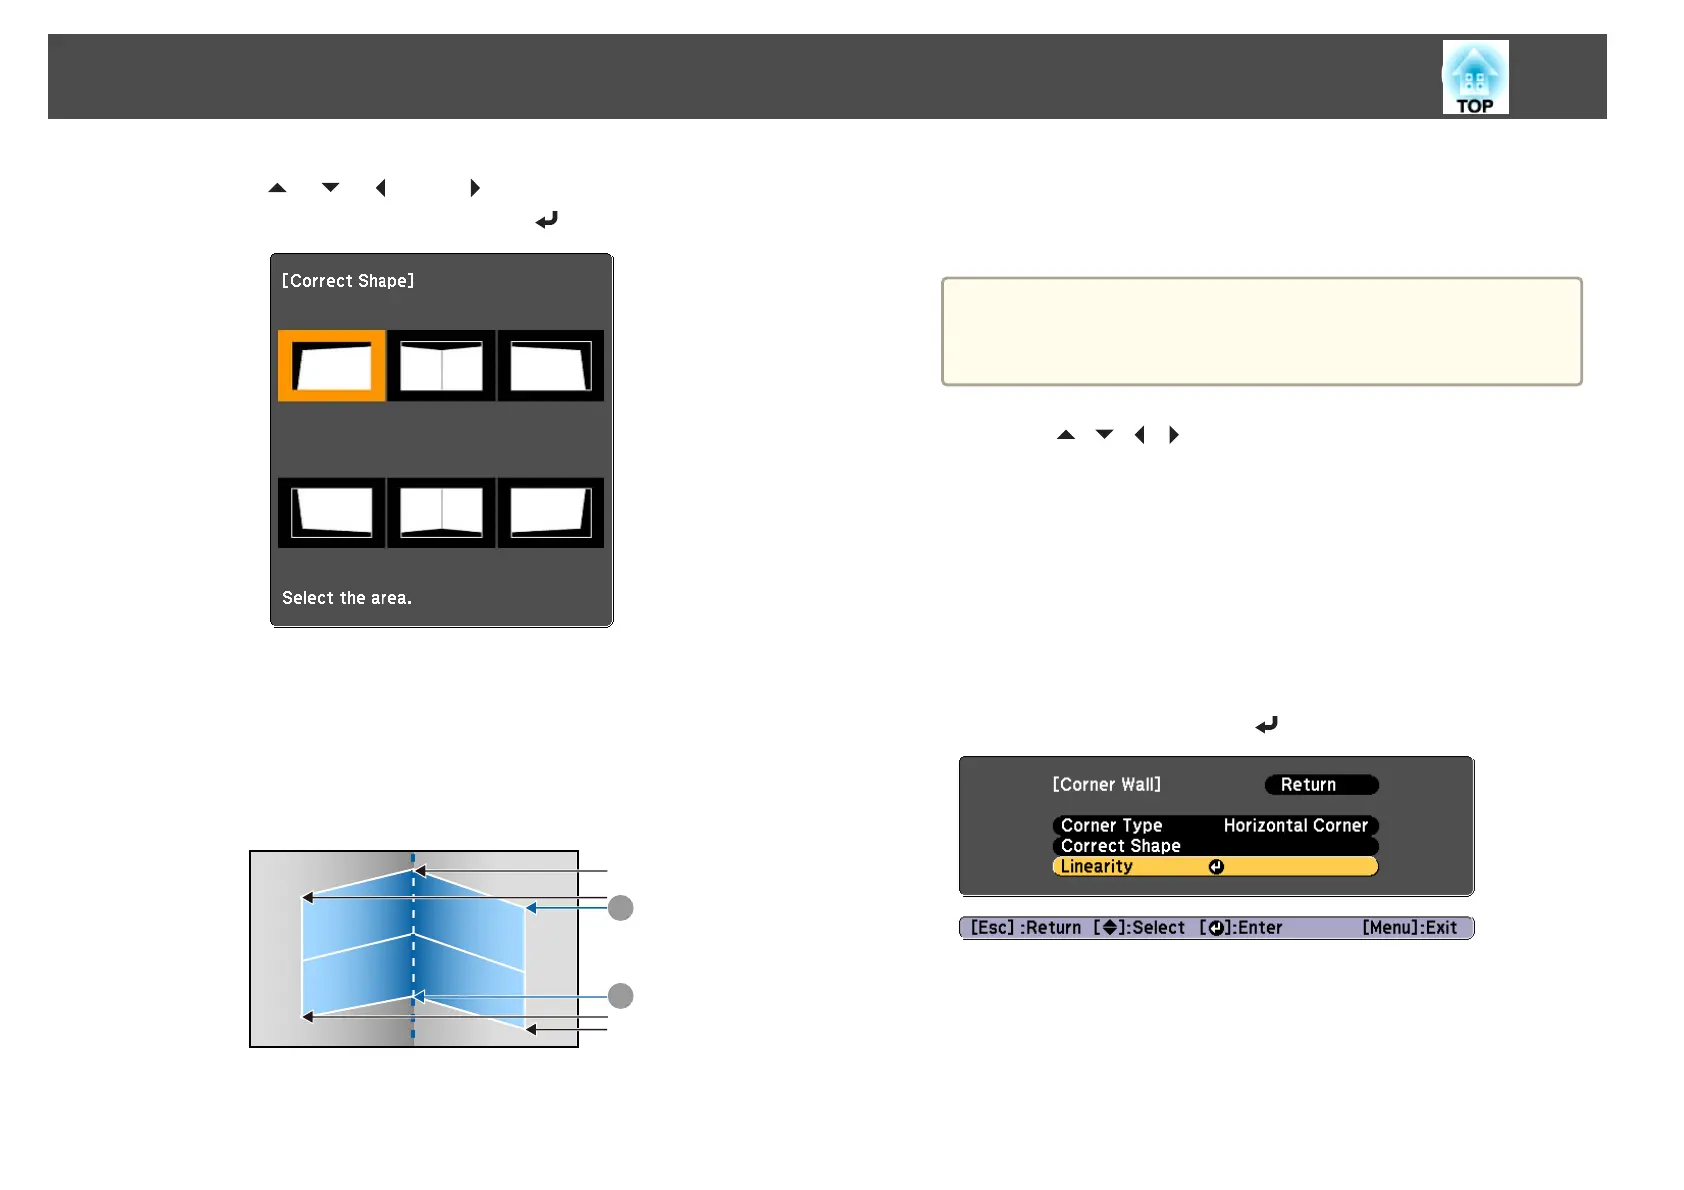
Use the [ ], [ ], [ ], and [ ] buttons to select the area you
want to adjust, and then press the [
] button.
Adjustment tips
When Horizontal Corner is selected:
Adjust the upper area based on the lowest point (indicated by the
U
arrow).
Adjust the lower area based on the highest point (indicated by the
V
arrow).
A
B
When Vertical Corner is selected:
Adjust the left and right based on the point nearest to the vertical
line in the center of the screen.
a
If the [Esc] button is pressed for approximately two seconds,
the confirm default reset screen is displayed.
Select Yes to reset the result of Corner Wall.
j
Press the [ ][ ][ ][ ] buttons to adjust the shape.
If the message "Cannot adjust any further." is displayed while
adjusting, you cannot adjust the shape any further in the direction
indicated by the gray triangle.
k
Repeat steps 9 and 10 as needed to adjust any remaining parts.
If the image expands or contracts, go to the next step and adjust the
linearity.
l
Press the [Esc] button to display the screen from step 4. Select
Linearity, and then press the [
] button.
Adjusting Projected Images
64
 Loading...