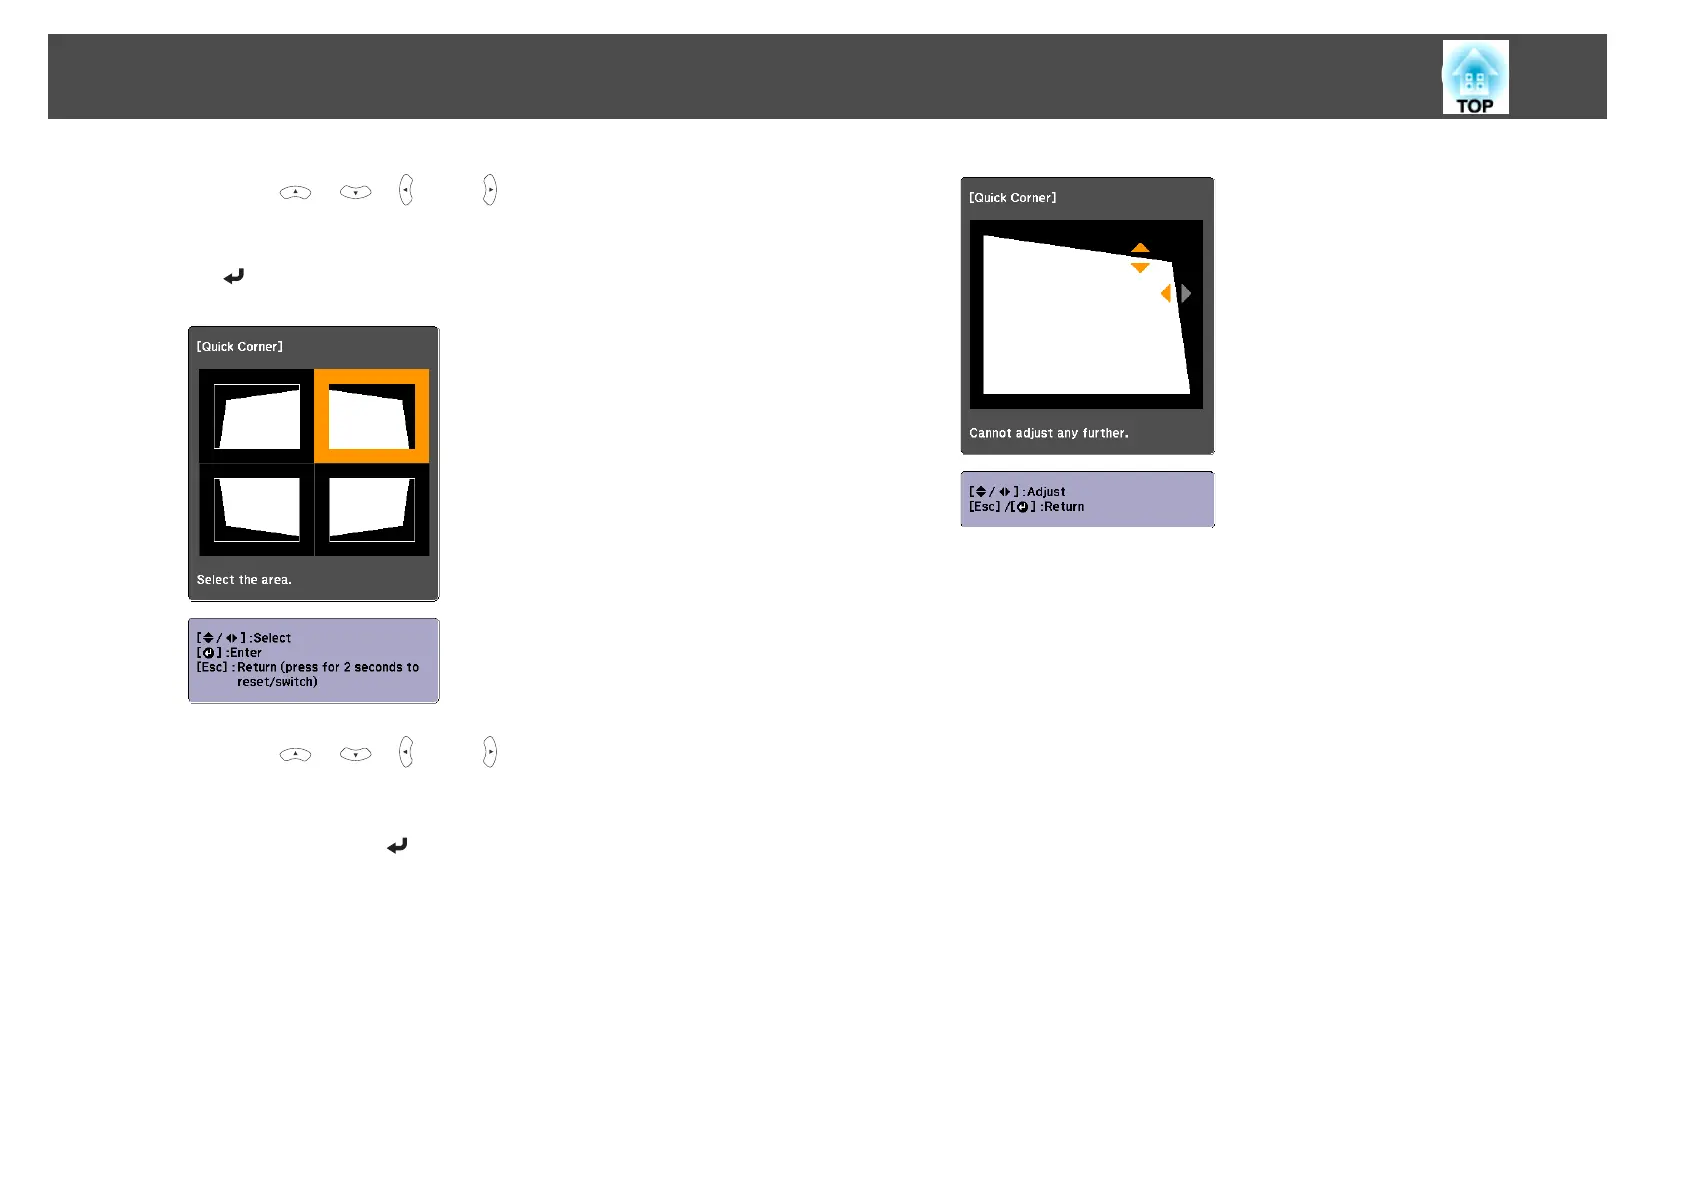
d
Using the [ ], [ ], [ ], and [ ] buttons on the remote control,
or the [
w], [v], [a], and [b] buttons (or the [Wide]/[Tele] buttons)
on the control panel, select the corner to correct, and then press
the [
] button.
e
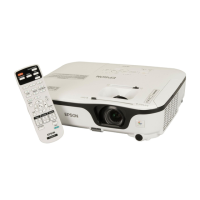
Using the [ ], [ ], [ ], and [ ] buttons on the remote control,
or the [
w], [v], [a], and [b] buttons (or the [Wide]/[Tele] buttons)
on the control panel, correct the position of the corner.
When you press the [
] button, the screen shown in step 4 is
displayed.
If the message "Cannot adjust any further." is displayed while
adjusting, you cannot adjust the shape any further in the direction
indicated by the gray triangle.
f
Repeat procedures 4 and 5 as needed to adjust any remaining
corners.
g
When you are done, press the [Esc] button to exit the correction
menu.
Because Keystone was changed to Quick Corner, the corner
selection screen shown in step 4 is displayed the next time you press
the [
w] or [v ] buttons on the control panel. Change Keystone to
H/V-Keystone if you want to perform horizontal and vertical
correction using the [
w] or [v] buttons on the control panel.
s Settings - Keystone - H/V-Keystone p.70
Adjusting Projected Images
39