Do you have a question about the Epson L4150 and is the answer not in the manual?
This document provides a comprehensive guide for setting up, using, and maintaining the Epson L4150 printer, an all-in-one inkjet device designed for home and small office environments. The printer emphasizes ease of use, cost-effective printing through its refillable ink tank system, and wireless connectivity options.
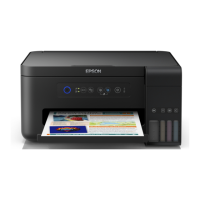
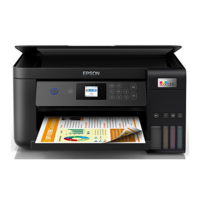
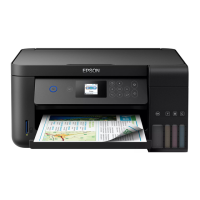
The Epson L4150 is a multifunction inkjet printer capable of printing, scanning, and copying. Its primary function is to produce high-quality color and monochrome prints using a continuous ink supply system, which differs from traditional cartridge-based printers. This system allows users to refill ink tanks directly from bottles, significantly reducing the cost per page and environmental waste associated with disposable cartridges. The printer supports various paper types and sizes, making it versatile for different printing needs, from documents to photos.
A key feature of the L4150 is its integrated ink tank system. Instead of small, disposable cartridges, the printer has four large, transparent ink tanks—one for black and three for cyan, magenta, and yellow. These tanks are designed to be easily refilled with genuine Epson ink bottles, which are keyed to prevent accidental filling of the wrong color. This design ensures a clean and straightforward refilling process, minimizing spills and mess. The transparent tanks allow users to monitor ink levels at a glance, preventing unexpected interruptions during printing.
The L4150 also offers robust connectivity options. It supports wireless connections, enabling users to print from computers, smartphones, and tablets without the need for physical cables. This wireless capability is facilitated by Epson's proprietary mobile printing solutions, such as Epson iPrint, Epson Print Enabler for Android, and compatibility with Google Cloud Print. For situations where a wireless connection is not feasible or preferred, a direct USB connection is also available. The printer is designed to integrate seamlessly into various network environments, though it is important to note its compatibility with 2.4 GHz Wi-Fi networks.
The scanning function allows users to digitize documents and photos. While the document does not detail specific scanning resolutions or features, it implies standard scanning capabilities suitable for everyday use. The copying function, often integrated with scanning, enables users to duplicate documents directly from the printer without requiring a computer.
Setting up the Epson L4150 involves a few straightforward steps, beginning with unpacking and ink filling. The unpacking process requires removing all protective materials from both the exterior and interior of the printer, including those within the scanner unit. This ensures that no obstructions interfere with the printer's mechanical components during operation.
The ink filling process is a critical initial step. Users are instructed to open the ink tank cover and then the cap for the specific ink tank they intend to fill. Epson's ink bottles are designed with a unique keying mechanism that ensures each bottle can only be inserted into the correct color tank, preventing errors. The bottles are also designed to stop filling automatically once the tank reaches its upper limit, preventing overfilling and spills. Users are advised not to shake or squeeze the ink bottles during this process. The document emphasizes the importance of using genuine Epson ink bottles, which are vacuum-packed to maintain reliability until opened.
After filling the ink tanks, the printer requires an initial ink charging process. This involves pressing and holding the stop button for approximately 3 seconds until the power light begins to blink. This process, which takes about 10 minutes, primes the ink delivery system, ensuring that ink flows correctly from the tanks to the print head. During this charging phase, users are cautioned not to turn off the product, raise the scanner unit, or load paper, as this could waste ink.
Loading paper is another essential usage feature. The printer features a rear paper feed slot, where paper should be loaded glossy or printable side up and short edge first. Adjustable edge guides help align the paper correctly, ensuring straight prints. Users are advised not to force the edge guides too tightly against the paper. The output tray should be pulled out to catch printed documents.
The software installation process is designed to be user-friendly. Users are instructed to ensure the printer is not connected to the computer during the initial software setup. The software package, available on a product CD or via download from the Epson support website, guides users through the installation. For wireless connections, the installer attempts to set up the connection automatically, though users may need to manually enter their network name (SSID) and password if the automatic setup fails. Direct USB connection is also an option, requiring a USB cable.
Mobile printing is a significant convenience feature. The L4150 supports printing from smartphones and tablets through Epson iPrint for iOS and Android devices. Android users can also utilize Epson Print Enabler. These features allow users to print documents and photos by connecting their device and printer to the same network and selecting the print option. Remote printing is also supported via Epson Connect and Google Cloud Print, enabling users to print from virtually anywhere.
The Epson L4150's design incorporates several features aimed at simplifying maintenance and ensuring consistent print quality. The most prominent maintenance feature is its refillable ink tank system. Unlike cartridge-based printers that require frequent replacement of expensive cartridges, the L4150's tanks can be refilled with ink bottles. This not only reduces ongoing costs but also minimizes the frequency of intervention required from the user. The transparent ink tanks are a direct maintenance aid, allowing users to visually monitor ink levels and plan refills proactively, avoiding unexpected low-ink situations.
The document provides clear instructions for troubleshooting common printing issues, which can be considered a form of user-level maintenance. For instance, if printouts show lines or incorrect colors, users are advised to run a nozzle check. This diagnostic test helps identify clogged nozzles in the print head. If clogs are detected, the next step is to perform a print head cleaning, a function typically accessible through the printer's utility software on a computer. Regular print head cleaning, when necessary, helps maintain optimal print quality and prevents permanent damage to the print head.
The document also offers guidance on network troubleshooting. If network setup is unsuccessful, users are advised to verify the selected network name (SSID), restart their router, and ensure that their router supports 2.4 GHz connections, as the printer is compatible with this frequency. These steps are crucial for maintaining the printer's wireless functionality.
For physical maintenance, the initial unpacking instructions emphasize removing all protective materials. This prevents internal components from being damaged or obstructed, which could lead to mechanical failures or poor print quality. Users are also cautioned not to touch the flat white cable or the ink tubes and their translucent cover during internal access, as these are delicate components critical to the printer's operation.
The use of genuine Epson ink and specialty papers is highlighted as a way to ensure peak performance and brilliant results. While not a direct maintenance action, using recommended consumables helps prevent issues such as print head clogging, inconsistent color output, and paper jams, thereby reducing the need for corrective maintenance.
Finally, comprehensive support resources are provided, including an online User's Guide and technical support contact information. These resources serve as a valuable maintenance tool, allowing users to find detailed instructions for advanced troubleshooting, driver downloads, FAQs, and direct assistance from Epson if issues persist. This proactive support system empowers users to resolve problems efficiently and keep their printer in optimal working condition.
| Print Technology | Inkjet |
|---|---|
| Print Resolution | 5760 x 1440 dpi |
| Connectivity | USB, Wi-Fi, Wi-Fi Direct |
| Paper Capacity | 100 sheets |
| Scanner Type | Flatbed |
| Scanner Resolution | 1200 x 2400 dpi |
| Copier Function | Yes |
| Functions | Print, Scan, Copy |
| Duplex Printing | Manual |
| Copy Resolution | 600 x 600 dpi |
| Display | No |
| Dimensions | 375 x 347 x 187 mm |
| Weight | 5 kg |
| Mobile Printing | Epson iPrint |
| Supported Paper Sizes | A4, A5, A6, B5 |
| Copy Speed (Black) | 7.7 ipm |
| Copy Speed (Color) | 3.8 ipm |
| Ink Tank Colors | Black, Cyan, Magenta, Yellow |
| Ink Bottle Yield (Black) | 4, 500 pages (ISO standard) |
| Ink Bottle Yield (Color) | 7, 500 pages (ISO standard) |
| Power Consumption | 12W (Printing) |
| Operating Temperature | 10°C - 35°C |
| Operating Humidity | 20% to 80% |
| Print Speed (Color) | 5.0 ipm |