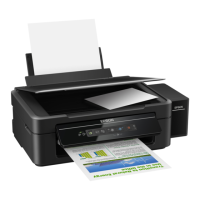
Start Here
4
Load paper
1 Flip the feeder guard forward.
2 Raise the paper support, pull out the output tray, then
raise the paper stopper.
3 Slide the edge guide to the left.
4 Load paper against the right edge guide and behind the
tab line on the left edge guide, with the printable side
faceup.
Caution: Don’t load the paper sideways; always load it short
edge first.
5 Slide the edge guide against the left edge of the paper,
but not too tightly.
6 Flip the feeder guard back.
Read these instructions before using your product.
Extra black ink
for refilling
This product requires careful handling of ink. Ink may splatter
when the ink tanks are filled or refilled. If ink gets on your clothes
or belongings, it may not come off. Wear plastic gloves when
filling the ink tanks.
Note: The included ink bottles must be used for printer setup and are
not for resale.
Caution: Do not open ink bottles until you are ready to fill the ink tanks.
The ink bottles are vacuum packed to maintain reliability.
1
Remove all protective
materials
1 Remove all the packing materials, as shown.
2 Make sure the transportation lock is set to the printing
position. Otherwise, you will not be able to print.
3 Unhook the ink tank unit from the printer.
Caution: Do not pull the ink tubes.
4 Remove the transportation caps from each ink tank and
store them on the inside of the ink tank unit.
Caution: Only use the transportation caps when transporting
the printer.
2
Fill ink tanks
Note: When you fill the ink tanks, place a sheet of paper under the
ink tank unit. If ink spills, wipe it off immediately to avoid permanent
stains.
Caution: Keep ink bottles out of the reach of children and do not
drink the ink.
1 Open the ink tank unit cover, then remove the ink tank
cap.
2 Snap off the tip, remove the bottle cap and seal, then
replace the bottle cap.
Caution: Replace the bottle cap tightly, or ink may leak.
3 Match the ink color with the correct tank and fill each
tank with all of the ink.
4 Replace the ink tank caps securely.
5 Seal each bottle with its tip before discarding.
6 Close the ink tank unit.
7 Hook the ink tank on the printer.
3
Turn on and select settings
1 Connect the power cord to the back of the printer and to
an electrical outlet.
Caution: Do not connect to your computer yet.
2 Press the power button.
3 Press or to select your language if necessary, then
press OK.
4 Select your country/region and press OK.
5 Select Summer if Daylight Saving Time is in effect;
otherwise, select Winter. Press OK.
6 Select the date format and press OK.
7 Press the number keys to enter the date and press OK.
8 Select the time format (12h or 24h) and press OK.
9 Press the number keys to enter the time. Then press
or to select AM or PM, if necessary, and press OK.
10 When initialization is complete, press and hold the OK
button for 3 seconds to charge the ink system.
Ink charging takes approximately 20 minutes. When the
power light stops flashing, priming has completed.
Caution: Do not turn off the printer while it is charging the ink
or you will waste ink.
L555