REV.-A
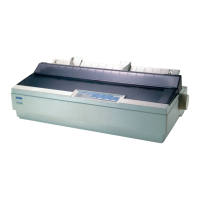
3.1 OVERVIEW
This section describes disassembly precautions, tools, service checks after repair, and screw
specifications.
3.1.1 Disassembly Precautions
Follow the precautions below when disassembling the printer.
I
WARNING
I
Before disassembling, assembling, or adjusting the printer, disconnect the power cord from the
external AC power socket. Failure to do so risks personal injury. The printer’s power switch is wired
into the primary circuitry. As a result, the printer still remains live with current flowing even when
this switch is off.
I
CAUTION
For efficient printer operation, use only the recommended tools for maintenance work.
Use only the lubricants and adhesives recommended in Chapter 6.
Adjust the printer only as described in this manual.
3.1.2
TOOIS
Tables 3-1 and 3-2 list the tools you need when disassembling, assembling, or adjusting the printer.
Use only tools that meet these specifications.
Table 3-1. Recommended Tools
Tool
Part No.
Round-nose pliers
B740400100
Nippers
B7405OO1OO
Tweezers
B74 1000100
Soldering iron B740200 100
E-ring holder # 2.5 (Note 2)
B740800400
E-ring holder # 5 B740800700
E-ring holder # 6 B740800800
Phillips screwdriver No. 2
B743800200
Normal screwdriver B743000 100
Box driver (7 mm across)
B74 1700200
Thickness gauge (0.36 mm)
—
Thickness gauge (0.40 mm)
—
NOTE
All tools are commercially
aveilable.
Table 3-2. Equipment Required for Maintenance
3-1
 Loading...