EPSON Stylus Photo R320 Revision B
DISASSEMBLY AND ASSEMBLY Disassembly 45
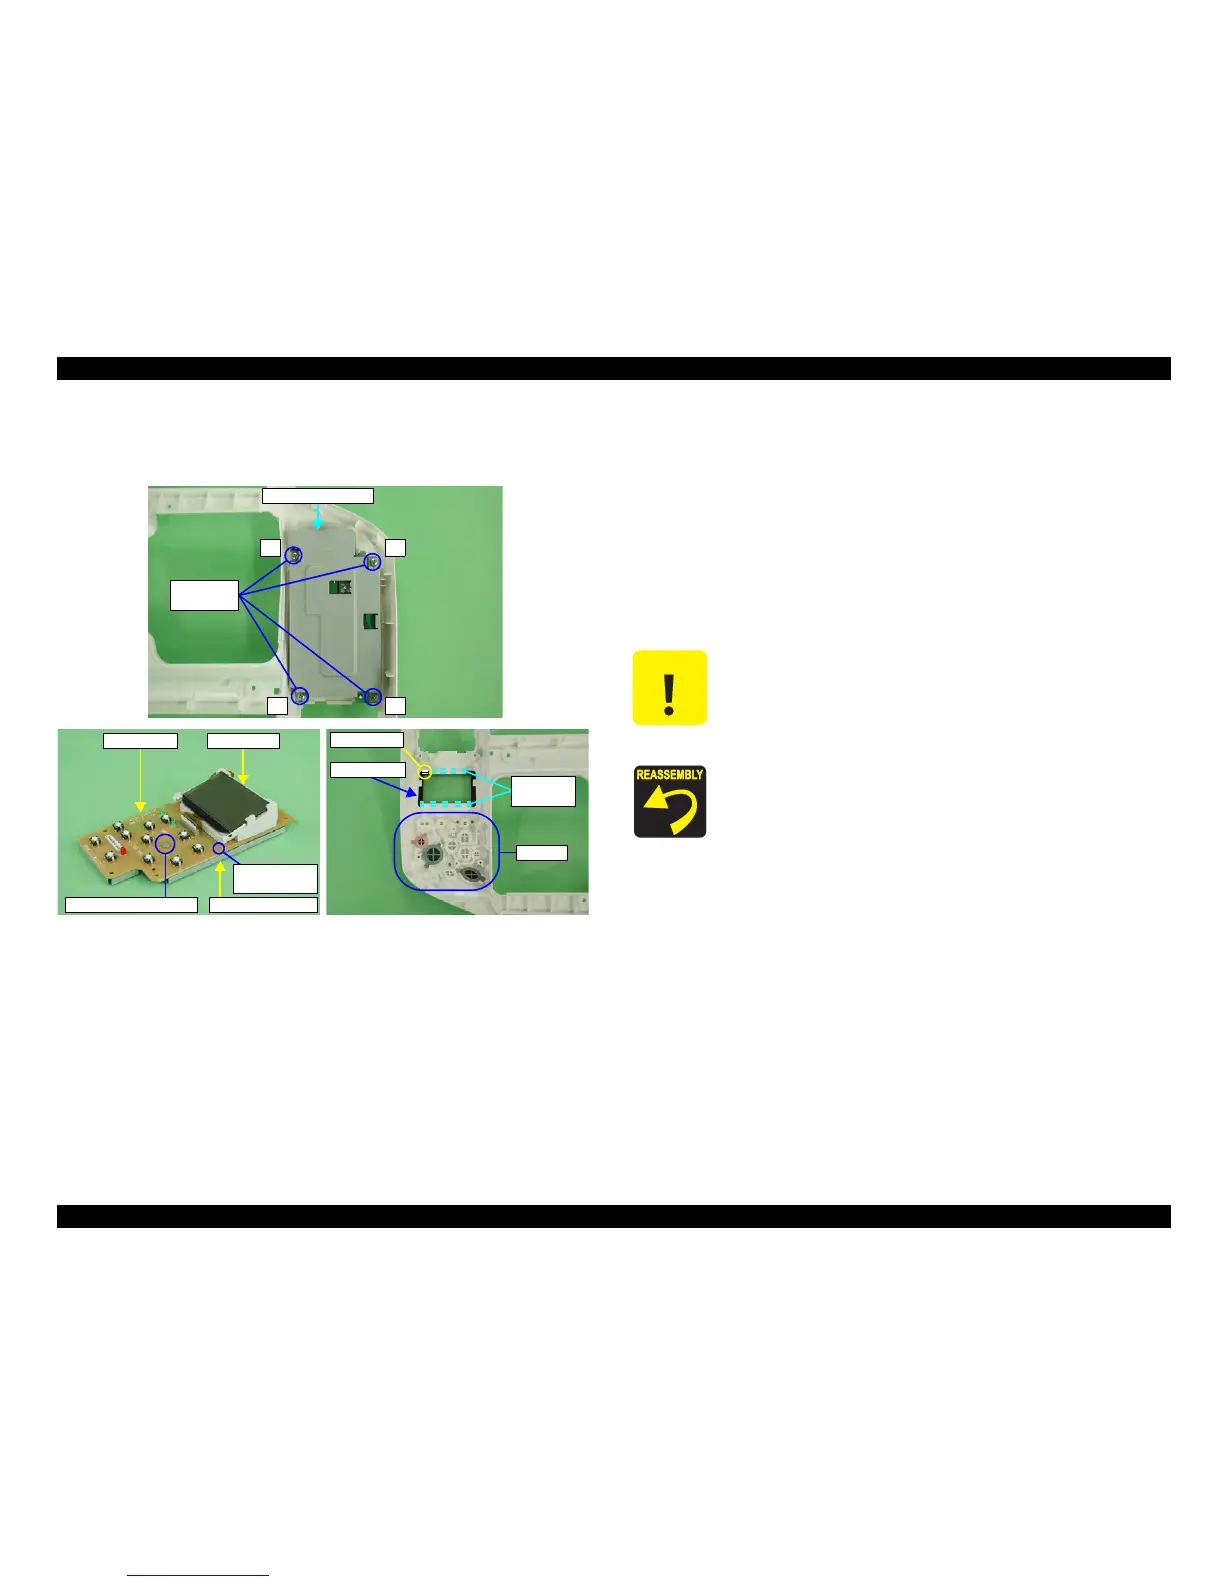
2.3.6 Removing Panel Board
External View
Figure 2-14. Removing "Panel Board"
Parts/Units which should be removed before removing "Panel Board"
Paper Support Assy./Preview Monitor Unit/Housing, Upper
Procedure for Removing
1. Remove the screws (x4) which secure "Board Assy., Panel". Then, remove
"Board Assy., Panel".
2. Remove the screw which secures "Panel Board". Then, remove "Panel Board"
from "Shield Plate, LCD".
3. Take off the two-sided tapes (x2) which secure "Cover, LCD" from the back
of "Housing, Upper". Then, remove "Cover, LCD".
C.B.P 3x8
(5-7kgf•cm)
Board Assy., Panel
2 4
13
Line Mark
Cover, LCD
Two-sided
Tapes
Switch
Panel Board LCD Panel
Rib and
Adjusting Hole
Shield Plate, LCDC.B.S 3x6 (4-6kgf•cm)
C A U T I O N
Do not damage "LCD Panel".
When removing "Panel Board Unit", the switch may detach and
drop. If this occurs, reinstall it referring the figure.
When looking at back side of "Housing, Upper", make sure that
the line mark of "Housing, Upper" securely comes to the position
shown in the figure.
Match the rib of "Shield Plate, LCD" and the positioning hole of
"Panel Board".
Screw "Board Assy., Panel" in the order as shown in the figure.

 Loading...


