Stylus Pro 4000 Field Repair Guide 4/28/05
Multi Sensor Adjustment for Auto Nozzle Check Printer Component, Software Item, LCD Display, Printer Button Page 153.
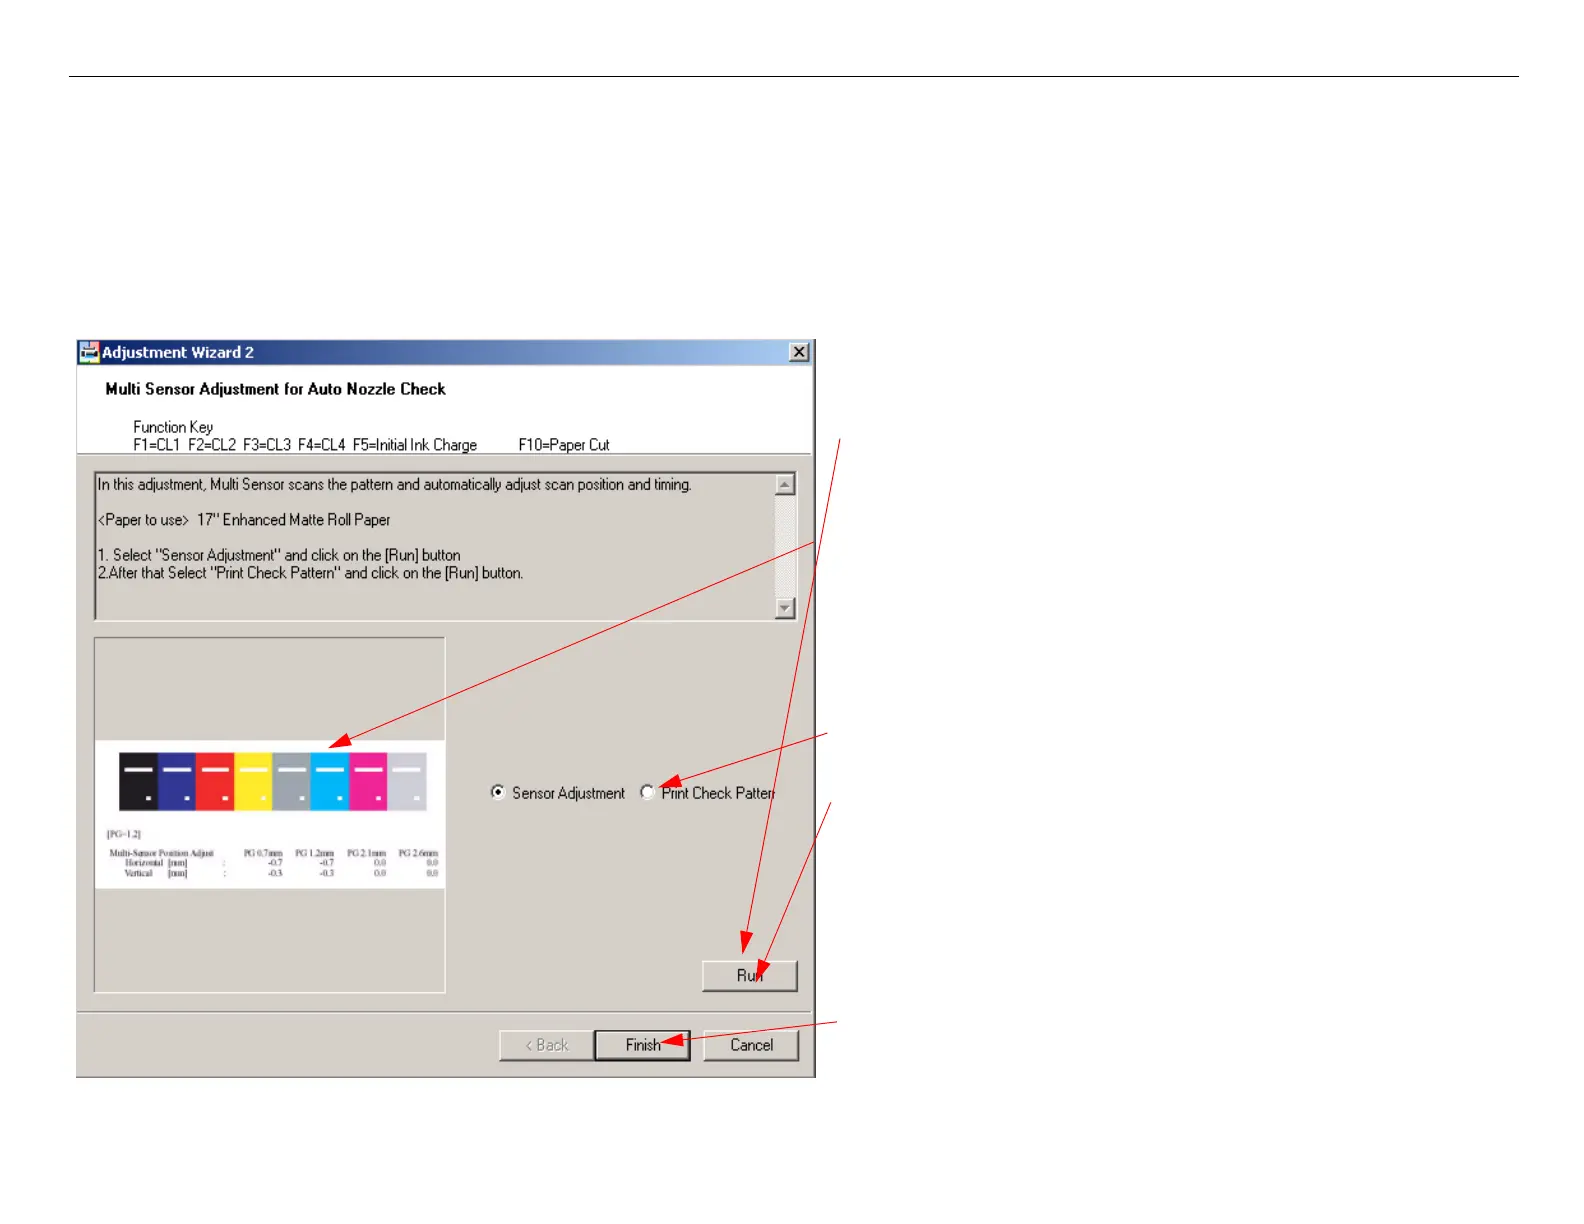
Multi Sensor Adjustment for Auto Nozzle Check
1. Load 17” Enhanced Matte roll paper.
2. From the Adjustment Wizard for the Pro 4000, select the Mulit Sensor Adjustment for Auto
Nozzle Check.
1. Click on the Run button.
2. The Printer will print out these patterns.
7. Click the Finish button.
3. The Printer will read the alignment patterns
automatically (using the Multi Sensor), and
write the appropriate values to the board.
4. Click on the Print Check Pattern button.
5. Click on the Run button.
6. The Printer will Print a check pattern, followed
by a nozzle check pattern.

 Loading...