3 Attach two tube clamps to the left and right sides on the back of the
printer and route the waste ink tube through the clamps as shown.
4 Remove the outer and inner caps from the waste ink bottle and store
them in a safe place.
Note: Do not throw the caps away; you will need them when disposing of the
waste ink.
5 Place the caution label for your language over the English label, if
necessary. Then, insert the waste ink bottle into the waste ink bottle
holder. The bottle and holder should be placed in an area lower than the
printer so that the waste ink can flow straight down.
6 Insert the waste ink tube into the waste ink bottle. The tube should
curve toward the bottle and straight down as shown.
Make sure that the tube sits above the yellow line indicated on the
outside of the bottle. If the tube is too long, cut the end to the
appropriate length.
7 Connect the power cord. (Do not connect the printer to your
computer yet.)
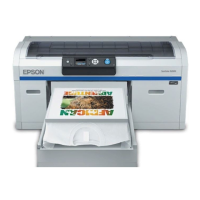
Epson
®
SureColor
®
F2100 Series
Start Here
Read these instructions before using your product.
Choose a Location for the Printer
Choose a location for the printer that is near a wall outlet where the plug can
be easily unplugged. Avoid places subject to rapid changes in temperature and
humidity. Also keep the printer away from direct sunlight, strong light, or heat
sources.
Make sure to place the printer on a flat, stable surface with enough space on
all sides (see illustrations below). The surface supporting the printer should
be wider than the space between the rubber feet on the bottom of the printer,
at least 2 feet (60 cm) off the ground, and capable of supporting at least 220
pounds (100 kg).
1.26 in.
(3.2 cm)
23 in.
(58.5 cm)
28 in.
(71.1 cm)
29.53 in.
(75 cm)
2.95 in.
(7.5 cm)
78.74 in.
(200 cm)
23.62–31.50 in.
(60–80 cm)
2.55 in.
(6.5 cm)
19.68 in.
(50 cm)
47.24 in.
(120 cm)
5.90 in.
(15 cm)
Unpack
1 Make sure you have these items:
Maintenance kit
Platen hoop
hooks
Medium platen
and hoop
Waste ink
bottle holder
Grip pad
Waste ink bottle
Limited
warranty
Caution
label
Grip pad tool
Power cord
Tube/cable clamps
Tweezers
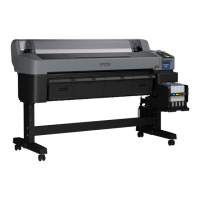
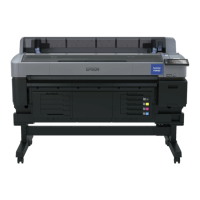
Printer
Ink charging unit
Waste ink tube
Ink/cleaning
cartridges
Note: See the online User’s Guide for information on installing the grip
pad, using the grip pad tool, installing the platen hoop hooks, and using the
maintenance kit and tweezers.
2 Remove all the packaging materials and tape. Check carefully for all the
tape inside and outside the printer and platen.
WARNING: The printer weighs about 185 pounds (84 kilograms) and
requires three people to lift and move it. Make sure to grip the printer where
indicated by the gray stickers as shown in the illustration. When moving the
printer, do not tilt it more than 10 degrees.
Stickers
3 Remove the carriage lock and store it in a safe place.
Note: Do not throw the carriage lock away; you will need it if you transport
the printer.
4 Open the printer cover and press down on the parts as shown to make
sure they are secure. Then close the printer cover.
Assemble the Printer
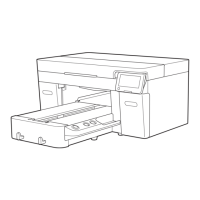
1 Remove the plugs from the waste ink outlets on the back of the printer
and store them in a safe place.
Note: Do not throw the plugs away; you will need them if you transport the
printer.
2 Connect the waste ink tube. Make sure that the longer end of the tube
is connected to the waste ink outlet on the left side and the shorter end
is connected to the waste ink outlet on the right side.
Note: Make sure the tubes point downward and are not twisted to ensure
proper ink drainage.
Install Ink Cartridges
1 Remove the ink cartridges from their
packages. Gently shake each ink cartridge
for about 15 seconds; white ink cartridges need to be shaken on both
sides. You do not need to shake the cleaning cartridge.
Color ink cartridges White ink cartridges
Caution: Do not touch the green chip on top of the cartridge.
2 Open the ink covers and install each cartridge into the correct slot for its
color.
Left ink bay Right ink bay
Slot 1 Slot 2 Slot 3 Slot 4 Slot 5 Slot 6 Slot 7
WH WH Y M C BK CL*
*Cleaning cartridge
3 Close the ink covers.
4 Press the button on the control panel.
5 Follow the prompts to select Language, Date & Time, and unit of
measurement.
6 Select White Ink/Color Ink and press the OK button.
7 Select Yes and press the OK button.
8 Press the OK button at each of the confirmation prompts.
9 Open the printer cover. Remove the ink charging cover and set it aside.
Press the OK button.