English
5
When Using Roll Paper
Attaching the Roll Paper Holder
1. Be sure that the printer power is turned off and then remove the AC adapter.
2. If the auto sheet feeder (ASF) is attached, remove it.
3. Slide the printer so that the hooks of the roll paper holder are inserted into the slots of the printer and
place the printer on the chassis of the roll paper holder. See illustration F.
4. Attach the AC adapter and then turn on the printer power.
When the power is turned on, the printer recognizes the roll paper holder, which enables printing on
roll paper.
Installing or Replacing Roll Paper
CAUTION:
Be sure to use roll paper that meets the specifications.
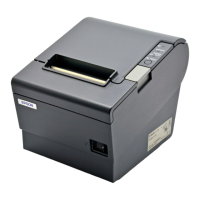
Read the instruction label attached to the roll paper holder. See illustration C for part names.
1. Be sure that the printer power is turned on.
2. Press the release lever to open the paper entrance.
3. If the roll paper edge guide is attached to the roll paper holder, squeezing the locking clip of the roll
paper edge guide and remove the edge guide. Be sure not to lose the removed roll paper edge guide.
4. Remove the used roll paper core if there is one. If there is roll paper inside the printer, remove it also.
5. Pull up the edge of the new roll paper approximately 10 cm {4 "}. Check the label instructions for the
proper direction for the paper to come off of the roll.
6. Slide the roll paper onto the shaft of the roll paper holder while inserting the end of the roll paper into
the slot in the middle of the printer.
7. Insert the roll paper as far as it will go.
8. Insert the roll paper edge guide onto the roll paper holder while squeezing the locking clip of the
edge guide.
Note: Adjust the edge guide so that there is no space at either edge of the roll paper.
9. Check that the installed roll paper is straight.
10. Press the release lever again to close the paper entrance; then the paper is cut and fed to the print
starting position.
Using Slip Paper
When Inserting by Hand
Read the instruction label attached to the top of the printer.
1. Be sure that the printer power is turned off and then remove the AC adapter.
2. If the roll paper holder is attached, remove it.
3. Attach the AC adapter and then turn on the printer power.
4. Press the release lever to open the paper entrance.
5. With the printer front toward you, insert the paper into the slot from the right and align the left edge
of the inserted paper with the edge of the slot.
6. Check that the paper is inserted straight.
7. Press the release lever again to close the paper entrance.
If printing data has been sent, the paper is fed automatically to the print starting position.
Note: Paper is fed backward when it is fed to the print starting position; therefore, if there are any
obstacles, the paper may not be fed to the print starting position correctly. Be sure to have enough room
behind the printer.
Using the Auto Sheet Feeder (ASF–Illustration B)
Attaching the ASF
1. Be sure that the printer power is turned off and then remove the AC adapter.
2. If the roll paper holder is attached, remove it.
3. Be sure that the release lever is in the closed position (the release lever is up.)
4. Place the ASF cable in the groove on the ASF. See illustration G.
5. Insert the hooks of the ASF into the slots on the back of the printer. See illustration H.
6. Push down the ASF until the triangle marks on the ASF and the printer are aligned. See illustration I.
Note: Be sure that the ASF cable is not caught between the printer and the ASF.
7. Insert the connector of the ASF cable into the connector indicated in illustration J.
8. Attach the paper support, if necessary. See illustration K.