ESI RF BRIDGE User Guide DRAFT, rev 4
www.elec-solutions.com © 2013 Electronic Solutions, Inc. Page 7 of 13
2. On the ESI RF Bridge, press the Network Button once, to start Network Invite.
a. The Yellow LED is flashing (and remains flashing until the Network Button is pressed again).
3. On the SUITE remote:
a. Press the PRESET, UP, STOP, or DOWN button to “wake up” and initiate Network Search.
Green PRESET LED is on solid.
b. After a few seconds, the SUITE remote joins the ESI RF network.
The Group 1 LED is on solid, and the Red PRESET button is on solid.
4. On the SUITE remote:
a. Press and release the STOP button to initiate Network Invite.
Green LED under PRESET flashes for up to 60 seconds while Network Invite is active.
5. While Network Invite is active on both the SUITE remote and ESI RF Bridge, apply power to each ESI
RF motor and if there are RQ devices, plug in an ESI RF RQ Transceiver to each RQ device, until all
devices are joined to the network.
a. Each device will jog once when it joins the network (within a few seconds).
6. On the ESI RF Bridge, press the Network Button once to stop Network Invite.
a. Yellow LED turns off.
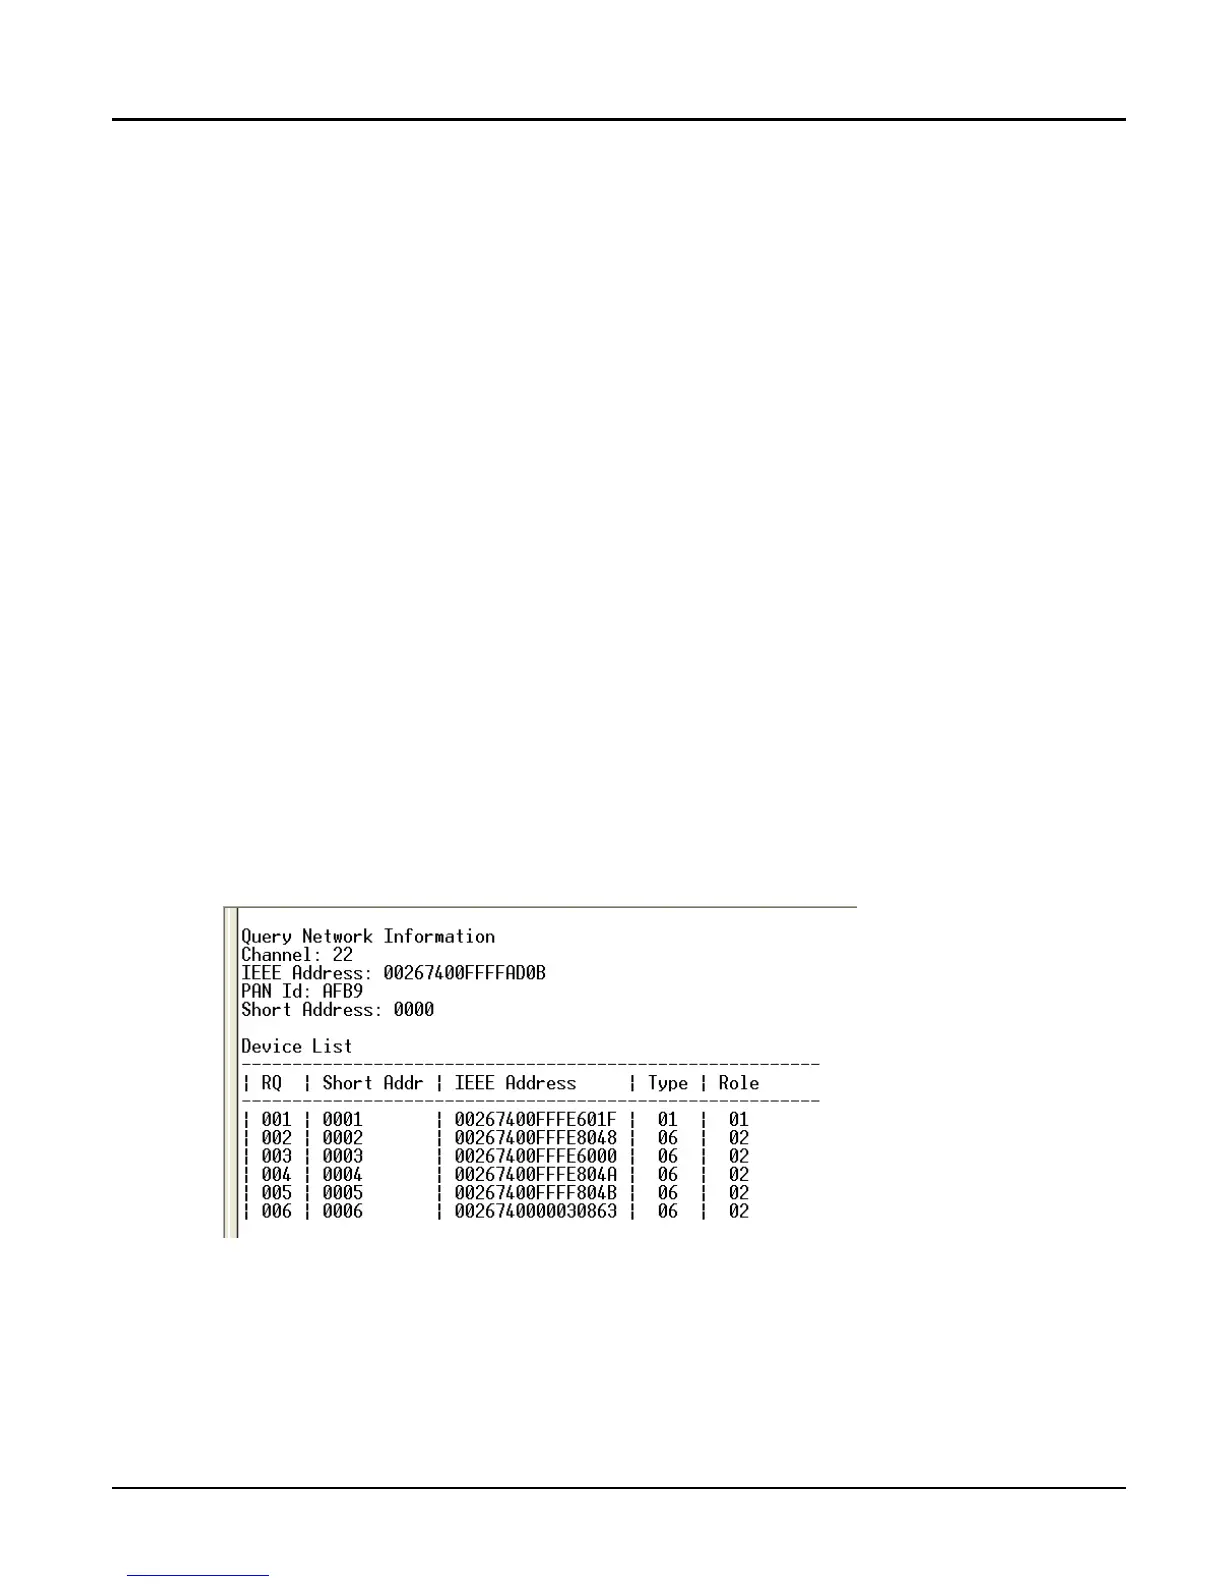
7. In the terminal emulator, press Ctrl-T to show the Device List. Verify that all devices successfully joined
the network. Below is an example of a Device List with six devices. The ESI RF Bridge does not show in
the Device List.
NOTE: The RQ address of each device is automatically reassigned, to 3 digit numbers in ascending
order, for example: 001, 002, 003, and so on.
NOTE: For the Type of device: 01 is a SUITE remote, and 06 is an ESI RF motor or ESI RF RQ
Transceiver (connected to a Q motor or RQ motor control).
Populated Device List:
8. Configure the ESI RF network:
a. Use the SUITE remote to configure the ESI RF network (Set Limits and so on), OR
b. In the terminal emulator or automation system, use the RQ commands listed in the next section to
configure the ESI RF network.
IMPORTANT: If you are not using a SUITE remote in the ESI RF network, you must set limits on
ESI RF motors first, in order to use RQ commands from the terminal emulator to
configure and control those motors.
 Loading...