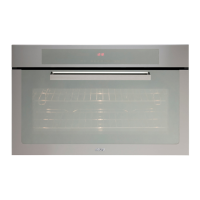
Do you have a question about the EURO Sienna ES9060DSXS and is the answer not in the manual?
Packaging materials may be hazardous to children, posing a suffocation risk.
Not intended for persons with reduced physical, sensory or mental capabilities unless supervised.
Appliance door can become very hot. Keep children away to prevent burns.
Not liable for damage from improper installation, use, or repairs.
Do not modify or attempt repairs. Improper repairs cause accidents and impair operation.
Steps for opening terminal board and attaching wires to cable grip and contacts.
Use a device for mains disconnection with distance between contacts for complete disconnection.
Adjacent panels must be heat-resistant materials; glue must withstand up to 100°C for wood furniture.
Oven fits in a standard opening of 560mm, under a counter or in a column.
Secured by four screws; do not lift by door or place excessive pressure on it.
Indented part on rack sides stops it from accidentally coming off runners.
Use as a tray for cooking food on rack or as drip pan for grilling/roasting.
Position accessories at the levels shown in the figure.
Details of keys 1-13 for temperature, time, functions, and display.
Use keys 5 & 6 to start, then 7 & 8 to set current hour within 3 seconds.
Oven performs sound signals for functions like end of cooking; 3 levels can be modified.
Touch and release key 3 to turn on the oven; timer display shows ON, bulb symbol lights up.
Independent time counter usable when oven is off. Set time using keys 7 & 8.
Select cooking function with keys 9 & 10, adjust temperature with 1 & 2. Oven heats up to preset temperature.
Internal oven light turns on with key 3. Stays on for 3 mins after temp reached or 1 min when accessed via other keys.
Rapidly preheats oven before cooking. Oven beeps when preset temp is reached.
Uses heat from top and bottom elements for traditional cooking.
Suitable for slow cooking or warming up meals.
Suitable for gentle cooking, browning, or keeping dishes warm.
For grilling small quantities of food like toasts and hot sandwiches.
For browning and sealing juices in foods like steak and hamburgers.
Ideal for cooking pizza and vegetable dishes.
Provides even heating for cooking different dishes on multiple levels.
Reduces defrost time for frozen food. Fan runs without heat.
When off, displays are off; timer shows current hour.
Prevents children from playing with the oven. Enables lock by holding key 3.
Disable lock by holding key 3 for 5 secs. Only switching off is possible when locked.
Key 3 turns the oven off, deleting any active program. Locking function remains active if enabled.
Symbol indicates centigrade degrees. Blinking means heating; solid means temp reached.
Reset timer settings by touching keys 5 and 6 together.
Unplug oven. Remove protective cover A, replace bulb B, and refit cover A.
Use only 25 W, E-14 type, T 300°C bulbs. Not for household illumination.
Gently press down on parts A and B to remove side racks. Reverse for reassembly.
Release hinge by raising movable bolt B. Lift door upwards and slide outwards.
Unplug oven. Wait for it to cool. Do not use abrasives, bleach, or high-pressure water/steam.
Use a damp cloth with diluted ammonia product for inside. Rinse and dry carefully.
Use soft cloth with soapy water for exterior. Wash accessories in dishwasher or in the sink.