Do you have a question about the EuroLite LED PST-10 QCL Spot and is the answer not in the manual?
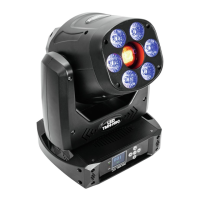
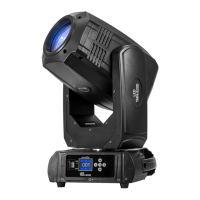
| Type | LED Moving Head Spot |
|---|---|
| Light Source | LED |
| LED Quantity | 4 |
| Power Consumption | 60 W |
| Pan | 540° |
| Tilt | 270° |
| Power Supply | 100-240 V AC, 50/60 Hz |
| Control Protocol | DMX |
| Effects | Color change, strobe |
| Connector | 3-pin XLR |
| Cooling | Fan |
Details the intended application of the LED pinspot for professional event technology, not household use.
Covers indoor use, avoiding moisture, not opening the housing, proper mains connection, and handling the plug.
Highlights that the product is not a toy and requires supervision for less capable users.
Addresses ambient temperature limits, housing temperature, proximity to flammable materials, and air circulation.
Covers direct light exposure, secure installation, professional installation, overhead use, and work area safety.
Warns against dimmers, permanent operation, short on/off cycles, and temperature fluctuations.
Instructions on battery safety, removal for long periods, and disposal of damaged batteries.
The rigging structure must support at least 10 times the weight of all installed fixtures.
Block access below the work area and use a stable platform during installation.
Use rigging hardware compatible with the structure and capable of bearing the device's weight.
Secure the device with a safety rope to prevent falling if the main attachment fails.
Release fixation screws, adjust inclination angle, and tighten screws to align the device.
Periodically inspect the device after installation to prevent corrosion, deformation, and looseness.
Connect DMX controller output to device DMX IN using a DMX cable.
Connect DMX OUT of one unit to the DMX IN of the next unit in the chain.
Terminate the last unit in the DMX chain with a 120 Ω resistor.
Use a DMX level amplifier for cable lengths over 300m or more than 32 devices.
Details the pinout for DMX output (socket) and DMX input (plug).
Steps to set the number of DMX channels (3, 4, 5, 6, 9) and the DMX starting address.
Defines channel functions and value ranges for 3, 4, and 5-channel DMX modes.
Details functions for 5-channel DMX mode: Preset colors, Auto/Sound programs, and speed control.
Defines functions for 6-channel DMX mode: Master dimmer, internal programs, and sound control.
Details functions for 9-channel DMX mode: Master dimmer, strobe, preset colors, and auto/sound programs.
Describes how to navigate the device's menu using the MENU, ENTER, UP, and DOWN buttons.
Details modes like Preset colors, Automatic, Sound control, Color mix, Dimmer, Silent scene, and DMX signal loss behavior.
Configures master/slave synchronization for multiple units, detailing slave setup, DMX chaining, and master mode setting.
Details the functions of each button on the IR-7 remote control for operating the device.
Provides instructions for battery replacement and handling for the IR remote control.
Instructions for cleaning the device exterior and lenses using a soft, moistened cloth.
Advises against self-repair and recommends authorized dealers for maintenance and spare parts.
Step-by-step guide for replacing a blown fuse with one of the same type and rating.
Instructions for environmentally friendly disposal of the product at local recycling plants.
Legal requirements for returning used batteries and rechargeable batteries separately from waste.






 Loading...