Do you have a question about the Euronda E9 Next 18L and is the answer not in the manual?
Euronda guarantees equipment quality if used per manual and warranty certificate.
Steam sterilizer complies with essential Council Directives and national standards.
Specifies required general culture, knowledge of unit, safety, and regulations for operators.
Instructions for correct installation, safe use, and routine maintenance of the unit.
Explains symbols used in the manual for safety, information, and prohibitions.
Procedure to request a new manual copy from Euronda S.p.A. with required information.
Key safety information for unit operation, including operator understanding and precautions.
Steriliser designed for instruments in medical, dental, and podology settings (121°C-134°C).
Details electrical, thermal, mechanical, and control safety devices integrated into the unit.
Identifies risks such as contamination and burns during normal operation and potential hazards.
Highlights important safety signs on the unit and their meanings, emphasizing non-removal.
Specifies essential personal protective equipment, such as latex safety gloves, for safe operation.
Provides overall dimensions and total weight of the packaging for the E9 NEXT steriliser.
Instructions for checking packaging integrity, contents, and handling the unit upon receipt.
Lists all items included in the packaging, from the steriliser unit to documentation and accessories.
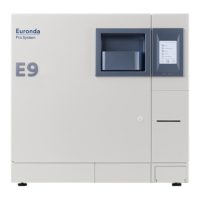
Details the E9 NEXT steriliser, its components, and their locations on the front, rear, and upper sections.
Illustrates required installation space dimensions for the unit with the door open and closed.
Presents detailed technical specifications, operating conditions, and noise level data for the unit.
Explains the functionality and installation of optional integrated and external printers for label printing.
Guidance on unpacking, handling, and correctly positioning the unit in the laboratory environment.
Instructions for the safe and correct installation of the steriliser by specialised technicians.
Essential safety precautions and requirements for connecting the unit to the power supply.
Steps for the initial power-on and setup of the steriliser after installation.
Guide to operating the touch screen interface and navigating its functions for cycle control.
Details the initial setup process, including language selection and system configuration.
Procedures for filling the clean water tank and draining the used water tank, with safety notes.
Overview of the program menu, including access to cycles, tests, and settings for operation.
Guide on how to choose and start various sterilization cycles based on load requirements.
Details the display information during a cycle, manual stopping, and end-of-cycle indicators.
How to access additional real-time data and parameters during a running sterilization cycle.
Instructions for selecting and performing diagnostic tests like Vacuum, Bowie & Dick, and Helix.
Describes the process and display for starting, running, and completing a test cycle.
Procedure for safely stopping active sterilization cycles or tests without interrupting power.
Information on potential E02 alarm messages due to power interruptions.
How to recover the unit after an alarm interruption and return to the Home screen.
Accessing the settings menu to configure various operating parameters of the steriliser.
Guide to setting the unit's internal date and time using the interface controls.
Configuration of sterile condition expiry days and the number of labels to print.
Enabling and setting up user profiles, including names and passwords, for traceability.
Options for configuring integrated or external printers, including thermal and label types.
Procedure for reprinting labels if the roll is exhausted during printing, including setting expiry.
Instructions for selecting the steriliser's interface language via country flags.
Guide to installing and configuring the Aquafilter device for automatic water supply.
Activating and using user identification for load release, allowing acceptance, rejection, or immediate use.
Steps for configuring the Ethernet connection and default IP address for network integration.
Options for delayed start and test planning, allowing scheduling of cycles and tests for specific times.
Instructions for proper shutdown and storage of the unit during extended periods of non-use.
Information on the E-Memory software used for managing data saved to the SD card.
Details on configuring software settings, including language, user data, and system preferences.
Procedure for safely inserting and removing the SD memory card for data management.
Crucial safety instructions for performing maintenance operations, emphasizing qualified personnel and power disconnection.
Guidelines for routine cleaning and checks to ensure continuous, safe, and efficient unit operation.
Periodic checks for drain pipes and servicing procedures for the safety valve.
Instructions for adjusting the closing mechanism to ensure a proper seal and cycle integrity.
Procedures for extraordinary maintenance, including filter replacement and door seal replacement.
Explanation of rust formation causes and recommended cleaning methods for the unit.
Guidance on proper disposal of the unit according to material type and local regulations.
Information on procedures and documentation required when selling the unit to a new purchaser.
Essential steps for preparing instruments, including decontamination, cleaning, drying, and handling.
Recommendations for packaging materials and methods to maintain instrument sterility.
Guidelines for arranging instruments and packages within trays for optimal steam circulation and drying.
Instructions for safely unloading hot materials and preserving their sterility post-sterilization.
Summary of sterilization cycles (B134, B134 PRION, B121) and their parameters.
Details on performing diagnostic tests (Vacuum, B&D, Helix) to verify unit performance.
Table showing which cycles have been validated according to EN 13060 standards.
Recommended limit values for contaminants and chemical-physical characteristics of water used.
Guide to identifying and resolving common errors, alarms, and operational problems with the unit.
Details on optional devices like Aquafilter Deionizer, Aquabox, and Aquaosmo for water treatment.
| Chamber Volume | 18 liters |
|---|---|
| Type | Class B sterilizer |
| Power Supply | 230 V ± 10% 50/60 Hz |
| Sterilization Cycle Time | 30 minutes |
| Display | Digital display |