6
Assembly / Montering
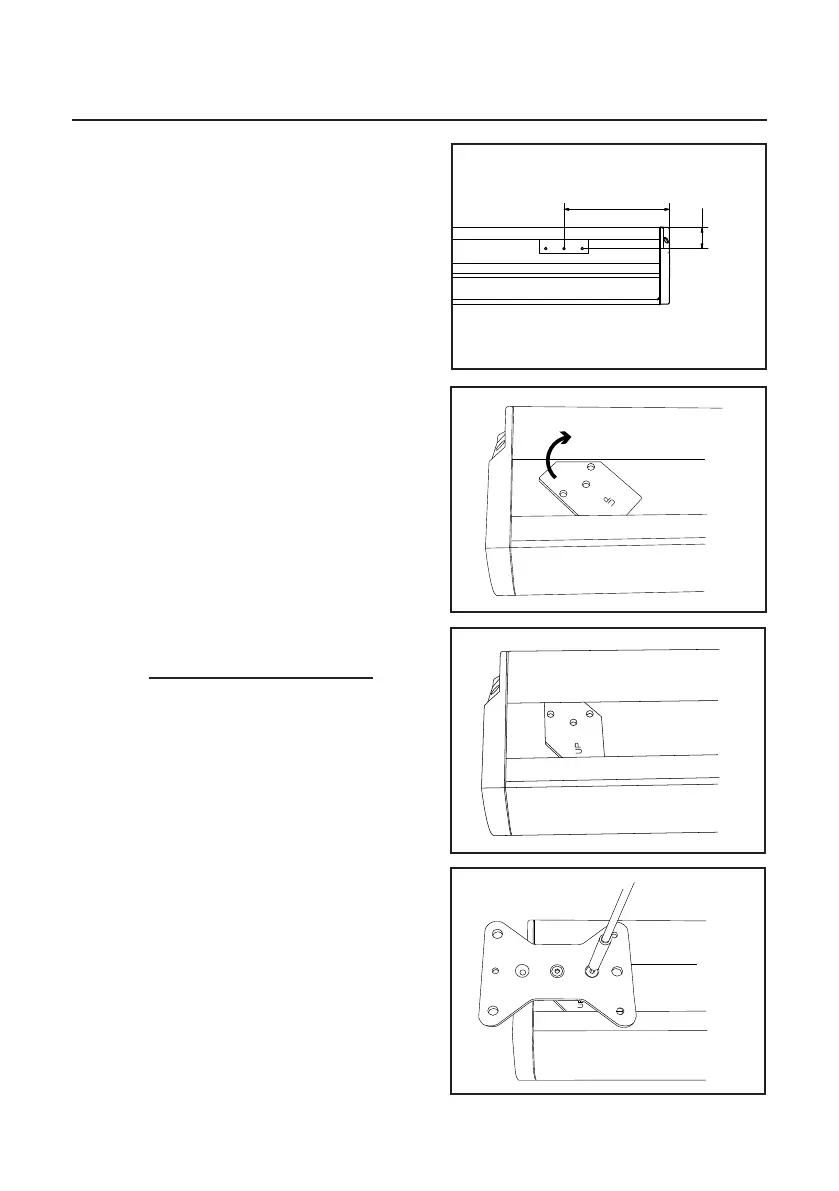
UK: The ”Thor” screen can be mounted on the wall
or in the ceiling. Keep the screen horizontal at all
times during installation.
Wall mount:
1. Mount the wall brackets and make sure they are
levelled. Sideways spacing isn’t crucial as they can
slide sideways but recommended spacing is shown
in fig 7.
However - The brackets should never be mounted
more than 40cm in from the ends!
Please note that a distance of 20mm is
required above the case’ final position to allow the
mounting.
2. Mount the case. Make sure the case hooks
properly over the bracket.
Ceiling mount:
1. Mount the bracket inserts. Note ”UP”-mark
(fig 8 & 9).
2. Fasten the ceiling bracket using two screws for
each bracket and appropriate threadlocker (not
supplied) (fig 10). Please note that the ceiling bracket
is reversible and offers two different sets of holes of
your choise!
3. Attach to the ceiling using appropriate fasteners
(not supplied).
SE: ”Thor” kan monteras på vägg eller i tak.
Håll duken horisontell under hela installationen.
Väggmontering:
1. Skruva upp väggkonsolerna vågrätt. Exakt posi-
tionering i sidled är inte nödvändig då kassetten kan
glida på konsolerna. Rekommenderad positionering
visas i fig 7. Konsolerna får dock aldrig monteras
längre in än 40cm från kanterna!
Notera att ett spel på 20mm krävs över kassettens
slutliga position för att montering skall kunna ske.
2. Häng upp kassetten. Se till att kassetten hakar
ordentligt över konsolerna.
Takmontering:
1. För i konsolinläggen - notera ”UP”-markeringen
(fig 8 & 9).
2. Fäst takkonsolerna med två skruvar vardera och
använd lämplig gänglåsning (medföljer inte) (fig 10).
Observera att takkonsolen kan monteras på två olika
håll beroende på vilken hålbild som önskas.
3. Fäst upp i taket med lämpliga fästbeslag.
1
1
2
2
3
3
4
4
5
5
6
6
A A
B B
C C
D D
Niclas 2013-09-23
Designed by Checked by Approved by
Date
1 / 1
Edition Sheet
Date
200
45
fig 7
fig 8
fig 9
fig 10

 Loading...