Do you have a question about the Eurotherm 6180 XIO and is the answer not in the manual?
Explains symbols found on the unit's labeling, including safety and connection indicators.
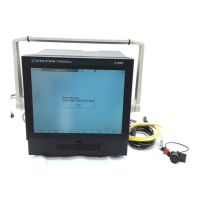
Details the process of unpacking the recorder and checking accessories.
Provides installation details for mounting the recorder in a panel, including dimensions and fixing clips.
Covers power supply wiring and connections, including power requirements and warnings.
Describes the 24V DC supply voltage wiring and connector details.
Explains EIA485 connections, DIP switch configuration for master/slave, and pinouts.
Details the Type-A USB socket for connecting peripherals like memory sticks and keyboards.
Describes the Compact Flash card slot and its removal procedure.
Explains how numeric values are rounded or truncated on the display if space is insufficient.
Explains the status bar at the top of the display, including access level and page name.
Details the four access levels (Logged out, Operator, Engineer, Service) and user-specific displays.
Describes the page name and batch information display, and its functionality.
Explains the status icons for alarms, instrument alarms, and channel alarms.
Describes the pop-up display accessed from the alarm indication area, including alarm summaries and message logs.
Explains the function of the six printed keys below the display for changing modes and accessing menus.
Details the specific functions of each navigation key.
Guides the user through the initial power-up and configuration sequence, including security levels.
Details how to access the recorder configuration menus, including password entry.
Describes various display modes like trend, bargraph, and numeric, and how to cycle through them.
Explains the vertical trend display, including faceplates and channel cycling.
Describes the horizontal trend display, similar to vertical but with horizontal traces.
Details the circular trend display, including rotate and new chart modes.
Explains vertical bargraph display options with faceplates above or at the right edge.
Describes horizontal bargraph display modes, including single and dual column formats.
Covers numeric display modes showing process variable values as digital numbers.
Explains how to enter and view operator notes, which are associated with group history.
Covers manual archiving of data to memory devices or remote hosts via FTP.
Details initiating data transfer to local media like Compact Flash or USB.
Explains how to archive recorder files to a remote computer using FTP.
Covers saving, restoring, importing, and exporting configurations, linearisation tables, and user screens.
Introduces the main configuration menu, listing key areas like Instrument, Channels, Views, etc.
Details settings for instrument name, display brightness, Modbus address, and communication timeouts.
Explains how to define group properties like trend speed, descriptor, and recording enable.
Covers configuring individual channels, including input types, scaling, and alarm settings.
Details setting up display modes for groups and user screens, and defining the Home page.
Explains how to set up local and remote archiving strategies, including compression and media handling.
Covers setting up events based on various sources like alarms, timers, or batch status.
Details configuring push-buttons for use as event sources, including signing and authorization.
Explains how to configure messages, including embedded values and destinations.
Describes how to enter and import user-defined linearisation look-up tables for custom scaling.
Covers configuring batch recording, including initiation, naming, and field data.
Details the configuration of various mathematical functions like average, minimum, maximum, and specific calculations.
Explains how to configure totalisers to maintain running totals of input or maths channels.
Describes configuring counters for preset, increment, or decrement operations, usable as event sources.
Details configuring count-down timers for general timing purposes, including self-start and repeating.
Covers configuring serial communication ports for ASCII and Modbus protocols.
Explains configuring the unit as a Modbus Master to communicate with slaves over Ethernet or serial.
Details setting up output channels for writing master values to slave channels.
Covers configuring demand writes to slave values via operator action, job action, or screen events.
Explains how to configure the instrument to send emails, including recipient lists and message content.
Details configuring up to 10 reports for printing via the ASCII printer as a result of job actions.
Covers the configuration and setup of the Ethernet/IP communication protocol.
Describes enabling software options like Trial Mode, Virtual Channels, and Simulation.
Details the security levels (Engineer, Operator, Logged out, Service) and setting access permissions for users.
Covers management options like audit trail, password policies, and centralized security settings.
Explains how to add new users, set passwords, and assign access permissions.
Details the process of removing users from the recorder and Active Directory.
Guides on how to change the password for the current user, including password policy compliance.
Explains how to clear the password cache, which stores authenticated user passwords.
Provides steps for setting up an Active Directory server for user authentication.
Covers configuring IP address, subnet mask, default gateway, and SNTP server settings.
Details the configuration of local host name, domain name, and DNS servers.
Explains how to set and edit the recorder's date and time.
Covers setting language, country, time zone, and daylight saving time.
Details enabling new options with key codes and upgrading the recorder operating software.
Explains accessing master communications diagnostics for troubleshooting.
Describes how to test network connections with host computers and Modbus slaves.
Allows copying point or group configurations, including optional alarm and job data.
Explains how to search for jobs based on type and category to find relevant triggers.
Covers customizing screen appearance by selecting colors and font sizes for various elements.
Displays recorder hardware/software details, including variant, versions, and memory capacities.
Explains the keys for file operations like cut, copy, paste, delete, and refresh.
Describes the function of the Hide key for managing filename display.
Details the file structure on the archive medium, including subdirectories and file naming conventions.
Introduces the Bridge feature for remote operation and configuration, available in Full and Lite versions.
Lists the minimum system requirements for running the Bridge software on a PC.
Explains how to connect the recorder to a PC via direct connection, dial-up router, or networked systems.
Refers to the CD insert for details on installing the Bridge software.
Outlines the three areas for recorder configuration: Network, Options, and Access.
Refers to section 4.5 for detailed network key fields.
Explains how to enable 'Full' Bridge option via the Options menu and autoconfigure.
Details enabling remote access for access levels and user IDs, including password setup.
Guides on initiating the Bridge program, entering host/user details, and starting as Lite or Full.
Explains how to configure sounds for point alarms played via the host PC's sound card.
Covers basic operation of the Bridge software, including display modes, alarm acknowledgement, and status line.
Explains how to cycle through display modes and return to the Home page.
Refers to section 3.1.4 for alarm acknowledgement and message reading.
Describes the status line reflecting connected instrument status like system messages and FTP.
Lists common error messages preventing Bridge from viewing the recorder and their causes.
Explains the option to create screen layouts using drawing tools, text, and image files.
Details including user screens in display modes and selecting them as the Home page.
Covers importing and exporting user screens using the Save/Restore menu.
Guides on defining objects, specifying size, position, and sophisticated fine-tuning.
Prerequisites for screen layout creation, including access permissions and enabling user screens.
Lists selectable screen components with default positions, dimensions, and draw order.
Explains how to edit component properties and user screen options using the Component Property Editor.
Defines parameters associated with components, divided into basic and advanced.
Details basic parameters like Arc Angle, Background colour, Button text, etc.
Covers advanced parameters for components, including colors, fonts, and visibility settings.
Defines various components like Group Vertical/Horizontal Trend, Bargraphs, and Numeric displays.
Covers connecting the recorder via Ethernet cable for Modbus communication.
Explains Modbus TCP protocol for slave devices and its use in automated equipment.
Lists supported Modbus function codes like Read Holding Registers and Pre-set single register.
Details supported data types for Modbus TCP, including integers and floating-point values.
Explains how the recorder handles invalid multi-register write requests.
Discusses local file storage for user login information and Modbus security settings.
Provides a map of memory addresses allocated to recorder functions.
Details memory address allocation for configuration parameters, including data types.
Lists addresses for instrument number, status, alarms, and configuration counter.
Provides addresses for channel configuration parameters like span, PV type, and alarms for channels 1-12.
Lists addresses for channel run-time data, including PV, status, and alarm information for channels 1-12.
Details addresses for group configuration parameters like trend type, archive rate, and text fields for groups 1-6.
Allows the host to identify available features and their corresponding addresses.
Explains how indirection tables group spaced register addresses for efficient read/write requests.
Provides hexadecimal addresses for 32-bit floating-point values for channels 1-12.
Lists hexadecimal addresses for channel run-time data for channels 1-12.
Explains the structure of Modbus messages (requests and responses) and data encoding.
Details the Modbus function code 03 for reading holding registers, including request and response formats.
Explains Modbus function code 04, identical to 03 but with a different exception response code.
Describes Modbus function code 06 for writing a single value to a single register.
Details Modbus function code 08 for initiating loop-back tests.
Explains Modbus function code 16 for writing values to multiple registers, including batch field examples.
Covers printing messages and reports via the Serial Communications option.
Details serial port connections for EIA232 and DC power.
Shows locations and pinouts for serial ports and EIA232 connections.
Provides pinout details for the DC connector.
Outlines the two configuration areas: Connections and Reports.
Details the default configuration page for ASCII printer protocol and other protocols.
Explains how to configure up to 10 reports for printing, including field types and styles.
Describes text filters for recognizing specific strings in ASCII input, useful for GPS data.
Guides on importing printer drivers from various media or host PC via the Save/Restore menu.
Provides an example of configuring a report to print channel values and time/date upon alarm.
Details group configuration for reports, including descriptor and alarm settings.
Explains channel configuration for reports, referencing section 4.3.3 for details.
Describes setting up an event to trigger a report when an alarm occurs.
Details the configuration of report fields, including date/time, text, process value, and batch fields.
Explains enabling alarm messages for printing and setting up serial communication parameters.
Defines installation category II and pollution degree 2 as per BS EN61010 standards.
Provides detailed technical specifications for the recorder, including standard features, options, environmental performance, and physical details.
Details accessing the main diagnostic display and its sub-menus for troubleshooting.
Explains how to access the main diagnostic display upon power-up.
Covers special modes like Sales Demo, available for factory use only.
Guides on checking the display by flooding the screen with single colors.
Details the process of calibrating the touch screen for accurate input response.
Displays a summary of the recorder's hardware and software configuration.
Shows diagnostic summary information, including MAC address and software version.
Explains how to exit diagnostics and restart the recorder in normal operating mode.
Provides guidance on essential maintenance tasks like touch screen cleaning and battery replacement.
Offers instructions on how to clean the touch-sensitive screen safely.
Outlines recommended maintenance tasks, including battery replacement every three years.
Provides a step-by-step guide for replacing the backup battery.
Explains how to access the recorder's web server from a remote PC using a browser.
Lists links to Eurotherm's website for downloads and documentation.
Describes the instrument access tabs for viewing information like trends, alarms, and messages.
Opens the instrument page to display status, alarms, and other instrument-related information.
Details how instrument alarms are displayed, either as 'Healthy' or a list of active alarms.
Explains how global channel alarms are indicated, based on active point alarms.
Allows selection of display format (horizontal, vertical, numeric) and refresh rate for trend data.
Shows a horizontal trend display, detailing process values, descriptors, and time scales.
Describes the vertical trend display, similar to horizontal but with vertical scales.
Presents process values in a table format, showing descriptors, spans, and values.
Displays a log of alarm messages for a selected group, with options to filter by time.
Produces a list of archived .uhh files for Review or Quickchart applications.
Displays a subset of information from the recorder's 'About' screen, including variant and software versions.
| Brand | Eurotherm |
|---|---|
| Model | 6180 XIO |
| Category | Voice Recorder |
| Language | English |