EVAC reserves the right to make alterations to this specication without prior notice.
© Copyright Evac Oy. All rights reserved.
2
VACUUM TOILET
TROUBLE SHOOTING
Date:
Doc.
11 Nov 2010
002262-2
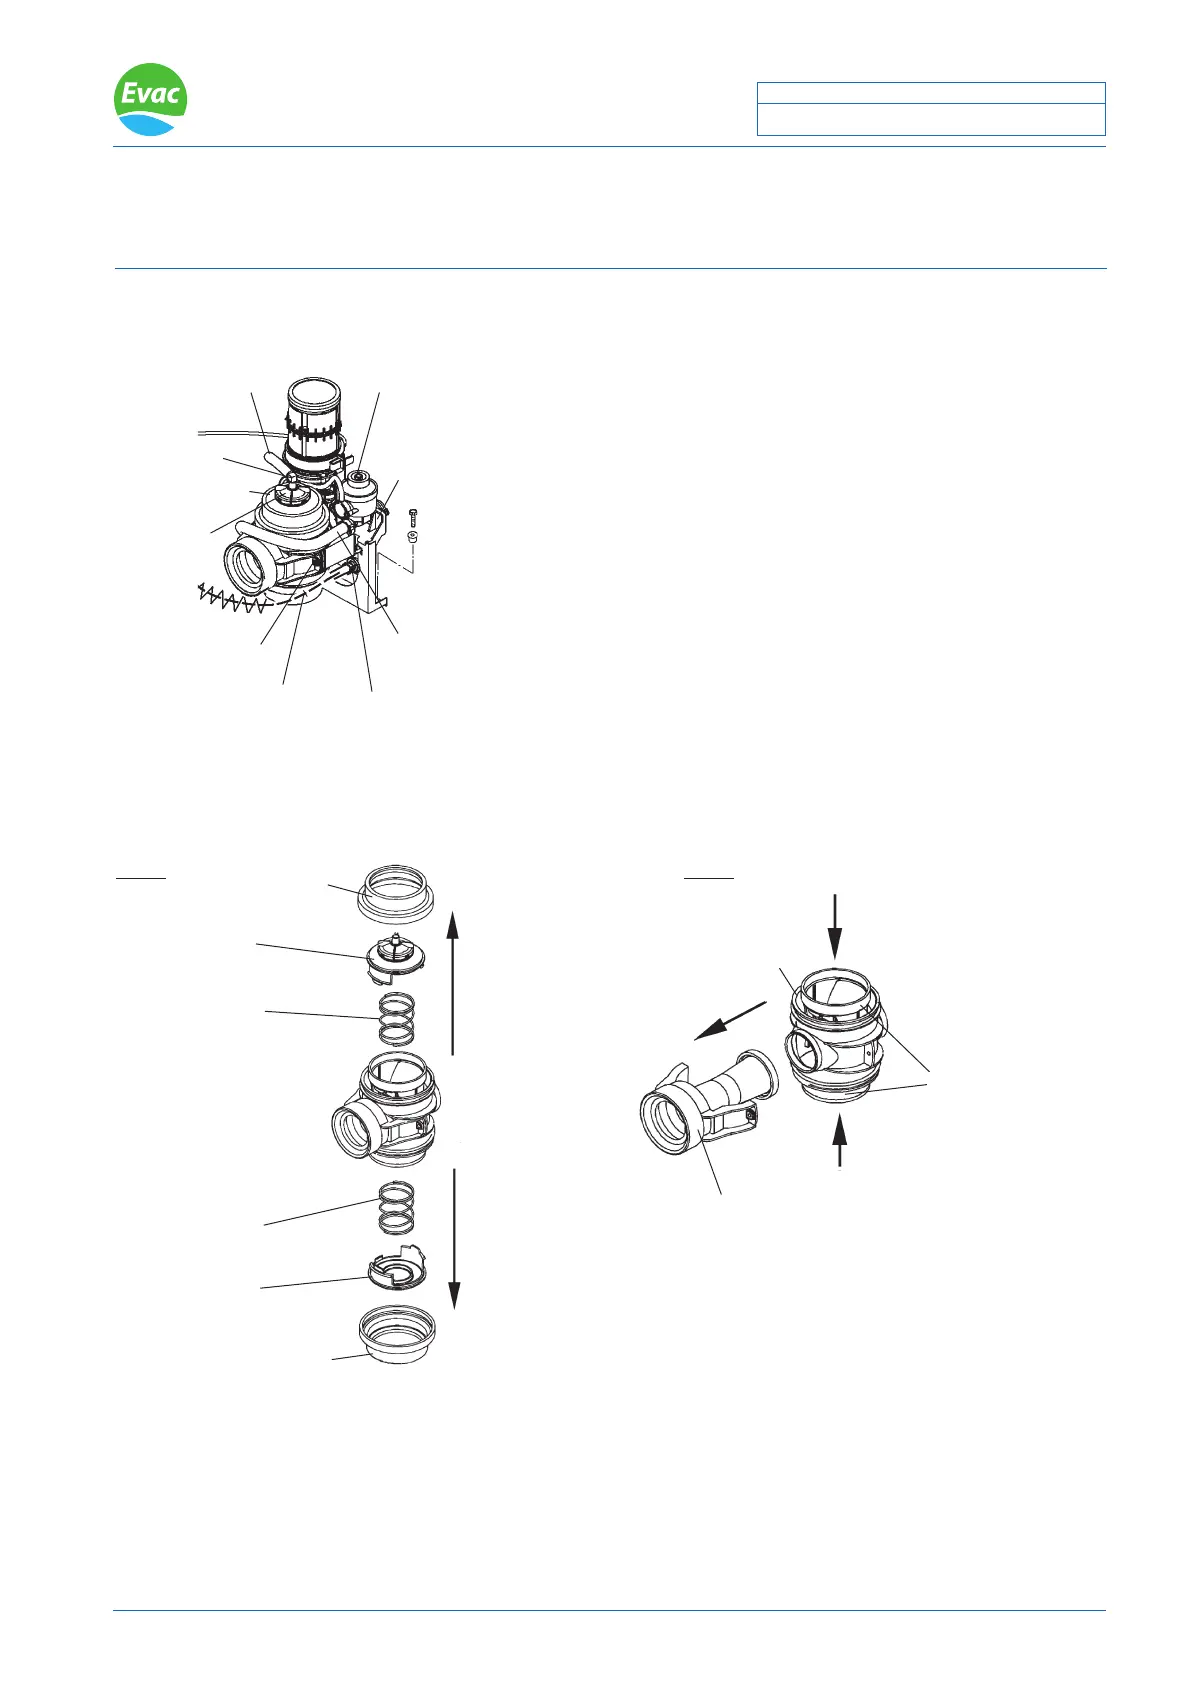
6543002 DISCHARGE VALVE, EVAC 910, WALL MODELS AND FLOOR MODELS
Dismantling of the discharge valve
Rubber sleeve
Cover
Spring
Rubber sleeve
Cover
Spring
Press
Press
Discharge valve body
Closing mechanism
Rubber sleeve and brace
Fig. 3 Fig. 4
1. Remove the rubber sleeves, the covers and the
springs.
(see g.3).
2. Press lightly the closing mechanisms and remove the
rubber sleeve with the brace (see g.4).
9. Loose (only in the USPH models) water valve
from the component plate.
10. Disconnect the hose from the relief valve.
11. Unscrew two screws*.
Rubber hose A
Connecting nipple
(only in USPH models)
Water valve
Component
plate
Hose B
(only in USPH models)
Elbow
Hose C
Relief
Screws*
Discharge valve