EasyManua.ls Logo

Evelo Atlas User Manual

Evelo Atlas
4 pages
To Next Page IconTo Next Page
Page #1 background imageLoading...
Page #1 background image
EVELO Atlas
Quick Start Guide
Welcome to your EVELO Atlas!
You’ve made a great decision to purchase the best electric bike on the market, and
we encourage you to read through the included display panel manual and user
guide. We know you’re eager to get started, so we want to point out a few quick tips.
Assembling your Atlas yourself?
Please stop here and check out the following link for assembly instructions:
www.evelo.com/atlas-assembly

Other manuals for Evelo Atlas

Question and Answer IconNeed help?

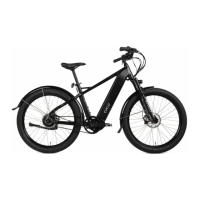
Do you have a question about the Evelo Atlas and is the answer not in the manual?

Evelo Atlas Specifications

General IconGeneral
BrandEvelo
ModelAtlas
CategoryBicycle
LanguageEnglish

Summary

Step 1: You'll Need Power

Front Brake Assembly Note

Hydraulic brake caliper requires a spacer removed before wheel installation to prevent damage.

Charging the Battery

Locate the charge port on the battery and use the included charger to fully charge before first use.

Step 2: Pre-Ride Check

Wheel Spin and Brake Check

Ensure wheels spin freely and brakes engage securely without levers hitting the handlebars.

Belt Tension and Thru-Axle Security

Check belt for approximately 3/8" of play and ensure the thru-axle is tightened firmly.

Tire Pressure Guidelines

Recommended tire pressure is 18-24 PSI for optimal performance based on rider weight.

Step 3: Controls Familiarization

Brake Lever Operation

Brake levers have cutoff switches; squeeze both evenly for optimal stopping power.

Enviolo Twist Shifter Usage

Twist shifter to adjust gear ratio for terrain; can shift while stopped for partial range.

Pedal Assist Level Adjustment

Use '+' and '-' buttons to select one of five assist levels; start with levels 1 or 2.

Step 4: Adjust Your Seat

Seat Post Height Adjustment

Use the quick release lever to adjust the seat post for a slight bend in your leg at full extension.

Step 5: Power Up Your Bike

Power Button Operation

Press and hold the 'o' button on the handlebar control for 2-3 seconds to turn the display panel on or off.

Step 6: Get On and Ride

Initial Riding Recommendations

Start slow on flat terrain, use low assist levels, and utilize throttle for boosts.

Related product manuals